SWITCH
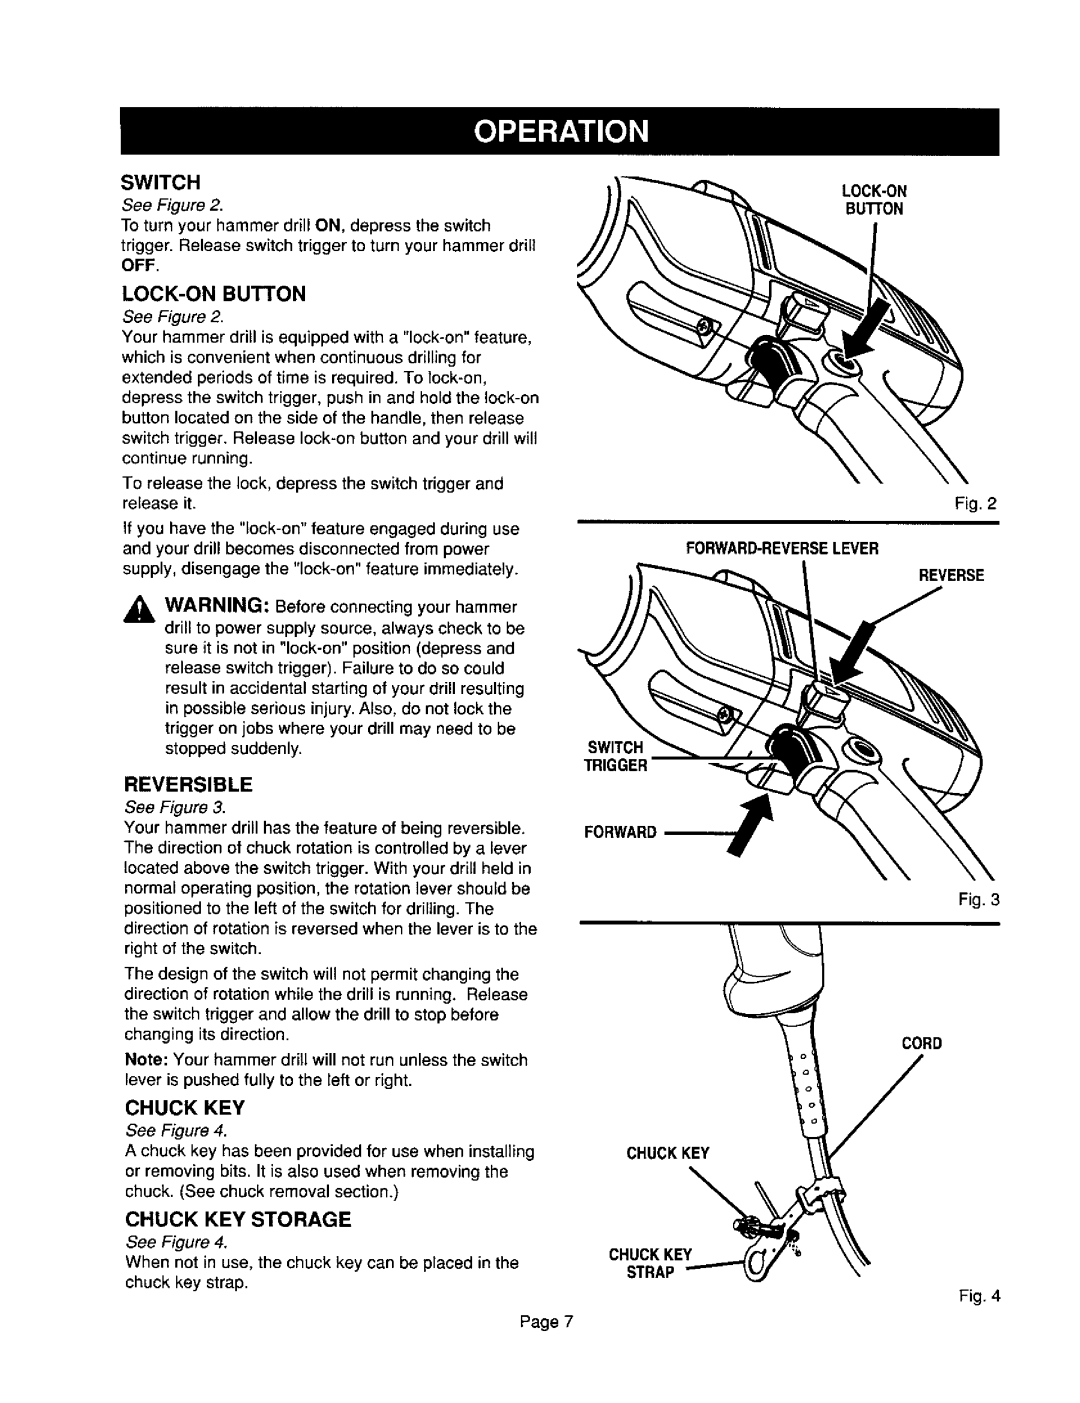
See Figure 2.BU'I-I'ONTo turn your hammer drill ON, depress the switch
trigger. Release switch trigger to turn your hammer drill OFF.
LOCK-ON BUTTON
See Figure 2.
Your hammer drill is equipped with a
To release the lock, depress the switchtrigger and release it.
if you have the
_L WARNING: Before connecting your hammer drill to power supply source, always check to be sure it is not in
Fig. 2
REVERSE
SWITCH
TRIGGER
REVERSIBLE
See Figure 3. |
| ||
Your hammer drill has the feature of being reversible. | FORWARD | ||
The direction of chuck rotationis controlledby a lever |
| ||
located above the switch trigger. With your drill held in |
| ||
normal operating position,the rotation lever should be | Fig. 3 | ||
positioned to the left of the switch for drilling.The | |||
| |||
direction of rotation is reversed when the lever is to the |
| ||
right of the switch. |
| ||
The design of the switch will not permit changing the |
| ||
direction of rotation while the drill is running. Release |
| ||
the switch trigger and allow the drill to stop before |
| ||
changing | its direction. |
| |
Note: Your hammer drill will not run unless the switch |
| ||
lever is pushed fully to the left or right. |
| ||
CHUCK | KEY |
| |
See Figure 4. |
| ||
A chuck key has been provided for use when installing |
| ||
or removing bits. It is also used when removing the |
| ||
chuck. (See chuck removal section.) |
| ||
CHUCK | KEY STORAGE |
| |
See Figure 4.
When not in use, the chuck key can be placed in the
chuck key strap,
Fig. 4
Page 7
