CLAMPING BAND SAW TO WORKBENCH
See Figure 10.
If the band saw is to be used in a portable application, we recommend that you fasten it permanently to a mounting board that can easily be clamped to a workbench or other supporting surface. The mounting board should be of sufficient size to avoid tipping of
saw while in use. Any good grade plywood or chip- board with a 3/4 in. thickness is recommended.
Mount saw to board using holes in frame as a template for hole pattern or the diagram in
Figure 9. Locate and mark the holes where band saw is to be mounted.
•Follow last three steps in previous section called
Mounting Band Saw to Workbench.
If lag bolts are used, make sure they are long enough to go through holes in the saw and material the saw is being mounted to. If machine bolts are being used, make sure bolts are long enough to go through holes
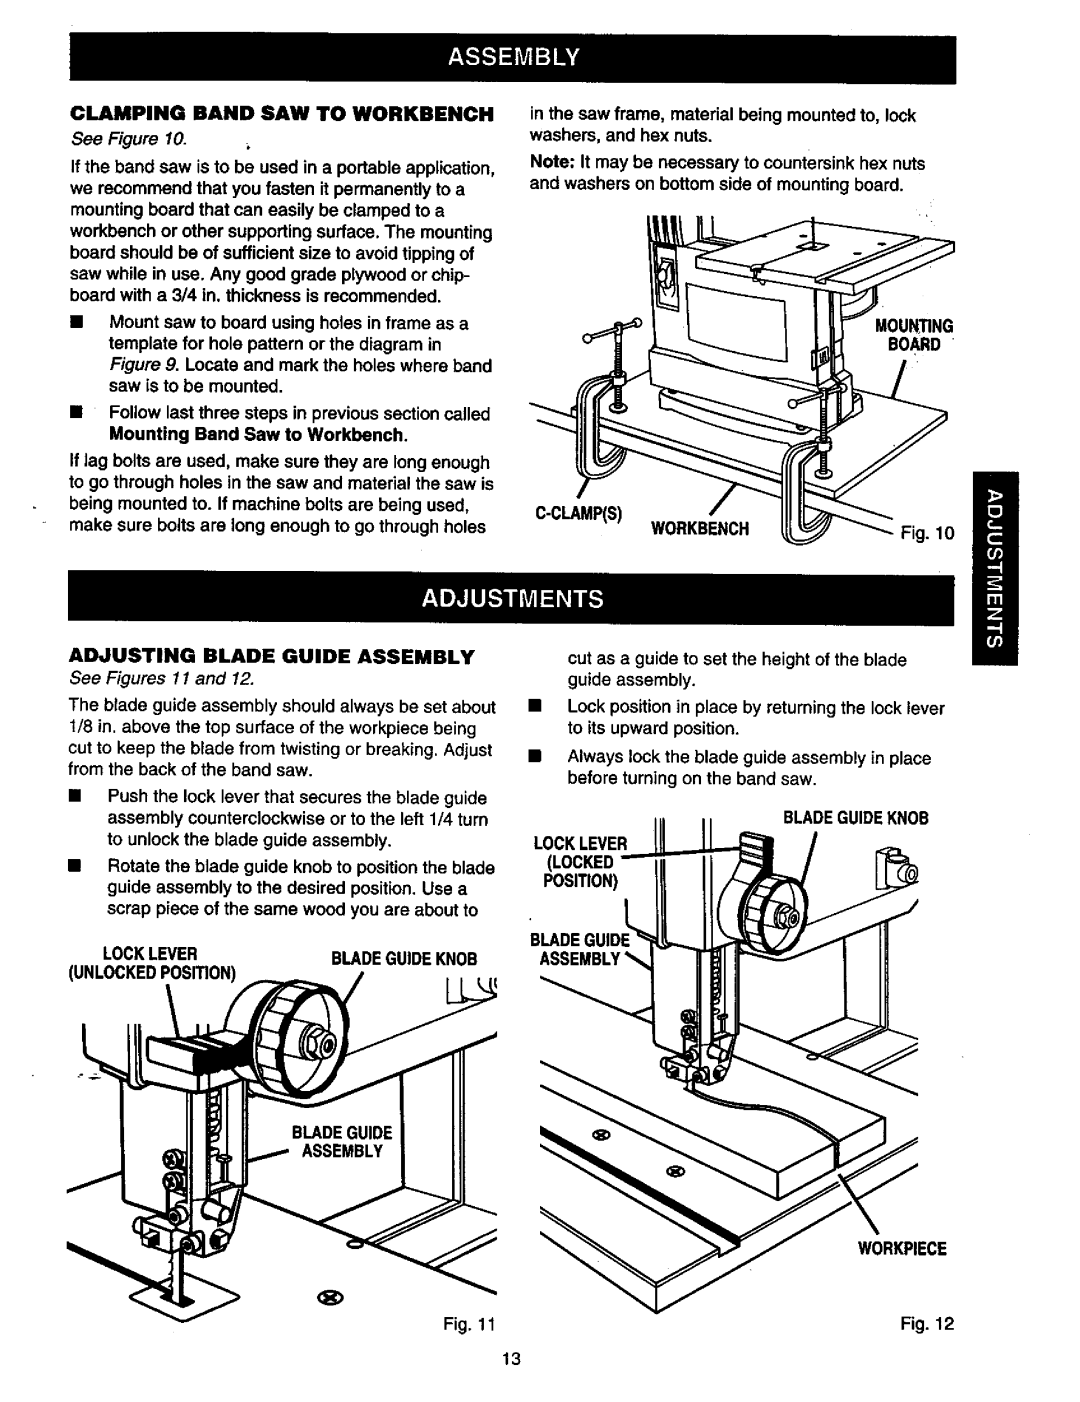
ADJUSTING BLADE GUIDE ASSEMBLY
See Figures 11 and 12.
The blade guide assembly should always be set about 1/8 in. above the top surface of the workpiece being
cut to keep the blade from twisting or breaking. Adjust from the back of the band saw.
•Push the lock lever that secures the blade guide assembly counterclockwise or to the left 1/4 turn to unlock the blade guide assembly.
•Rotate the blade guide knob to position the blade guide assembly to the desired position. Use a scrap piece of the same wood you are about to
LOCKLEVERBLADEGUIDEKNOB (UNLOCKEDPOSITION)
in the saw frame, material being mounted to, lock washers, and hex nuts.
Note: It may be necessary to countersink hex nuts and washers on bottom side of mounting board.
MOUNTING
BOARD "
C-CLAMP(S)
WORKBENCH | Fig. 10 |
|
cut as a guide to set the height of the blade guide assembly.
•Lock position in place by returning the lock lever to its upward position.
•Always lock the blade guide assembly in place before turning on the band saw.
BLADEGUIDEKNOB
LOCKLEVER
POSITION)
BLADEI
k
I
WORKPIECE
®
Fig. 11 | Fig. 12 |
13