
486.248473 specifications
The Craftsman 486.248473 is a versatile and robust utility tractor designed for homeowners and small farm operations. With its blend of power, efficiency, and user-friendly features, this tractor is a popular choice among gardening enthusiasts and those with larger properties to maintain.One of the standout features of the Craftsman 486.248473 is its powerful engine. The tractor is equipped with a reliable Briggs & Stratton engine, providing ample horsepower for a variety of tasks, from mowing to tilling. This engine is designed for optimal performance, ensuring that users can tackle tough jobs with ease while maintaining fuel efficiency.
Another key characteristic is its cutting-edge lawn mowing technology. The Craftsman 486.248473 features a durable, heavy-duty mowing deck that boasts a wide cutting path. This allows for efficient mowing and ensures a clean cut every time. The deck is adjustable, offering multiple height settings to meet the varying needs of your lawn, whether you prefer a manicured look or a more natural look.
Comfort and convenience are also prioritized in the design of this tractor. The ergonomic seat is adjustable, providing a comfortable riding experience, especially during extended use. The easy-to-reach control panel allows operators to adjust settings and monitor performance without hassle, making it intuitive even for novice users.
The tractor's robust construction is another point of emphasis. Built with a reinforced frame and durable materials, the Craftsman 486.248473 is designed to withstand the rigors of regular use. This ensures longevity and reliability, making it a worthwhile investment for users seeking a workhorse in their gardening and landscaping repertoire.
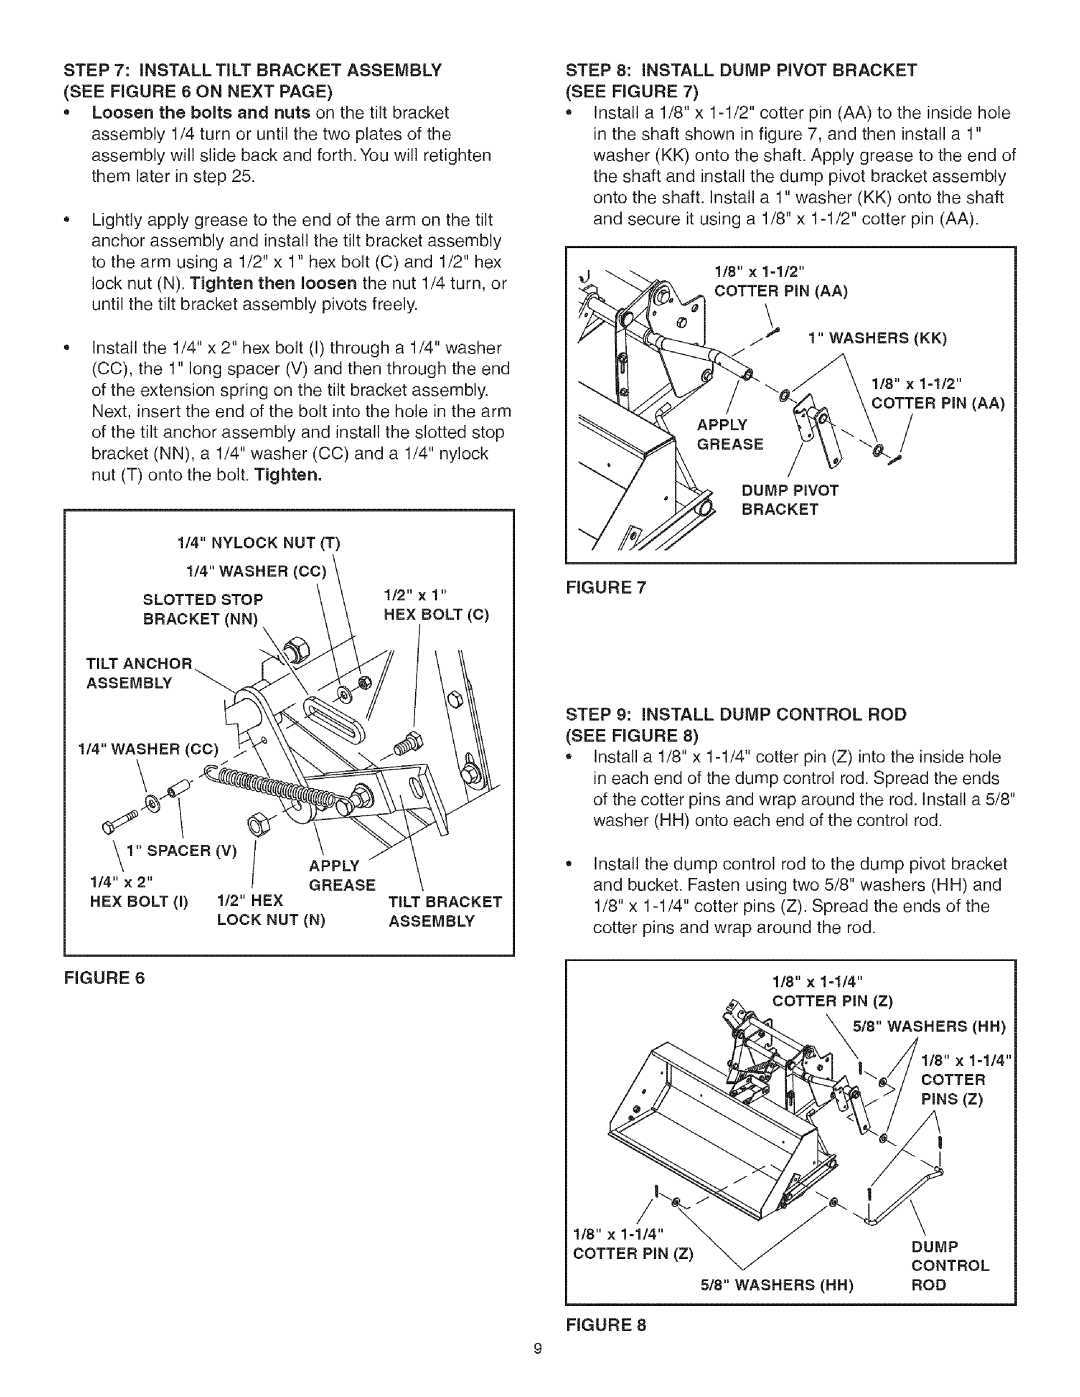
Additionally, the Craftsman 486.248473 is compatible with various attachments. This versatility allows users to customize the tractor with plows, tillers, and other implements to meet specific needs throughout the year—from snow removal in winter to tilling soil in the spring.
In summary, the Craftsman 486.248473 is an outstanding utility tractor that combines power, efficiency, and user-friendly features. Its strong engine, advanced mowing technology, comfort-driven design, durability, and compatibility with attachments make it an essential tool for anyone looking to manage and maintain their property effectively. Whether for routine lawn care or more demanding landscaping tasks, this tractor stands out as a reliable solution for various outdoor projects.