•Carefully remove cotter pin, clevis pin and drilled pin from yoke end of crank rod assembly (see figure below).
•Place universal joint into end of worm gear lining up large holes. Insert drilled pin (ensure opening in pin is in line with small openings in universal joint) (see figure below).
•Place yoke end of crank rod around universal joint, lining up openings. Insert clevis pin through assembly and secure with cotter pin. Spread ends of cotter pin with a pair of pliers to lock in place (see figure below).
•Tighten nut on eye bolt, keeping eye in line with the rod white tightening the in- side securely.
Cotter Pin
Clevis Pin
Crank Rod
Assembly
Joint Pin
Universal
Worm Bracket Joint
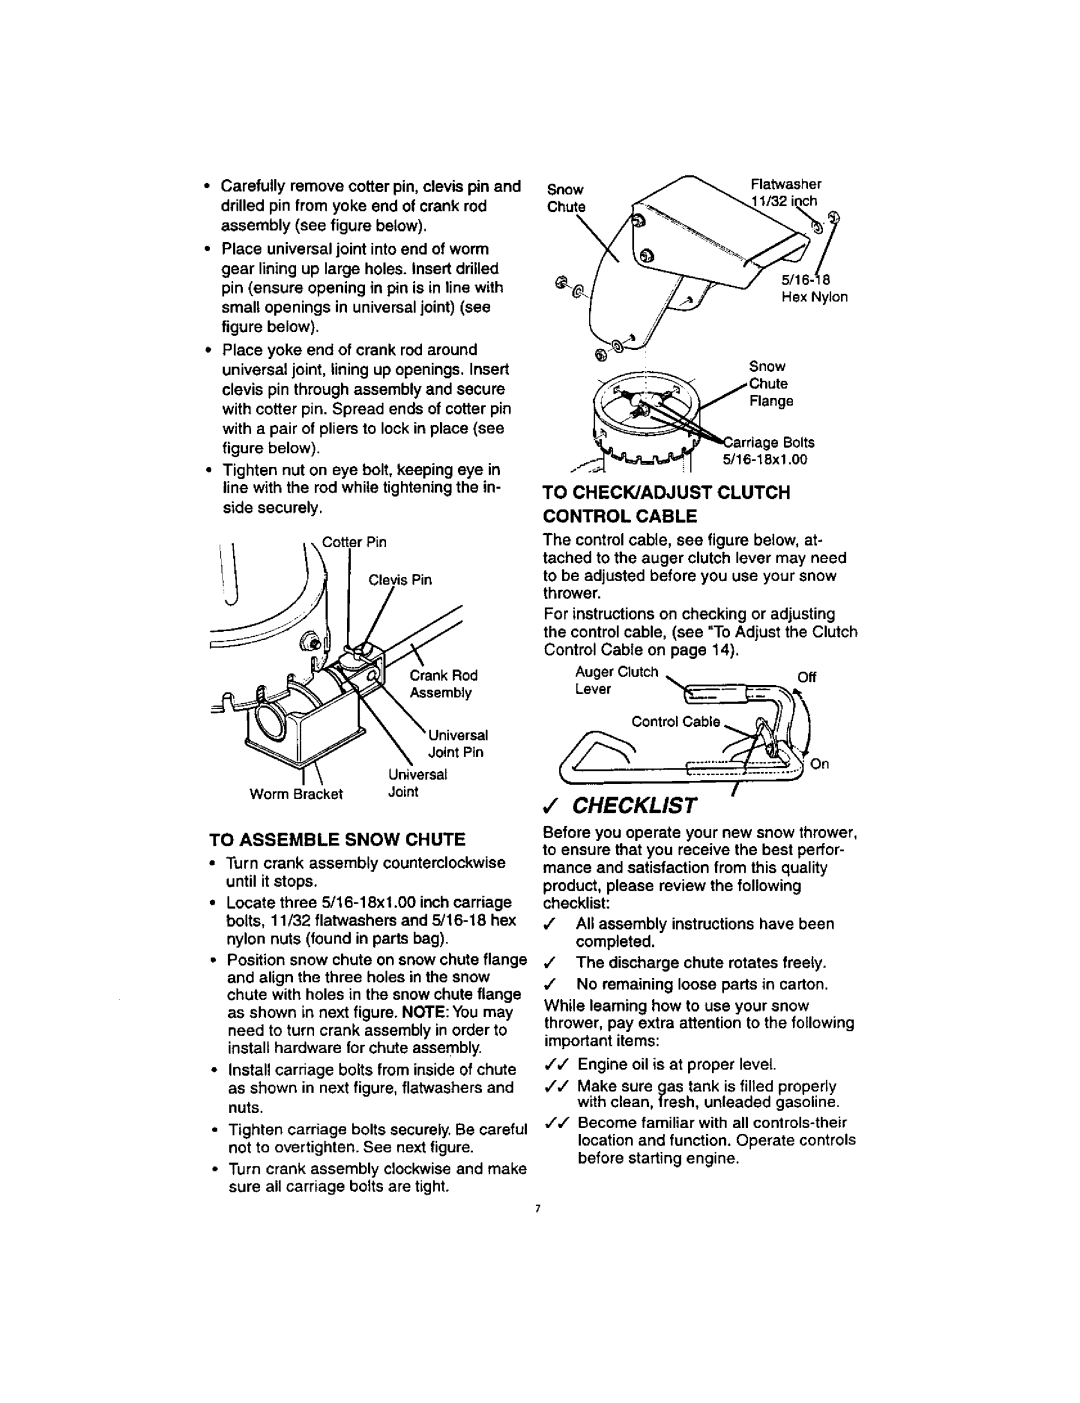
TO ASSEMBLE SNOW CHUTE
•Turn crank assembly counterclockwise until it stops.
•Locate three
•Position snow chute on snow chute flange and align the three holes in the snow chute with holes in the snow chute flange as shown in next figure. NOTE: You may
need to turn crank assembly in order to install hardware for chute assembly.
•Install carriage bolts from inside of chute as shown in next figure, flatwashers and nuts.
•Tighten carriage bolts securely. Be careful not to overtighten. See next figure.
•Turn crank assembly clockwise and make sure all carriage bolts are tight.
SnowFlatwasher Chute
Hex Nylon
TO CHECK/ADJUST CLUTCH
CONTROL CABLE
The control cable, see figure below, at- tached to the auger clutch lever may need
to be adjusted before you use your snow thrower.
For instructions on checking or adjusting the control cable, (see "To Adjust the Clutch
Control Cable on page 14).
Auger Clutch _. | Off |
Lever _,,_
ControlCable_..j
/
,/ CHECKLIST
Before you operate your new snow thrower, to ensure that you receive the best perfor- mance and satisfaction from this quality
product, please review the following checklist:
,/" All assembly instructions have been completed.
,/ The discharge chute rotates freely.
,/ No remaining loose parts in carton.
While learning how to use your snow thrower, pay extra attention to the following important items:
/#" Engine oil is at proper level.
/,/ Make sure gas tank is filled properly with clean, fresh, unleaded gasoline.
•// Become familiar with all