ACTUATOR ROD AND ACTUATOR CHANNEL REPLACEMENT
I CRAFTSMAN°I | ACTUATOR |
| ROD | AND | ACTUATOR |
| |||||||
• | Disconnect | power | from | the unit. |
| ||||||||
|
| CHANNEL | REMOVAL |
|
|
|
|
| |||||
|
| • | Remove | work | surface |
| |||||||
LOCKING | SYSTEM |
| only). |
|
|
|
|
|
|
|
|
|
|
• | Remove | pull out | work | surface | (Roll- | ||||||||
Parts Replacement |
| away only.) See drawer and work |
| ||||||||||
| surface |
| installation | and | removal.) |
| |||||||
|
|
|
|
| |||||||||
|
| • | Remove | enough | drawers | to | reach | the | |||||
|
|
| top back inside of the unit, (See |
| |||||||||
|
|
| drawer and work surface installation | ||||||||||
|
|
| and removal.) |
|
|
|
|
|
|
| |||
|
| • | Push | actuator | rod to | back of | unit | to | |||||
|
|
| disconnect from back of lock. |
|
| ||||||||
|
| • | Rotate | actuator | rod straight | down. |
| ||||||
|
| • | Pull out | to | remove. |
|
|
|
|
| |||
|
| ACTUATOR |
| CHANNEL | REMOVAL |
| |||||||
|
| • | Move | actuator | channel |
| fully | to | the |
| |||
|
|
| right to remove from mounting |
|
| ||||||||
|
|
| flanges. |
|
|
|
|
|
|
|
|
| |
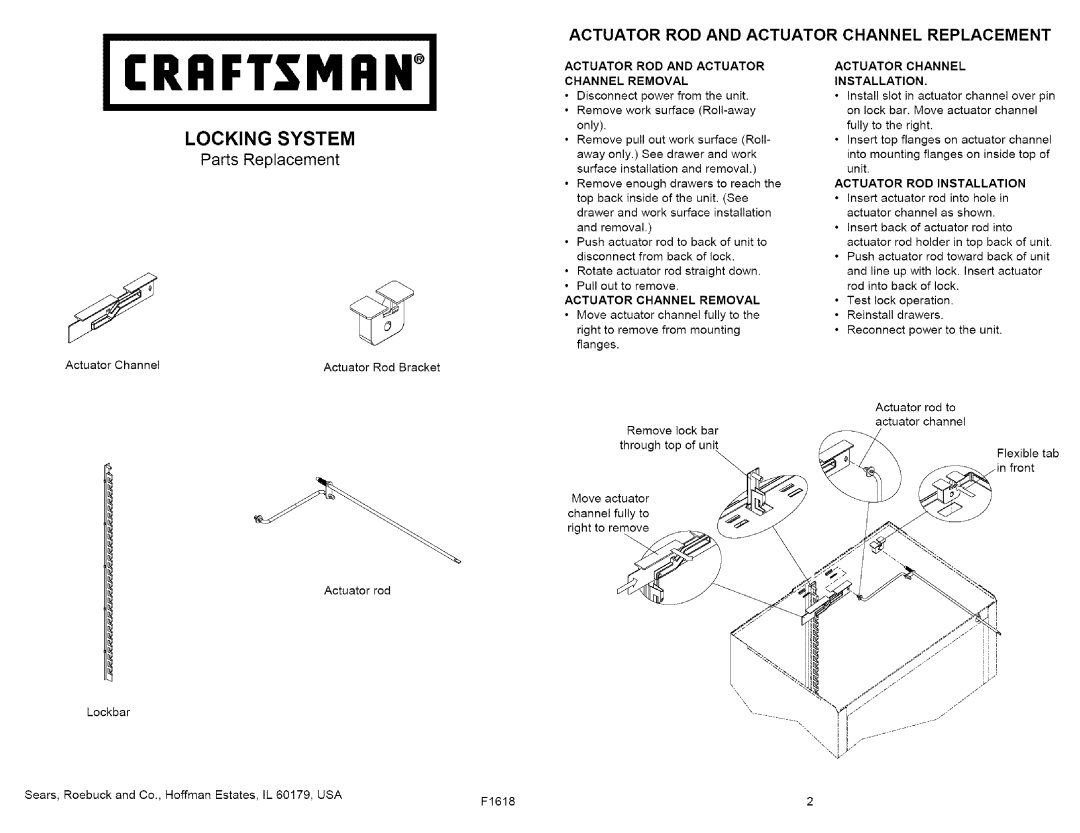
Actuator Channel | Actuator Rod Bracket |
|
Remove lock bar through top of unit
Move actuator channel fully to right to remove
Actuator rod
Lockbar |
|
|
Sears, Roebuck and Co., Hoffman Estates, IL 60179, USA | F1618 | 2 |
|
ACTUATOR CHANNEL
INSTALLATION.
•Install slot in actuator channel over pin on lock bar. Move actuator channel
fully to the right.
•Insert top flanges on actuator channel
into mounting flanges on inside top of unit.
ACTUATOR ROD INSTALLATION
•Insert actuator rod into hole in actuator channel as shown.
•Insert back of actuator rod into
actuator rod holder in top back of unit.
•Push actuator rod toward back of unit and line up with lock. Insert actuator rod into back of lock.
•Test lock operation.
•Reinstall drawers.
•Reconnect power to the unit.
Actuator rod to actuator channel
Flexible tab front
