CHEST TOP INSTALLATION AND REMOVAL
(With task light)
i CRAFTSMAN°i
CHEST TOP AND FACIA
PARTS REPLACEMENT
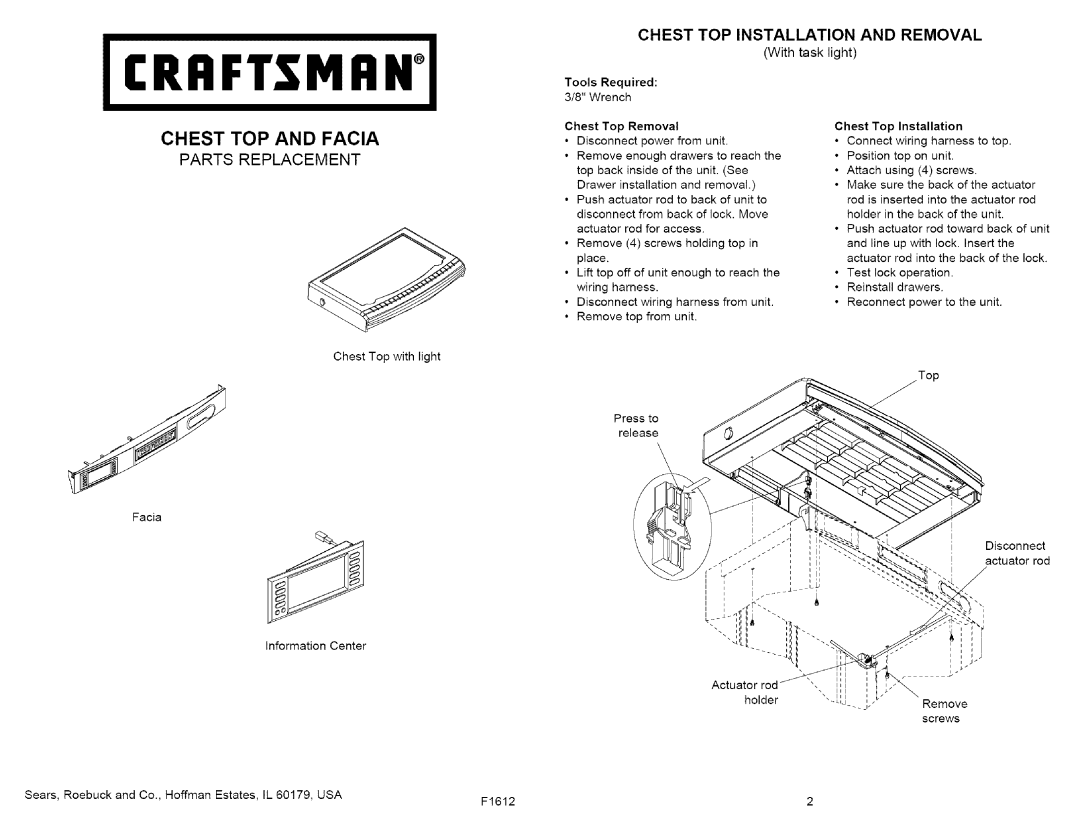
Chest Top with light
Tools Required:
3/8" Wrench
Chest Top Removal
•Disconnect power from unit.
•Remove enough drawers to reach the top back inside of the unit. (See Drawer installation and removal.)
•Push actuator rod to back of unit to disconnect from back of lock. Move actuator rod for access.
•Remove (4) screws holding top in place.
•Lift top off of unit enough to reach the wiring harness.
•Disconnect wiring harness from unit.
•Remove top from unit.
Chest Top Installation
•Connect wiring harness to top.
•Position top on unit.
•Attach using (4) screws.
•Make sure the back of the actuator rod is inserted into the actuator rod holder in the back of the unit.
•Push actuator rod toward back of unit and line up with lock. Insert the actuator rod into the back of the lock.
•Test lock operation.
•Reinstall drawers.
•Reconnect power to the unit.
S
Facia
Information Center
Press to
release
Disconnect actuator rod
Sears, Roebuck and Co., Hoffman Estates, IL 60179, USA | F1612 | 2 |
|