| ASSEMBLY |
|
| ||
Contents of Carton |
|
|
| ||
1 - | Air Compressor |
|
|
| |
2 - | Wheels |
|
|
| |
2 - | Shoulder Bolts, |
|
|
| |
2 - | Hex Nuts, |
|
|
| |
1 - | Handle |
|
| Open End | |
1 - | Handle Grip |
|
| ||
|
| Of Saddle | |||
2 - | Cap Screws |
|
|
| |
2 - |
|
|
| ||
2 - | Retainer Clips |
|
|
| |
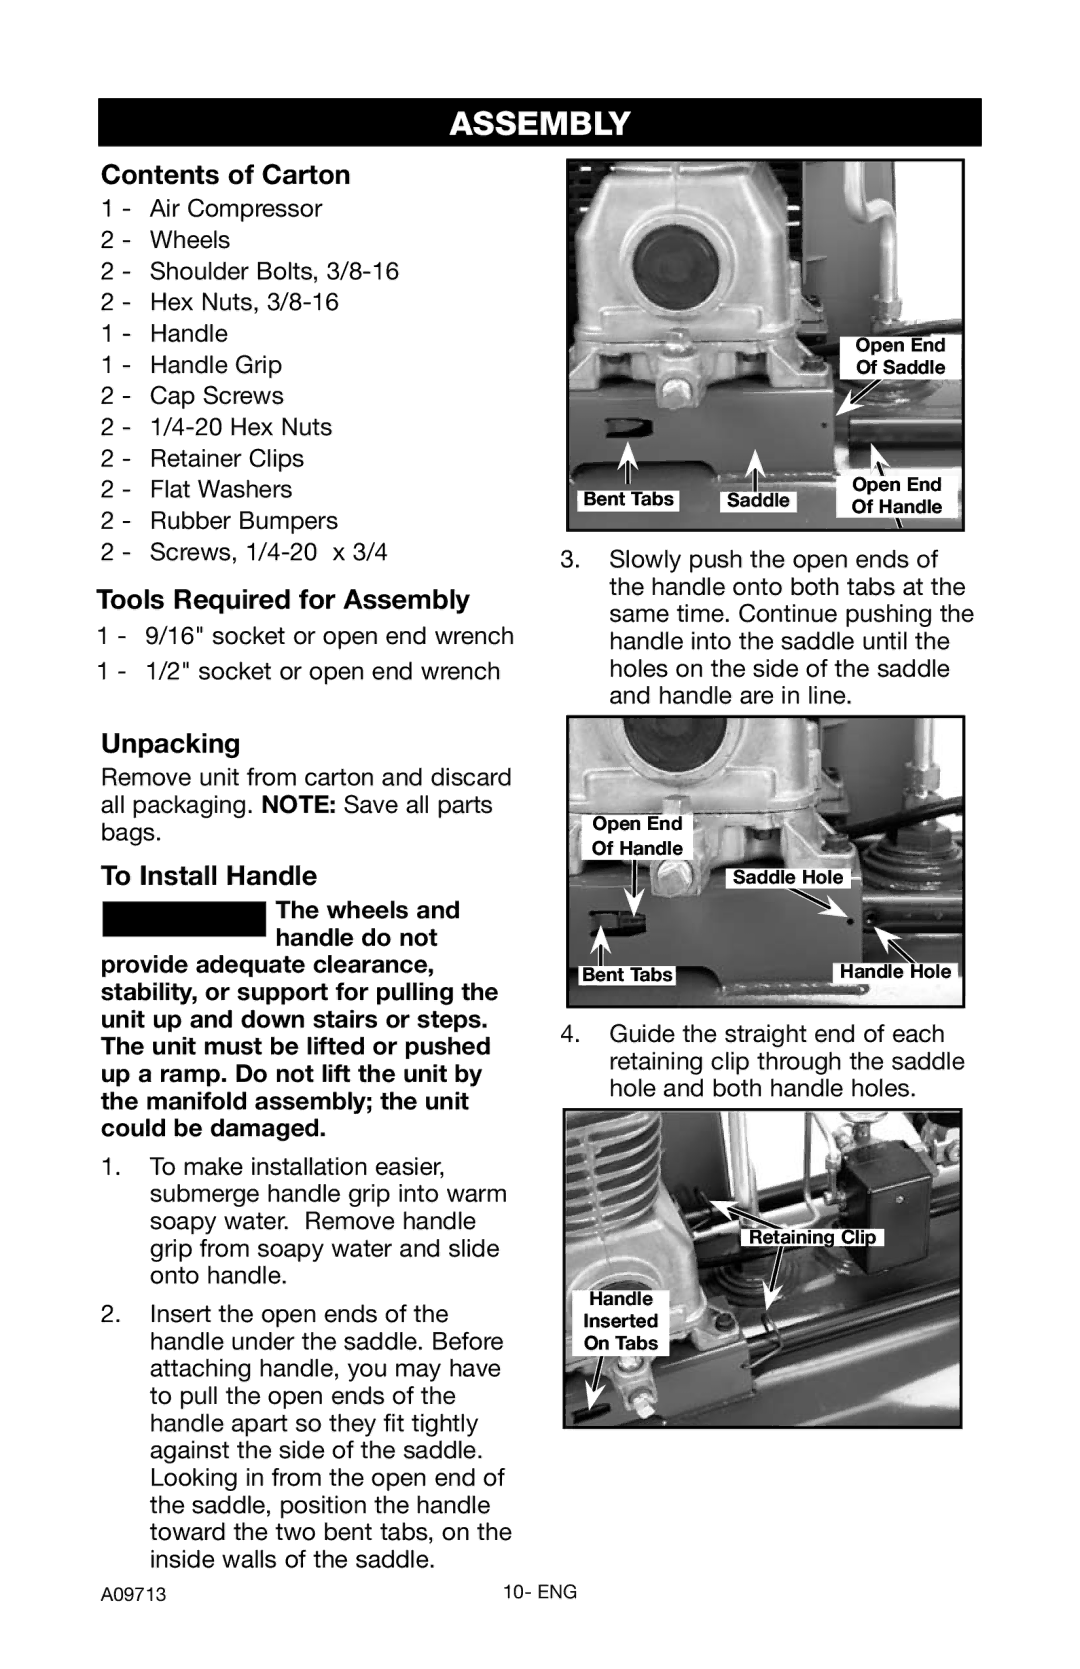
2 - | Flat Washers | Bent Tabs | Saddle | Open End | |
Of Handle | |||||
2 - | Rubber Bumpers | ||||
|
| ||||
|
|
| |||
2 - | Screws, | 3. Slowly push the open ends of | |||
Tools Required for Assembly | the handle onto both tabs at the | ||||
same time. Continue pushing the | |||||
1 - | 9/16" socket or open end wrench | ||||
handle into the saddle until the | |||||
1 - | 1/2" socket or open end wrench | holes on the side of the saddle | |||
|
| and handle are in line. | |||
Unpacking
Remove unit from carton and discard all packaging. NOTE: Save all parts bags.
To Install Handle
The wheels and handle do not
provide adequate clearance, stability, or support for pulling the unit up and down stairs or steps. The unit must be lifted or pushed up a ramp. Do not lift the unit by the manifold assembly; the unit could be damaged.
1.To make installation easier, submerge handle grip into warm soapy water. Remove handle grip from soapy water and slide onto handle.
2.Insert the open ends of the handle under the saddle. Before attaching handle, you may have to pull the open ends of the handle apart so they fit tightly against the side of the saddle. Looking in from the open end of the saddle, position the handle toward the two bent tabs, on the inside walls of the saddle.
Open End |
|
Of Handle |
|
| Saddle Hole |
Bent Tabs | Handle Hole |
4.Guide the straight end of each retaining clip through the saddle hole and both handle holes.
Retaining Clip
Handle
Inserted
On Tabs
A09713 | 10- ENG |