Note: To remove blender jar cover, lift edge of cover upwards. Lifting measured pour lid will not remove cover.
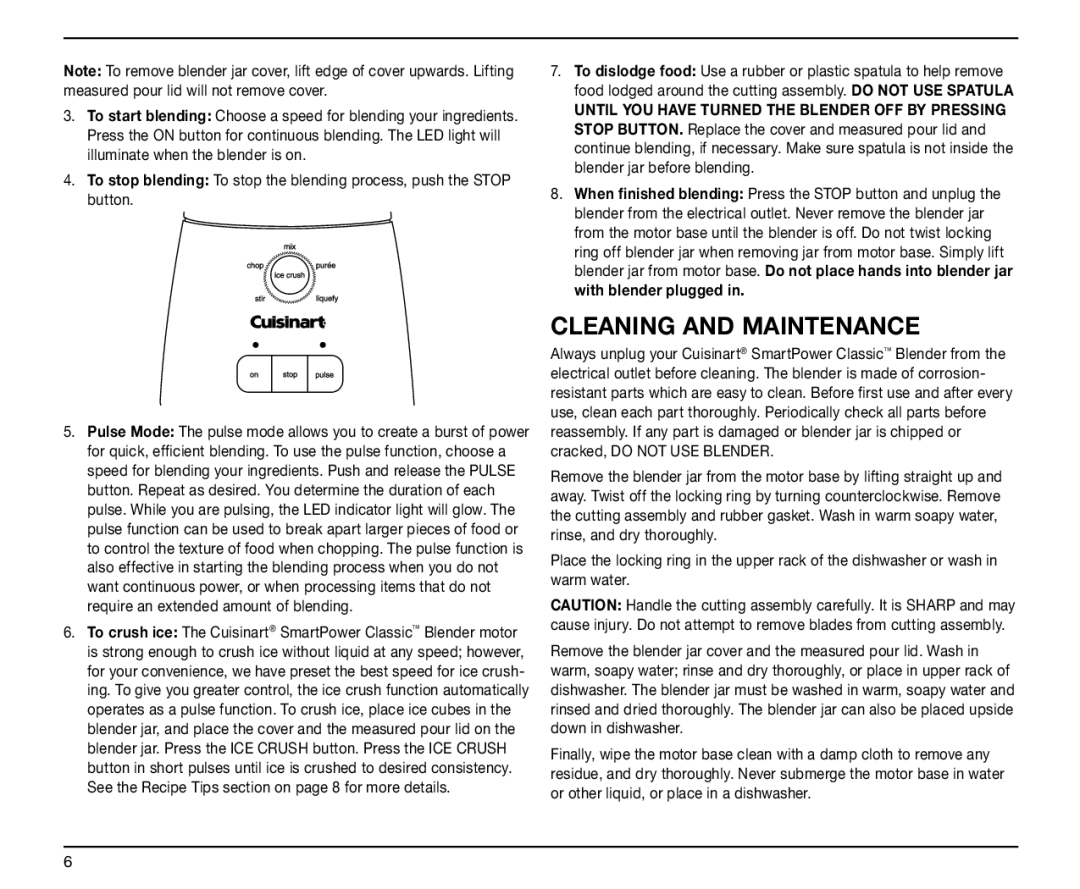
3.To start blending: Choose a speed for blending your ingredients. Press the ON button for continuous blending. The LED light will illuminate when the blender is on.
4.To stop blending: To stop the blending process, push the STOP button.
5.Pulse Mode: The pulse mode allows you to create a burst of power for quick, efficient blending. To use the pulse function, choose a speed for blending your ingredients. Push and release the PULSE button. Repeat as desired. You determine the duration of each pulse. While you are pulsing, the LED indicator light will glow. The pulse function can be used to break apart larger pieces of food or to control the texture of food when chopping. The pulse function is also effective in starting the blending process when you do not want continuous power, or when processing items that do not require an extended amount of blending.
6.To crush ice: The Cuisinart® SmartPower Classic™ Blender motor is strong enough to crush ice without liquid at any speed; however, for your convenience, we have preset the best speed for ice crush- ing. To give you greater control, the ice crush function automatically operates as a pulse function. To crush ice, place ice cubes in the blender jar, and place the cover and the measured pour lid on the blender jar. Press the ICE CRUSH button. Press the ICE CRUSH button in short pulses until ice is crushed to desired consistency. See the Recipe Tips section on page 8 for more details.
7.To dislodge food: Use a rubber or plastic spatula to help remove food lodged around the cutting assembly. DO NOT USE SPATULA
UNTIL YOU HAVE TURNED THE BLENDER OFF BY PRESSING STOP BUTTON. Replace the cover and measured pour lid and continue blending, if necessary. Make sure spatula is not inside the blender jar before blending.
8.When finished blending: Press the STOP button and unplug the blender from the electrical outlet. Never remove the blender jar from the motor base until the blender is off. Do not twist locking ring off blender jar when removing jar from motor base. Simply lift blender jar from motor base. Do not place hands into blender jar with blender plugged in.
CLEANING AND MAINTENANCE
Always unplug your Cuisinart® SmartPower Classic™ Blender from the electrical outlet before cleaning. The blender is made of corrosion- resistant parts which are easy to clean. Before first use and after every use, clean each part thoroughly. Periodically check all parts before reassembly. If any part is damaged or blender jar is chipped or cracked, DO NOT USE BLENDER.
Remove the blender jar from the motor base by lifting straight up and away. Twist off the locking ring by turning counterclockwise. Remove the cutting assembly and rubber gasket. Wash in warm soapy water, rinse, and dry thoroughly.
Place the locking ring in the upper rack of the dishwasher or wash in warm water.
CAUTION: Handle the cutting assembly carefully. It is SHARP and may cause injury. Do not attempt to remove blades from cutting assembly.
Remove the blender jar cover and the measured pour lid. Wash in warm, soapy water; rinse and dry thoroughly, or place in upper rack of dishwasher. The blender jar must be washed in warm, soapy water and rinsed and dried thoroughly. The blender jar can also be placed upside down in dishwasher.
Finally, wipe the motor base clean with a damp cloth to remove any residue, and dry thoroughly. Never submerge the motor base in water or other liquid, or place in a dishwasher.
6