CHAPTER 3: COMMON ADJUSTMENTS
Flywheel Adjustment
Chain tension/Flywheel Alignment
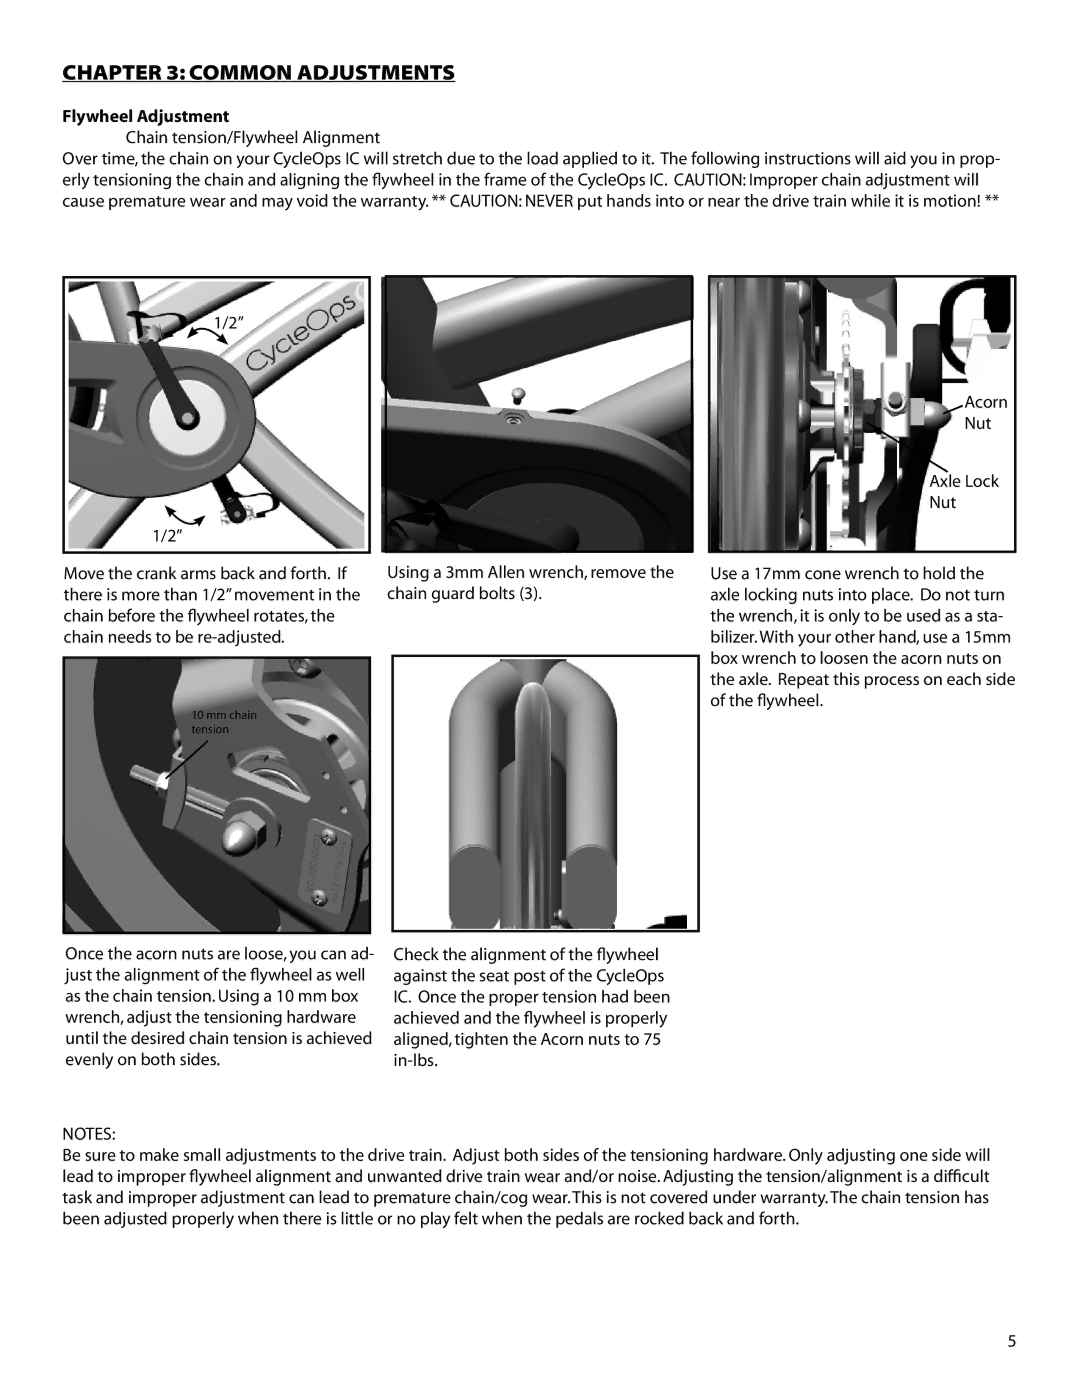
Over time, the chain on your CycleOps IC will stretch due to the load applied to it. The following instructions will aid you in prop- erly tensioning the chain and aligning the flywheel in the frame of the CycleOps IC. CAUTION: Improper chain adjustment will cause premature wear and may void the warranty. ** CAUTION: NEVER put hands into or near the drive train while it is motion! **
1/2”
1/2”
Acorn
Nut
Axle Lock Nut
Move the crank arms back and forth. If | Using a 3mm Allen wrench, remove the | |
there is more than 1/2” movement in the | chain guard bolts (3). | |
chain before the flywheel rotates, the |
|
|
chain needs to be |
|
|
|
|
|
10 mm chain |
|
|
tension |
|
|
|
|
|
Once the acorn nuts are loose, you can ad- | Check the alignment of the flywheel |
just the alignment of the flywheel as well | against the seat post of the CycleOps |
as the chain tension. Using a 10 mm box | IC. Once the proper tension had been |
wrench, adjust the tensioning hardware | achieved and the flywheel is properly |
until the desired chain tension is achieved | aligned, tighten the Acorn nuts to 75 |
evenly on both sides. |
Use a 17mm cone wrench to hold the axle locking nuts into place. Do not turn the wrench, it is only to be used as a sta- bilizer. With your other hand, use a 15mm box wrench to loosen the acorn nuts on the axle. Repeat this process on each side of the flywheel.
NOTES:
Be sure to make small adjustments to the drive train. Adjust both sides of the tensioning hardware. Only adjusting one side will lead to improper flywheel alignment and unwanted drive train wear and/or noise. Adjusting the tension/alignment is a difficult task and improper adjustment can lead to premature chain/cog wear. This is not covered under warranty. The chain tension has been adjusted properly when there is little or no play felt when the pedals are rocked back and forth.
5
