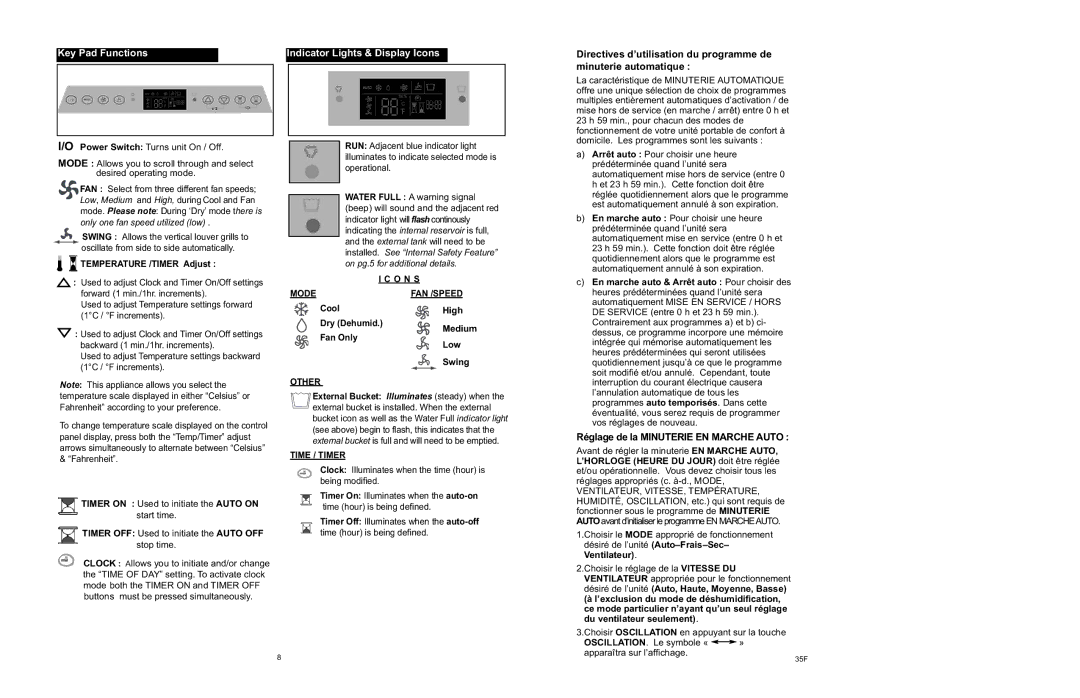
Key Pad Functions
I/O Power Switch: Turns unit On / Off.
MODE : Allows you to scroll through and select desired operating mode.
![]()
![]() FAN : Select from three different fan speeds; Low, Medium and High, during Cool and Fan mode. Please note: During ‘Dry’ mode there is only one fan speed utilized (low) .
FAN : Select from three different fan speeds; Low, Medium and High, during Cool and Fan mode. Please note: During ‘Dry’ mode there is only one fan speed utilized (low) .
SWING : Allows the vertical louver grills to oscillate from side to side automatically.
 TEMPERATURE /TIMER Adjust :
![]() : Used to adjust Clock and Timer On/Off settings forward (1 min./1hr. increments).
: Used to adjust Clock and Timer On/Off settings forward (1 min./1hr. increments).
Used to adjust Temperature settings forward (1°C / °F increments).
![]() : Used to adjust Clock and Timer On/Off settings backward (1 min./1hr. increments).
: Used to adjust Clock and Timer On/Off settings backward (1 min./1hr. increments).
Used to adjust Temperature settings backward (1°C / °F increments).
Note: This appliance allows you select the temperature scale displayed in either “Celsius” or Fahrenheit” according to your preference.
To change temperature scale displayed on the control panel display, press both the “Temp/Timer” adjust arrows simultaneously to alternate between “Celsius” & “Fahrenheit”.
TIMER ON : Used to initiate the AUTO ON start time.
TIMER OFF: Used to initiate the AUTO OFF stop time.
CLOCK : Allows you to initiate and/or change the “TIME OF DAY” setting. To activate clock mode both the TIMER ON and TIMER OFF buttons must be pressed simultaneously.
Indicator Lights & Display Icons
RUN: Adjacent blue indicator light illuminates to indicate selected mode is operational.
WATER FULL : A warning signal (beep) will sound and the adjacent red indicator light will flash continously indicating the internal reservoir is full, and the external tank will need to be installed. See “Internal Safety Feature” on pg.5 for additional details.
| I C O N S | |
MODE |
| FAN /SPEED |
Cool |
| High |
Dry (Dehumid.) | Medium | |
|
| |
Fan Only
Low
Swing
OTHER
External Bucket: Illuminates (steady) when the external bucket is installed. When the external bucket icon as well as the Water Full indicator light (see above) begin to flash, this indicates that the external bucket is full and will need to be emptied.
TIME / TIMER
Clock: Illuminates when the time (hour) is being modified.
Timer On: Illuminates when the
Timer Off: Illuminates when the
Directives d’utilisation du programme de minuterie automatique :
La caractéristique de MINUTERIE AUTOMATIQUE offre une unique sélection de choix de programmes multiples entièrement automatiques d’activation / de mise hors de service (en marche / arrêt) entre 0 h et 23 h 59 min., pour chacun des modes de fonctionnement de votre unité portable de confort à domicile. Les programmes sont les suivants :
a)Arrêt auto : Pour choisir une heure prédéterminée quand l’unité sera automatiquement mise hors de service (entre 0 h et 23 h 59 min.). Cette fonction doit être réglée quotidiennement alors que le programme est automatiquement annulé à son expiration.
b)En marche auto : Pour choisir une heure prédéterminée quand l’unité sera automatiquement mise en service (entre 0 h et 23 h 59 min.). Cette fonction doit être réglée quotidiennement alors que le programme est automatiquement annulé à son expiration.
c)En marche auto & Arrêt auto : Pour choisir des heures prédéterminées quand l’unité sera automatiquement MISE EN SERVICE / HORS DE SERVICE (entre 0 h et 23 h 59 min.). Contrairement aux programmes a) et b) ci- dessus, ce programme incorpore une mémoire intégrée qui mémorise automatiquement les heures prédéterminées qui seront utilisées quotidiennement jusqu’à ce que le programme soit modifié et/ou annulé. Cependant, toute interruption du courant électrique causera l’annulation automatique de tous les programmes auto temporisés. Dans cette éventualité, vous serez requis de programmer vos réglages de nouveau.
Réglage de la MINUTERIE EN MARCHE AUTO :
Avant de régler la minuterie EN MARCHE AUTO, L’HORLOGE (HEURE DU JOUR) doit être réglée et/ou opérationnelle. Vous devez choisir tous les réglages appropriés (c.
VENTILATEUR, VITESSE, TEMPÉRATURE, HUMIDITÉ, OSCILLATION, etc.) qui sont requis de fonctionner sous le programme de MINUTERIE AUTOavantd’initialiserleprogrammeENMARCHEAUTO.
1.Choisir le MODE approprié de fonctionnement désiré de l’unité
2.Choisir le réglage de la VITESSE DU VENTILATEUR appropriée pour le fonctionnement désiré de l’unité (Auto, Haute, Moyenne, Basse) (à l’exclusion du mode de déshumidification, ce mode particulier n’ayant qu’un seul réglage du ventilateur seulement).
3.Choisir OSCILLATION en appuyant sur la touche
8
OSCILLATION. Le symbole « ![]()
![]() » apparaîtra sur l’affichage.
» apparaîtra sur l’affichage.
35F