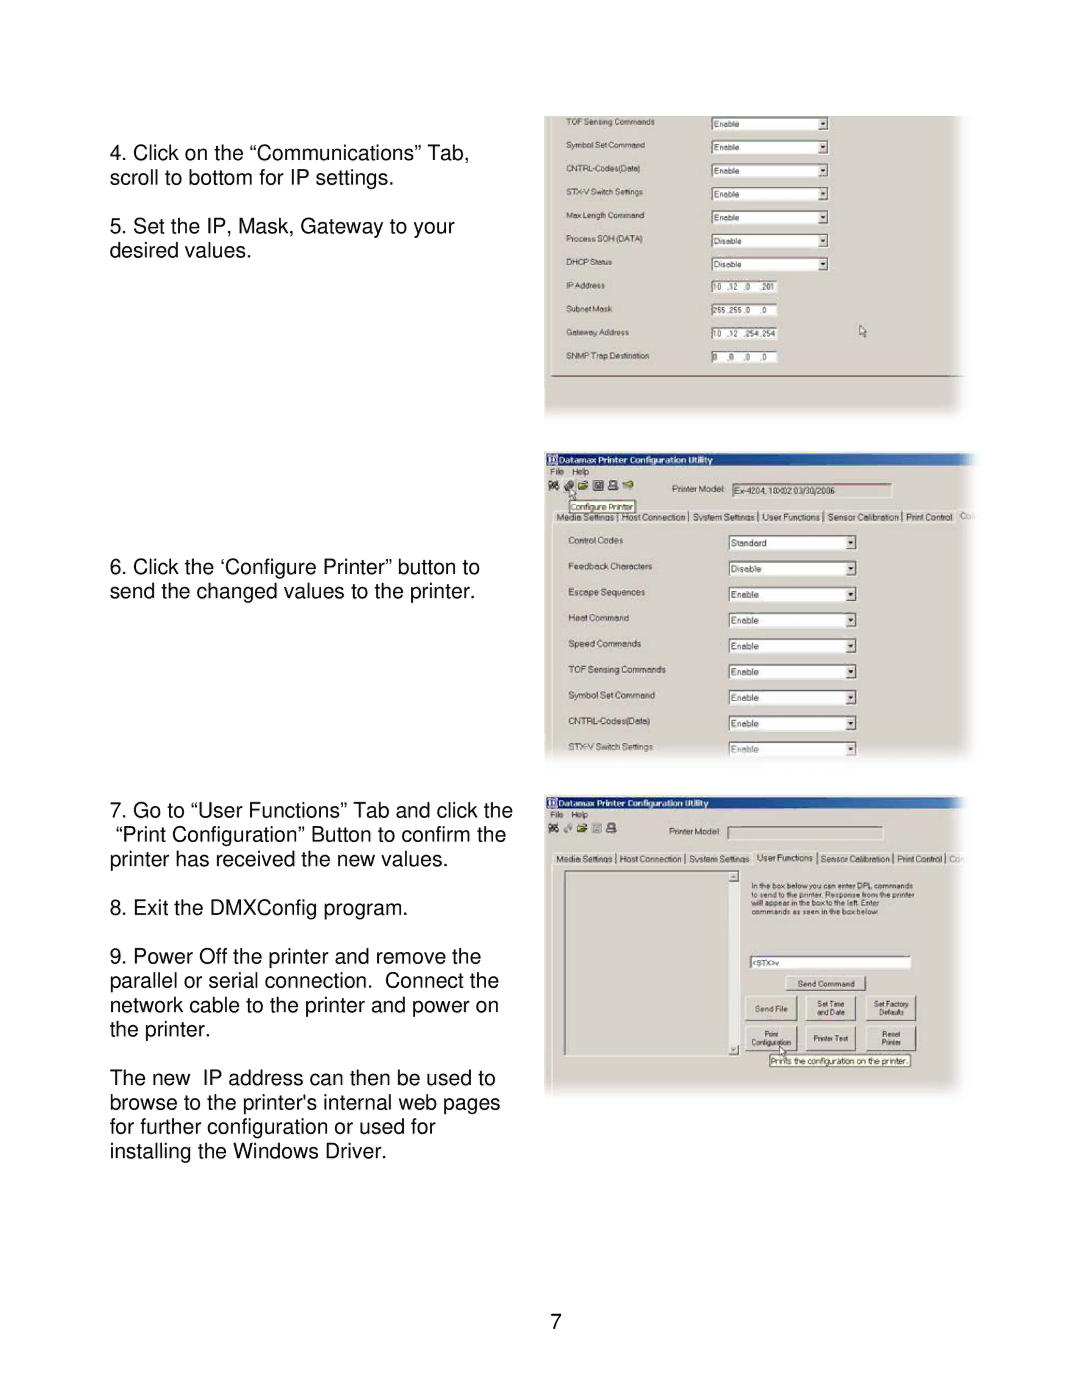
4.Click on the “Communications” Tab, scroll to bottom for IP settings.
5.Set the IP, Mask, Gateway to your desired values.
6.Click the ‘Configure Printer” button to send the changed values to the printer.
7.Go to “User Functions” Tab and click the “Print Configuration” Button to confirm the
printer has received the new values.
8.Exit the DMXConfig program.
9.Power Off the printer and remove the parallel or serial connection. Connect the network cable to the printer and power on the printer.
The new IP address can then be used to browse to the printer's internal web pages for further configuration or used for installing the Windows Driver.
7
