| Console Location |
|
|
|
|
| 2. Ensure that the ISS cable is not twisted through the access port. |
|
|
|
|
Note: | The ISS must be assembled and connected to the console so that it is receiving |
|
| power before the console connection can be tested. |
|
|
|
|
| Once the console and ISS are both powered up, cable connection should be tested and |
|
| established. |
|
| Once the console is powered, it automatically enters Setup Mode. You can step through |
|
| the Setup Mode options, or exit the Setup Mode to test the connection and sensor read- |
|
| ings in Current Weather Mode. See “Setup Mode” on page 9 for Setup Mode options. |
|
| See “Current Weather Mode” on page 18 for viewing and verifying current weather |
|
| data coming from the cabled console. |
|
| To verify that the console is receiving data from the ISS through the console connec- |
|
| tion, see “Cabled ISS Assembly” in the Integrated Sensor Suite Installation Manual. |
|
Console Location
Place the console in a location where the keyboard is easily accessible and the display is easy to read. For more accurate readings:
•Avoid placing the console in direct sunlight. This may cause erroneous inside tem- perature and humidity readings and may damage the unit.
•Avoid placing the console near radiators or heating/air conditioning ducts.
•If you are mounting the console on a wall, choose an interior wall. Avoid exterior walls that tend to heat up or cool down depending on the weather.
•If you have a wireless console, be aware of possible interference from cordless phones or other devices. To prevent interference, maintain a distance of 10 feet between the Vantage Pro2 console and a cordless phone (handset and base).
•Avoid positioning a wireless console near large metallic appliances such as refrig- erators, televisions, heaters, or air conditioners.
•The console antenna does not rotate in a complete circle. Avoid forcing the console antenna when rotating it.
Table & Shelf Placement
The console kickstand can be set to three different angles allowing five different dis- play angles.
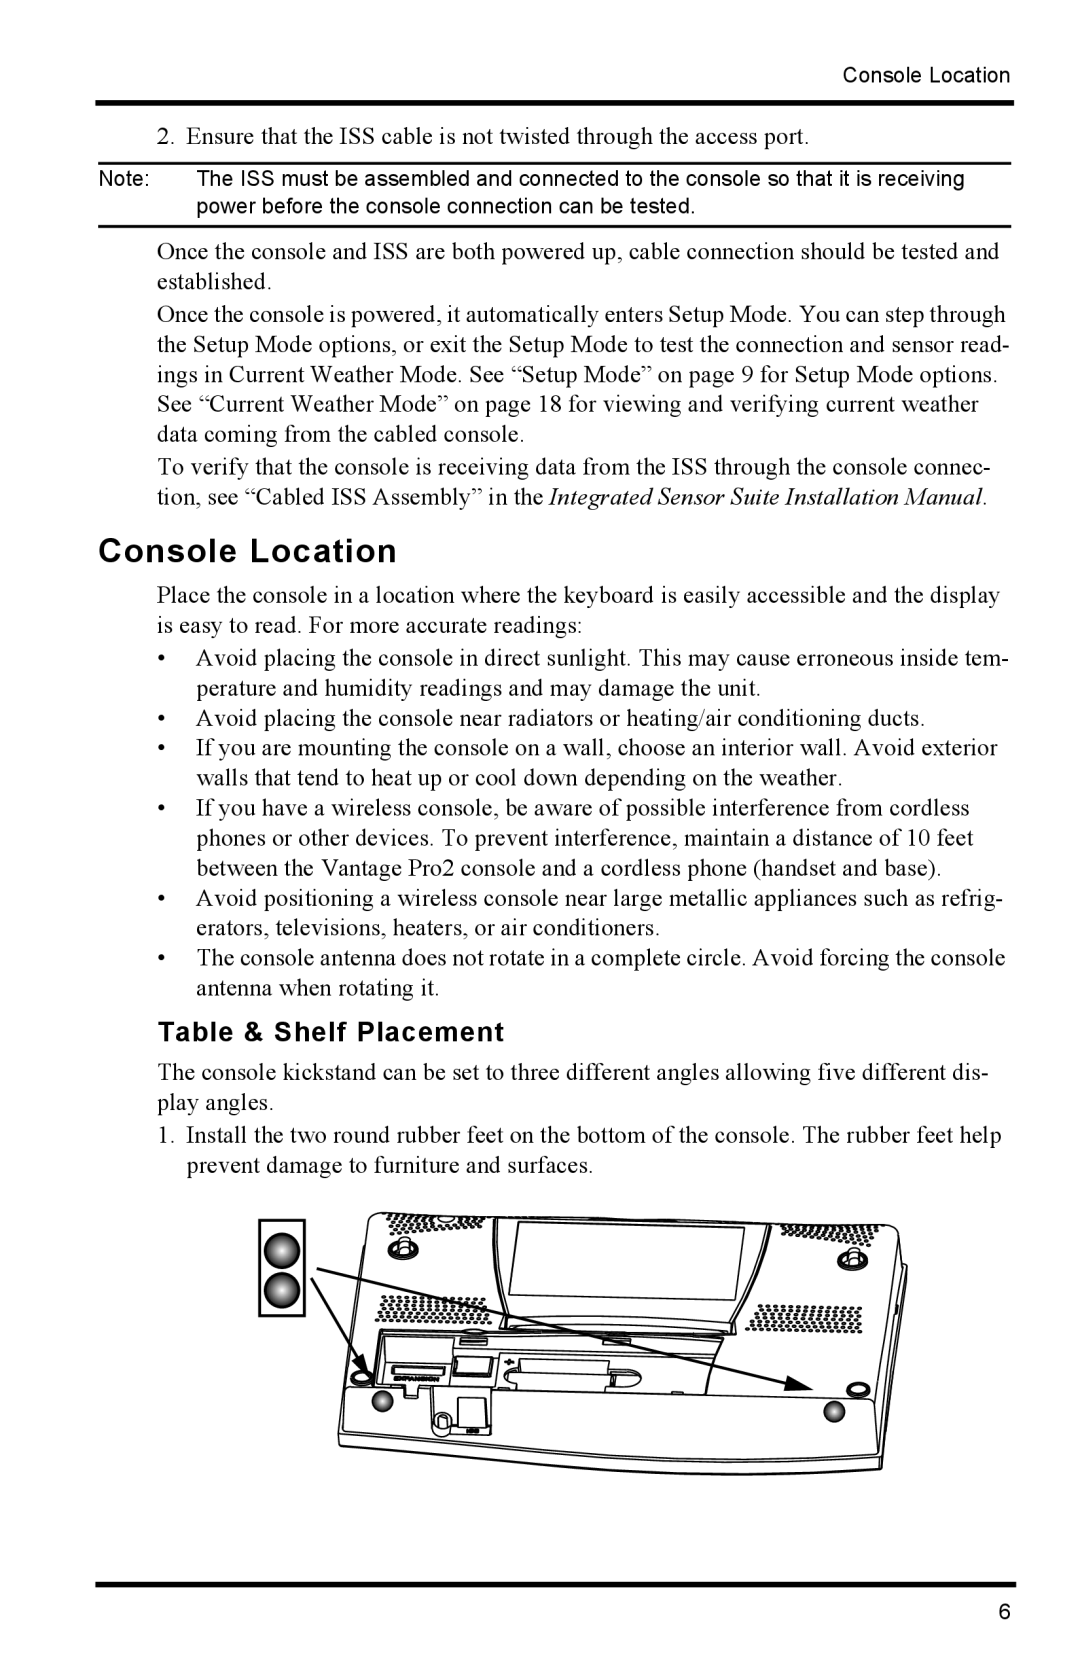
1.Install the two round rubber feet on the bottom of the console. The rubber feet help prevent damage to furniture and surfaces.
6
