w w w . d e l l . c o m s u p p o r t . d e l l . c o m
82
NOTICE: To prevent damage to the memory module connector, do not use tools to spread the inner metal tabs that secure the memory module.
6If you are replacing a memory module, remove the existing module.
NOTICE: Handle memory modules by their edges, and do not touch the components on a module.
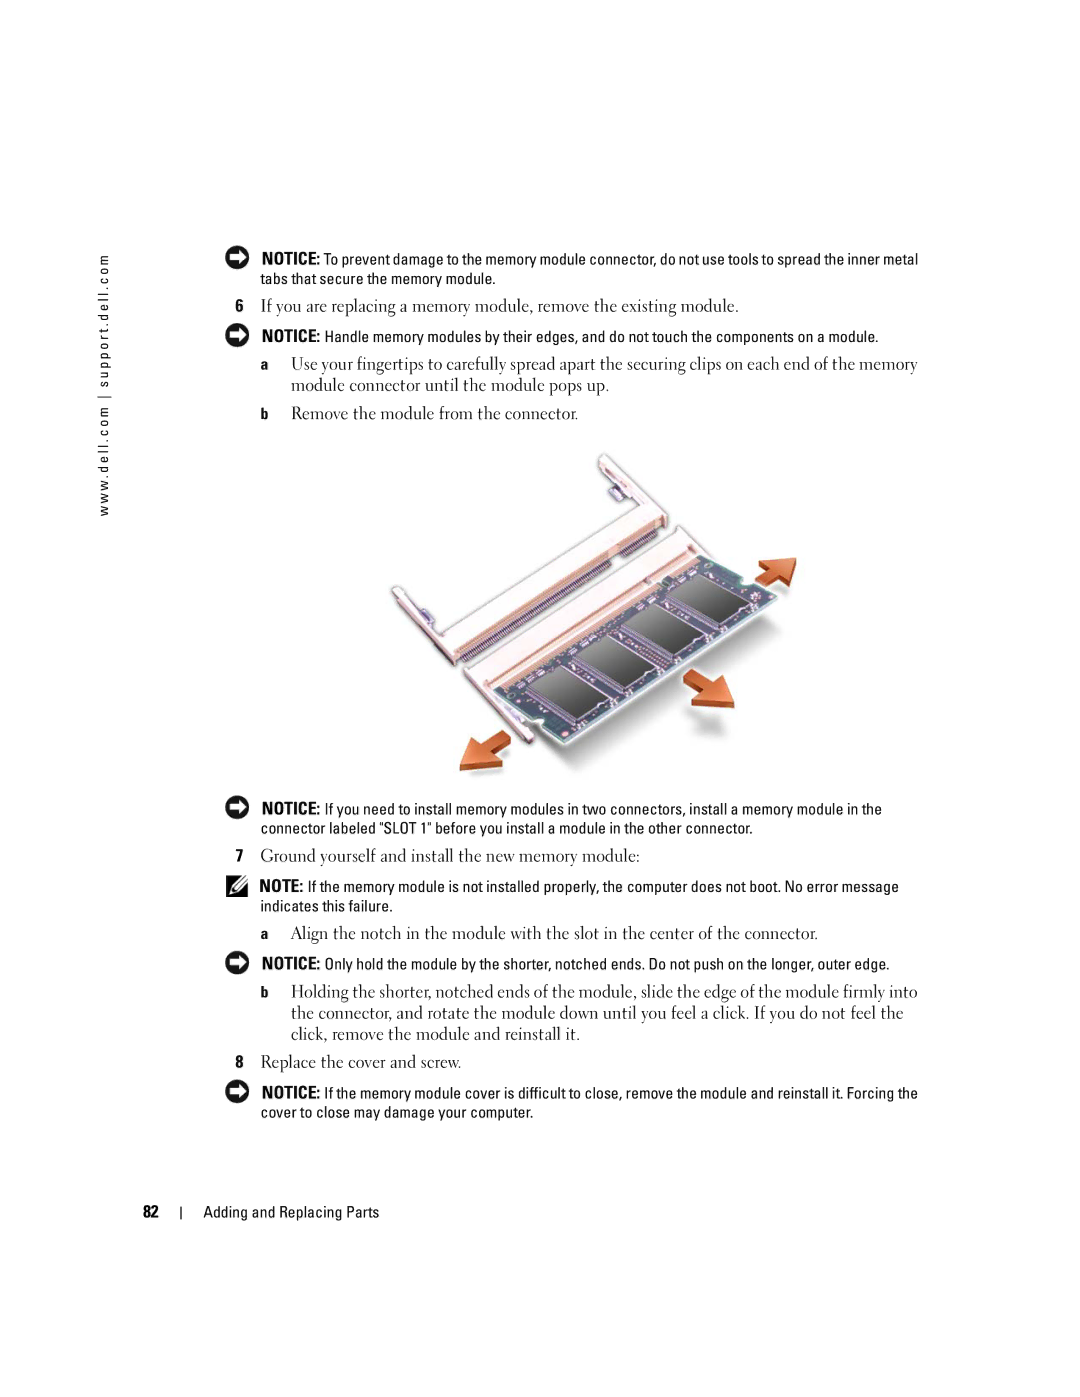
aUse your fingertips to carefully spread apart the securing clips on each end of the memory module connector until the module pops up.
bRemove the module from the connector.
NOTICE: If you need to install memory modules in two connectors, install a memory module in the connector labeled "SLOT 1" before you install a module in the other connector.
7Ground yourself and install the new memory module:
NOTE: If the memory module is not installed properly, the computer does not boot. No error message indicates this failure.
aAlign the notch in the module with the slot in the center of the connector.
NOTICE: Only hold the module by the shorter, notched ends. Do not push on the longer, outer edge.
bHolding the shorter, notched ends of the module, slide the edge of the module firmly into the connector, and rotate the module down until you feel a click. If you do not feel the click, remove the module and reinstall it.
8Replace the cover and screw.
NOTICE: If the memory module cover is difficult to close, remove the module and reinstall it. Forcing the cover to close may damage your computer.