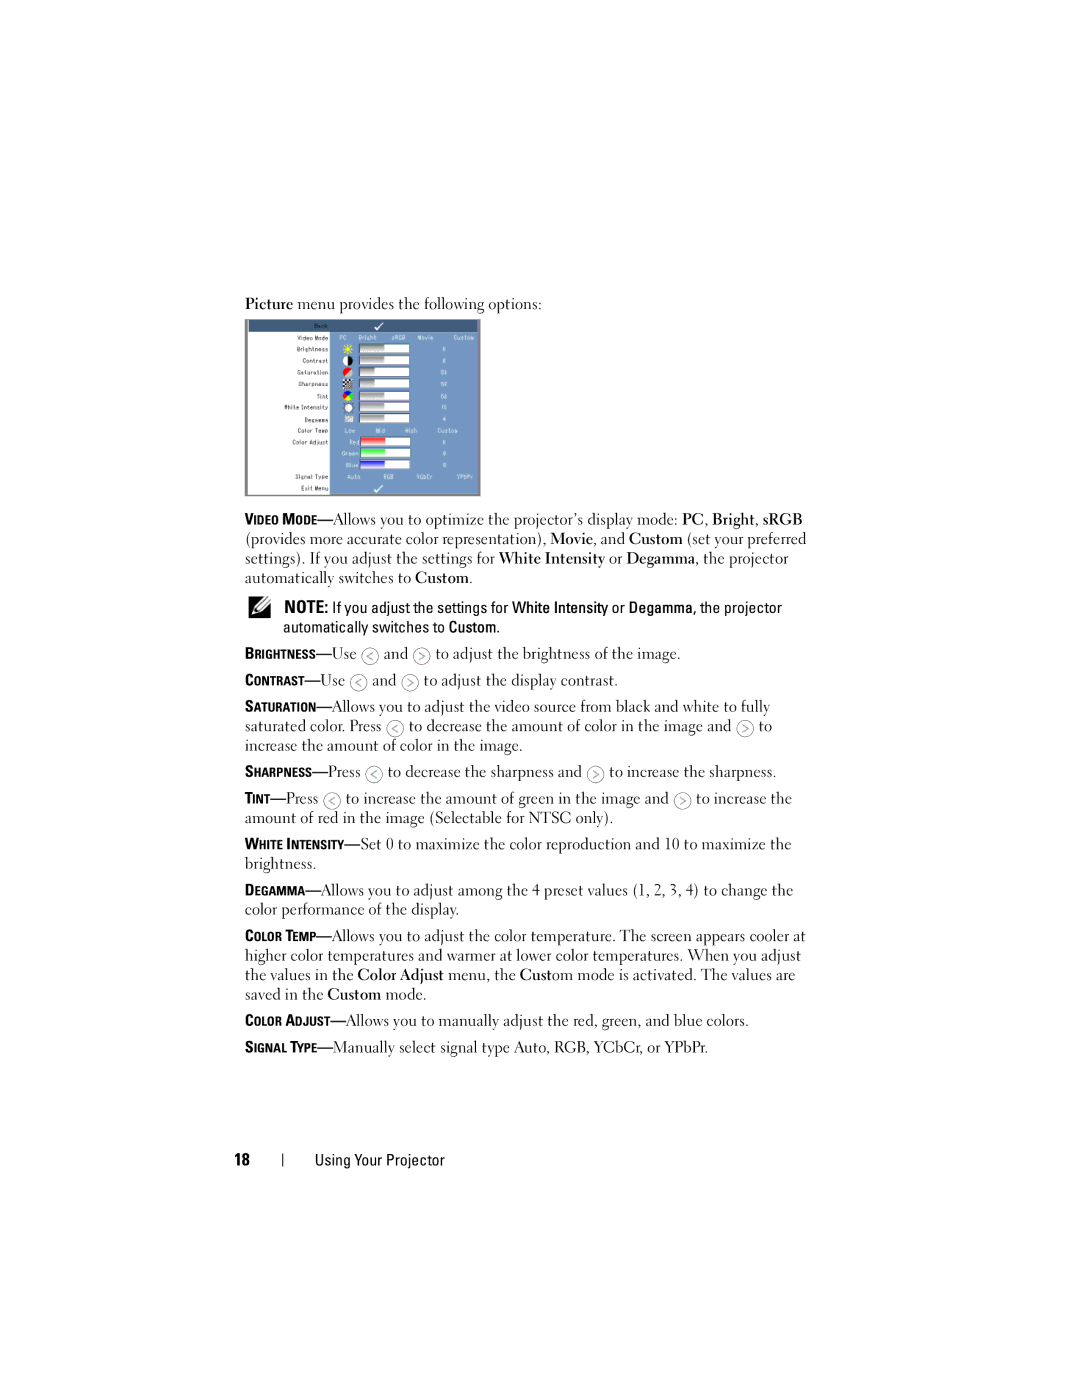
Picture menu provides the following options:
VIDEO MODE—Allows you to optimize the projector’s display mode: PC, Bright, sRGB (provides more accurate color representation), Movie, and Custom (set your preferred settings). If you adjust the settings for White Intensity or Degamma, the projector automatically switches to Custom.
NOTE: If you adjust the settings for White Intensity or Degamma, the projector automatically switches to Custom.
BRIGHTNESS—Use  and
and  to adjust the brightness of the image. CONTRAST—Use
  and
and  to adjust the display contrast.
SATURATION—Allows you to adjust the video source from black and white to fully saturated color. Press  to decrease the amount of color in the image and
  to increase the amount of color in the image.
SHARPNESS—Press  to decrease the sharpness and
  to increase the sharpness.
TINT—Press  to increase the amount of green in the image and
  to increase the amount of red in the image (Selectable for NTSC only).
WHITE INTENSITY—Set 0 to maximize the color reproduction and 10 to maximize the brightness.
DEGAMMA—Allows you to adjust among the 4 preset values (1, 2, 3, 4) to change the color performance of the display.
COLOR TEMP—Allows you to adjust the color temperature. The screen appears cooler at higher color temperatures and warmer at lower color temperatures. When you adjust the values in the Color Adjust menu, the Custom mode is activated. The values are saved in the Custom mode.
COLOR ADJUST—Allows you to manually adjust the red, green, and blue colors.
SIGNAL TYPE—Manually select signal type Auto, RGB, YCbCr, or YPbPr.