8.Replace the hinge cover (Hinge Cover).
9.Insert the battery into the battery bay, or connect the AC adapter to your computer and an electrical outlet.
10.Turn on the computer.
As the computer boots, it detects the additional memory and automatically updates the system configuration information.
•In the Microsoft® Windows® XP operating system,
•In the Microsoft Windows Vista™ operating system, click the Windows Vista Start button ![]() , and
, and
To confirm the amount of memory installed in the computer, click Start® Control Panel® System.
To install a memory module in DIMM B:
1.Follow the procedures in Before You Begin.
2.Turn the computer
![]() 1
1 ![]() captive screw on memory module cover
captive screw on memory module cover
3. Ground yourself by touching one of the metal connectors on the back of the computer.
NOTICE: If you leave the area, ground yourself again when you return to the computer.
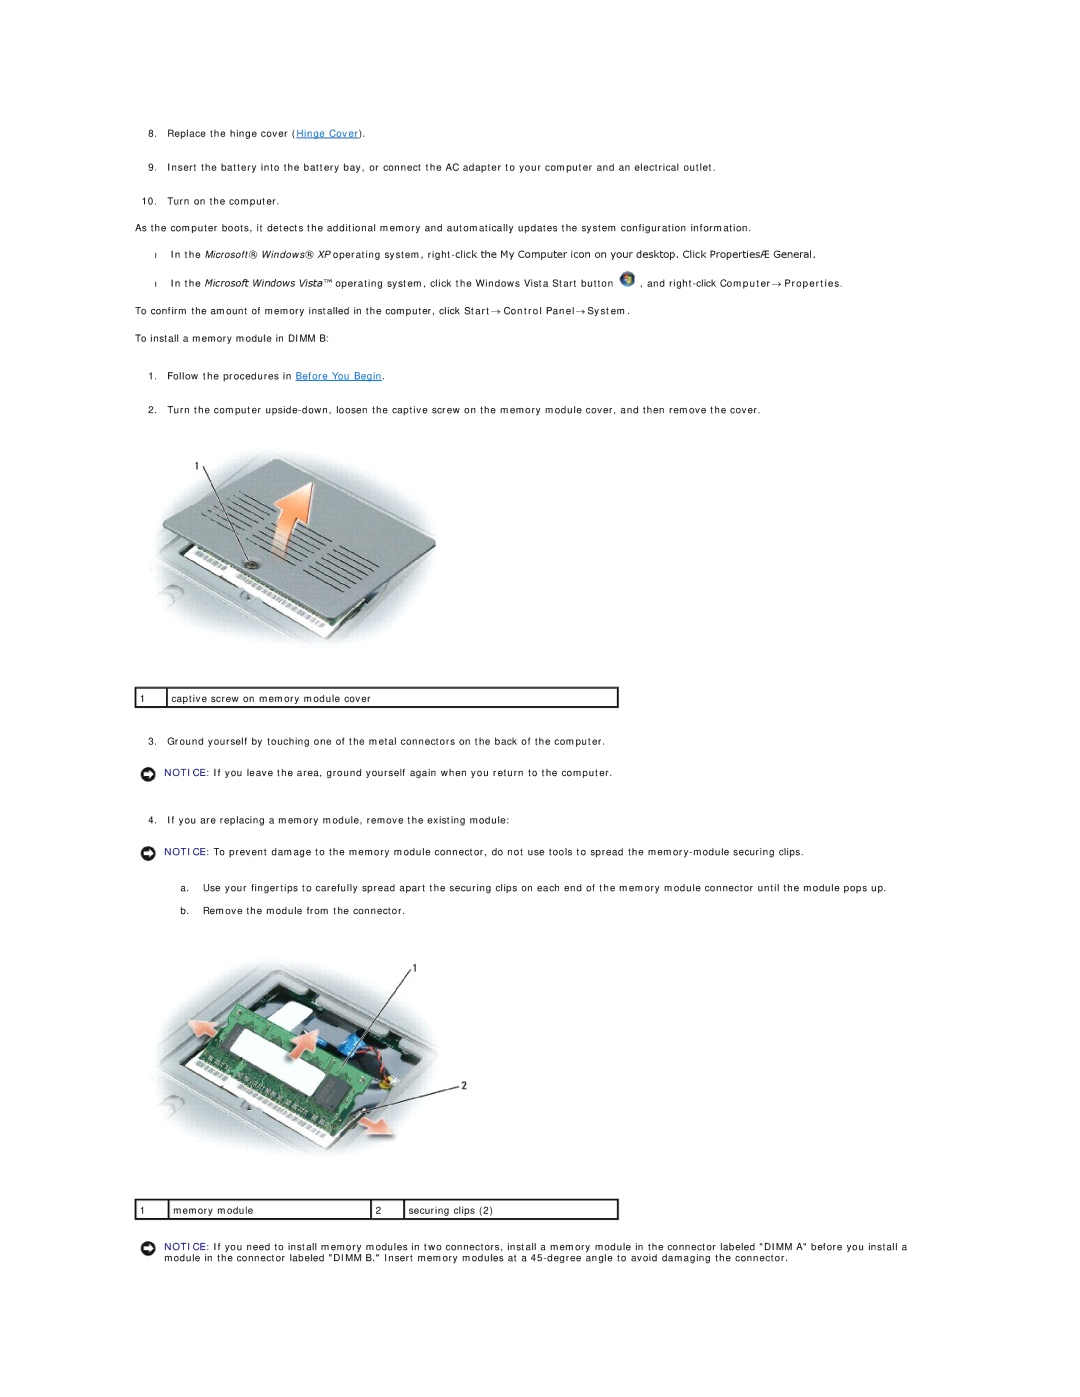
4. If you are replacing a memory module, remove the existing module:
NOTICE: To prevent damage to the memory module connector, do not use tools to spread the
a.Use your fingertips to carefully spread apart the securing clips on each end of the memory module connector until the module pops up.
b.Remove the module from the connector.
1 | memory module | 2 | securing clips (2) |
|
|
|
|
NOTICE: If you need to install memory modules in two connectors, install a memory module in the connector labeled "DIMM A" before you install a module in the connector labeled "DIMM B." Insert memory modules at a