1
2
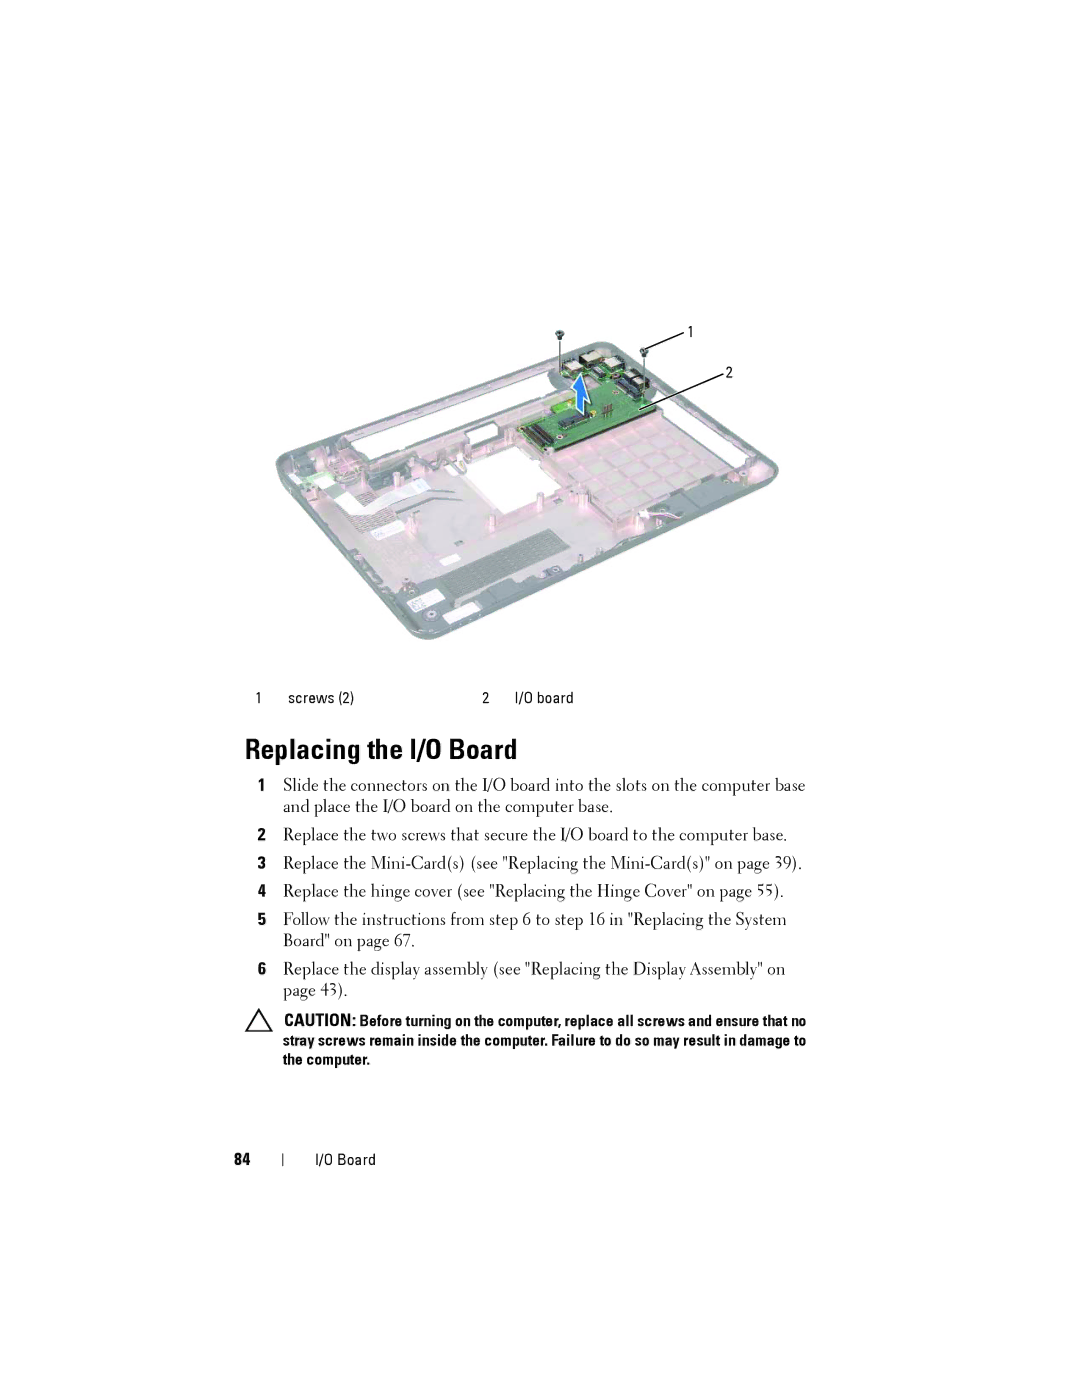
1 | screws (2) | 2 | I/O board |
Replacing the I/O Board
1Slide the connectors on the I/O board into the slots on the computer base and place the I/O board on the computer base.
2Replace the two screws that secure the I/O board to the computer base.
3Replace the
4Replace the hinge cover (see "Replacing the Hinge Cover" on page 55).
5Follow the instructions from step 6 to step 16 in "Replacing the System Board" on page 67.
6Replace the display assembly (see "Replacing the Display Assembly" on page 43).
CAUTION: Before turning on the computer, replace all screws and ensure that no stray screws remain inside the computer. Failure to do so may result in damage to the computer.
84
I/O Board
