4.Affix the adhesive tape.
5.Connect the display assembly cable
6.Affix the tape.
7.Install:
a.Bottom Cover
b.Hard Drive
c.Optical Drive
d.Battery
8.Follow the procedures in After Working Inside Your computer
Removing the Battery Connector
1.Follow the procedures in Before Working Inside Your Computer
2.Remove:
a.Battery
b.Hard Drive
c.Optical Drive
d.Bottom Cover
e.I/O Board
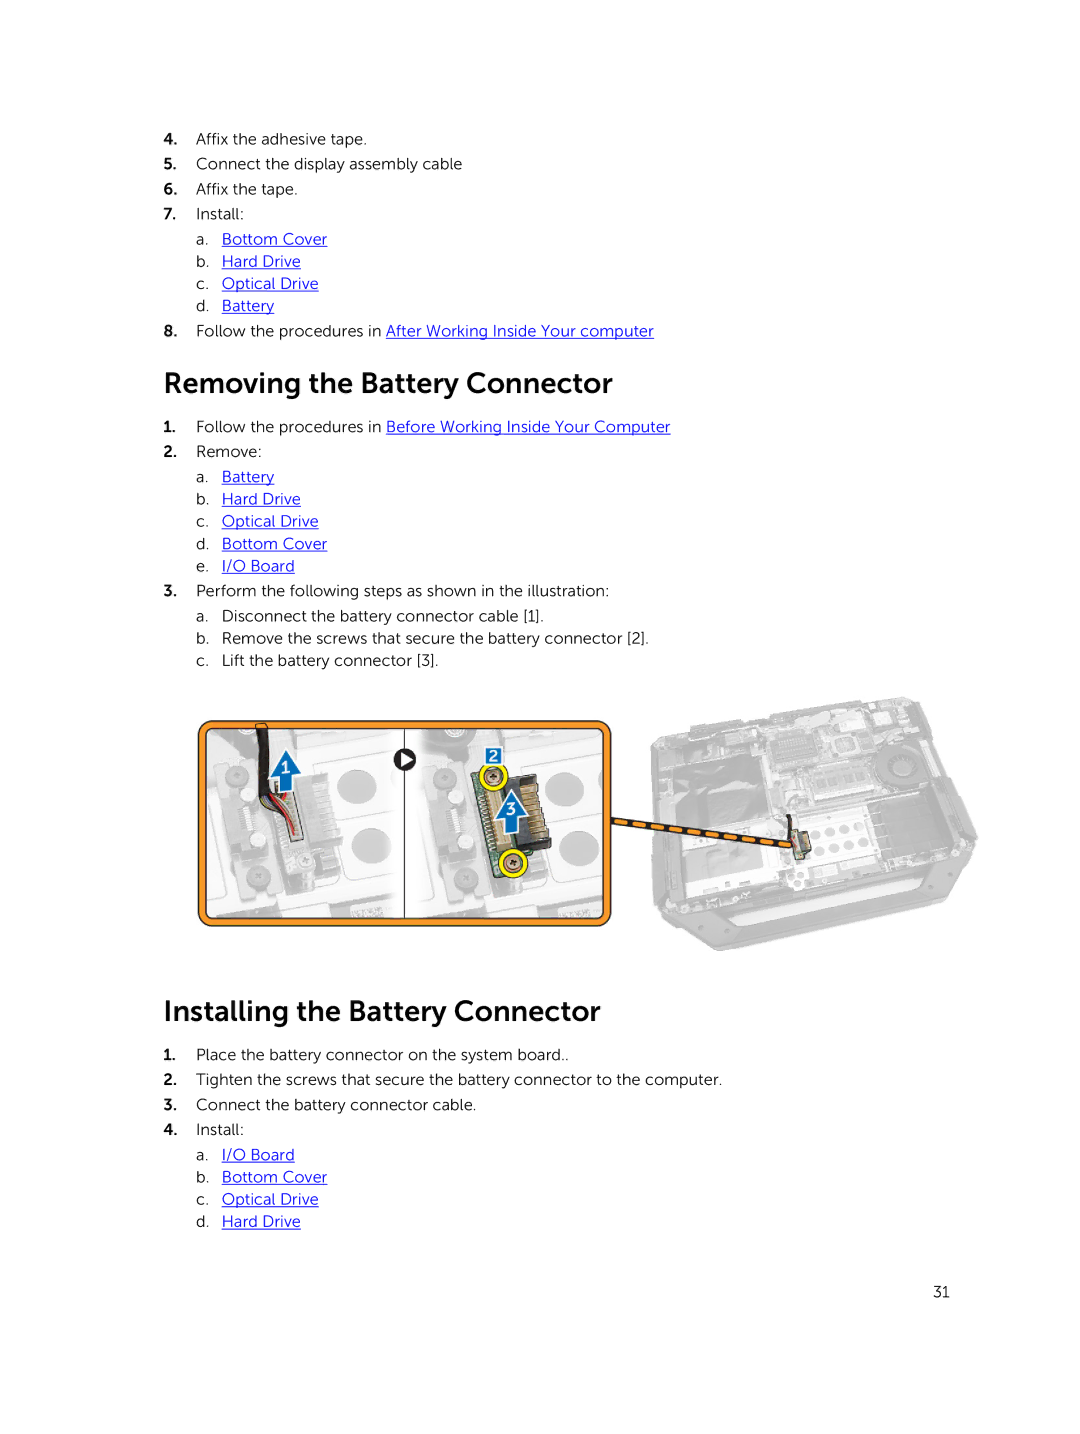
3.Perform the following steps as shown in the illustration:
a.Disconnect the battery connector cable [1].
b.Remove the screws that secure the battery connector [2].
c.Lift the battery connector [3].
Installing the Battery Connector
1.Place the battery connector on the system board..
2.Tighten the screws that secure the battery connector to the computer.
3.Connect the battery connector cable.
4.Install:
a.I/O Board
b.Bottom Cover
c.Optical Drive
d.Hard Drive
31