
ETAM36.365 specifications
The DeLonghi ETAM36.365 is an innovative fully automatic coffee machine designed to deliver the perfect cup of coffee with convenience and versatility. With its sleek, modern design, the ETAM36.365 not only enhances the aesthetics of any kitchen but also offers an array of features that appeal to coffee enthusiasts and casual drinkers alike.One of the standout features of the DeLonghi ETAM36.365 is its customizability. Users can easily adjust the strength, volume, and temperature of their coffee, allowing for a personalized experience with each brew. The machine also boasts a unique milk frother, which offers the ability to create creamy frothed milk for cappuccinos and lattes, making it perfect for those who enjoy specialty coffee drinks.
Equipped with advanced brewing technology, the ETAM36.365 utilizes a highly efficient pump and a thermoblock heating system. This ensures quick heat-up times and consistent brewing temperatures, resulting in optimal extraction of flavors from the coffee grounds. This attention to detail guarantees that every cup is rich in flavor.
The coffee machine features a built-in grinder made from stainless steel, which offers multiple grinding settings. This allows users to select their preferred grind size, enhancing the overall flavor profile of their coffee. The grinder is capable of accommodating both whole beans and pre-ground coffee, offering flexibility for different preferences.
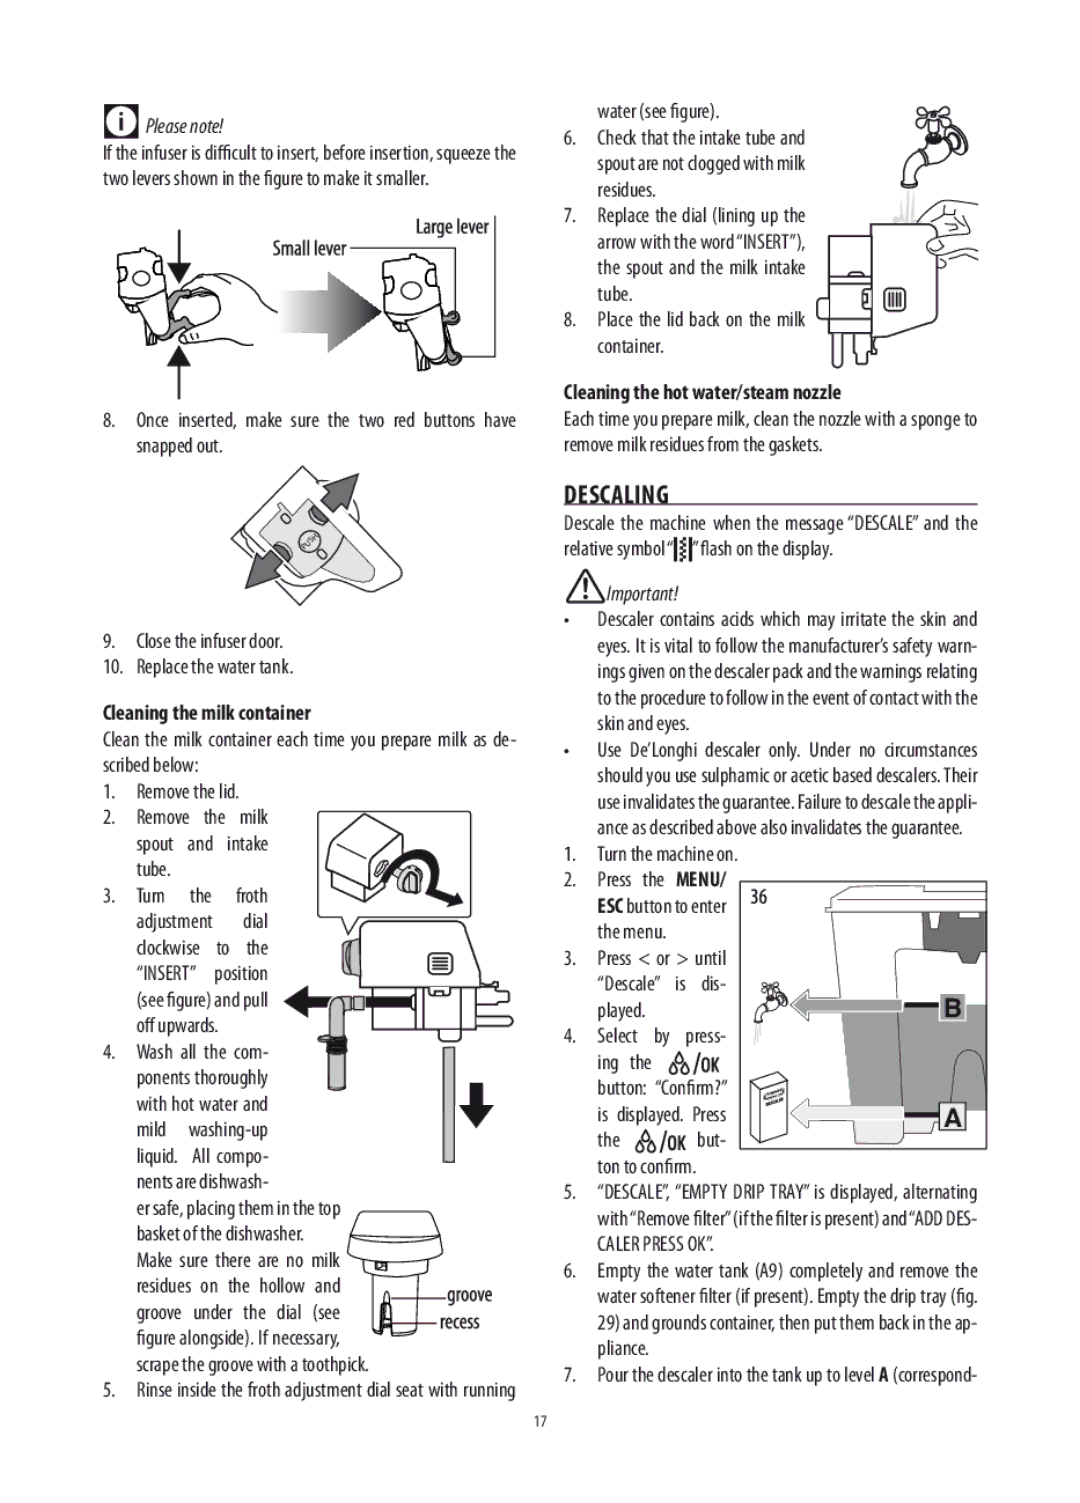
Cleaning and maintenance are simplified with the ETAM36.365. The machine has a removable brewing unit that can be easily rinsed and cleaned, while the automatic cleaning cycles ensure that the internal components are maintained without hassle. Additionally, the water tank and milk container are removable, making it easy to refill and clean.
The DeLonghi ETAM36.365 also incorporates an intuitive control panel, featuring an LCD display that guides users through the brewing process. This user-friendly interface allows quick adjustments to settings and options, making it accessible even to those unfamiliar with advanced coffee machines.
Ultimately, the DeLonghi ETAM36.365 embodies the essence of high-quality Italian craftsmanship combined with cutting-edge technology. Whether making a simple espresso or a complex milk-based beverage, this machine is designed to satisfy a range of coffee cravings, making it a worthwhile addition to any coffee lover's collection.