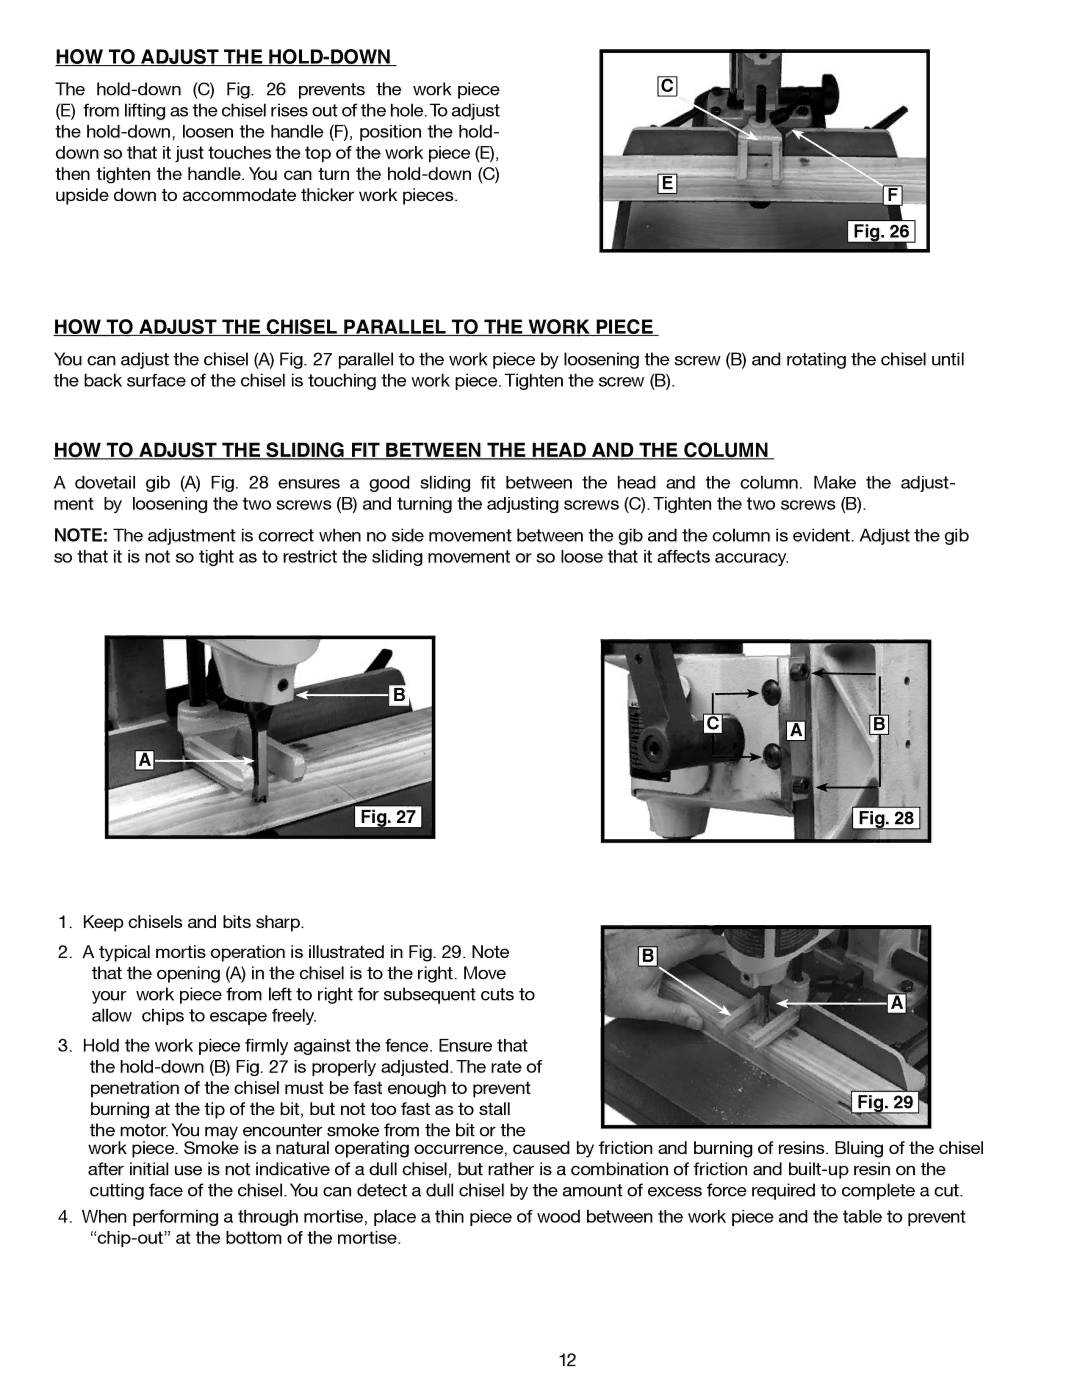
HOW TO ADJUST THE HOLD-DOWN
The
(E)from lifting as the chisel rises out of the hole.To adjust the
C
E
F
Fig. 26
HOW TO ADJUST THE CHISEL PARALLEL TO THE WORK PIECE
You can adjust the chisel (A) Fig. 27 parallel to the work piece by loosening the screw (B) and rotating the chisel until the back surface of the chisel is touching the work piece. Tighten the screw (B).
HOW TO ADJUST THE SLIDING FIT BETWEEN THE HEAD AND THE COLUMN
A dovetail gib (A) Fig. 28 ensures a good sliding fit between the head and the column. Make the adjust- ment by loosening the two screws (B) and turning the adjusting screws (C). Tighten the two screws (B).
NOTE: The adjustment is correct when no side movement between the gib and the column is evident. Adjust the gib so that it is not so tight as to restrict the sliding movement or so loose that it affects accuracy.
![]()
![]() B
B
C ![]()
![]() A
A
A
Fig. 27
1. Keep chisels and bits sharp.
2. A typical mortis operation is illustrated in Fig. 29. Note |
|
|
| |
B | ||||
that the opening (A) in the chisel is to the right. Move |
|
|
| |
your | work piece from left to right for subsequent cuts to |
|
|
|
|
| A | ||
allow | chips to escape freely. |
|
| |
|
|
| ||
3.Hold the work piece firmly against the fence. Ensure that the
penetration of the chisel must be fast enough to prevent burning at the tip of the bit, but not too fast as to stall the motor.You may encounter smoke from the bit or the
work piece. Smoke is a natural operating occurrence, caused by friction and burning of resins. Bluing of the chisel after initial use is not indicative of a dull chisel, but rather is a combination of friction and
4.When performing a through mortise, place a thin piece of wood between the work piece and the table to prevent
12