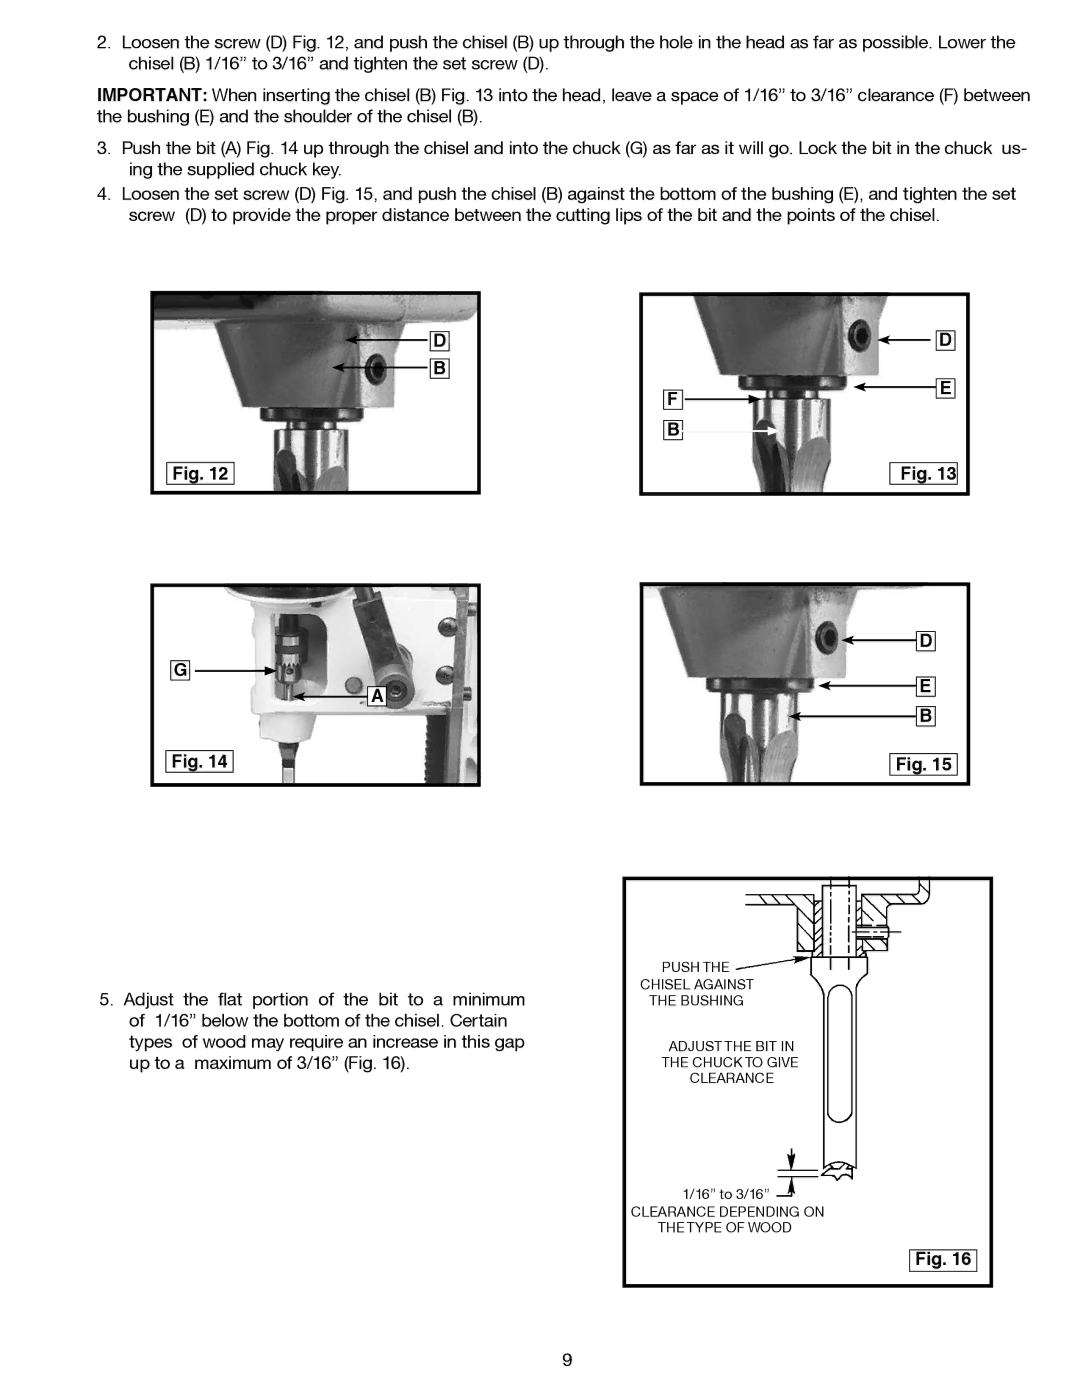
2.Loosen the screw (D) Fig. 12, and push the chisel (B) up through the hole in the head as far as possible. Lower the chisel (B) 1/16” to 3/16” and tighten the set screw (D).
IMPORTANT: When inserting the chisel (B) Fig. 13 into the head, leave a space of 1/16” to 3/16” clearance (F) between the bushing (E) and the shoulder of the chisel (B).
3.Push the bit (A) Fig. 14 up through the chisel and into the chuck (G) as far as it will go. Lock the bit in the chuck us- ing the supplied chuck key.
4.Loosen the set screw (D) Fig. 15, and push the chisel (B) against the bottom of the bushing (E), and tighten the set screw (D) to provide the proper distance between the cutting lips of the bit and the points of the chisel.
![]()
![]() D
D
![]()
![]() B
B
Fig. 12
G![]()
![]()
A
Fig. 14
| D |
F | E |
| |
B |
|
| Fig. 13 |
![]()
![]() D
D
![]()
![]() E
E
![]()
![]() B
B
Fig. 15
5.Adjust the flat portion of the bit to a minimum of 1/16” below the bottom of the chisel. Certain types of wood may require an increase in this gap up to a maximum of 3/16” (Fig. 16).
PUSH THE
CHISEL AGAINST
THE BUSHING
ADJUST THE BIT IN
THE CHUCK TO GIVE
CLEARANCE
1/16” to 3/16”
CLEARANCE DEPENDING ON
THE TYPE OF WOOD
Fig. 16
9