SERVICE PROCEDURES
Removing Control Valve and Burner Tube
1.Shut off gas supply to heater.
2.Remove lower front access panel on heater.
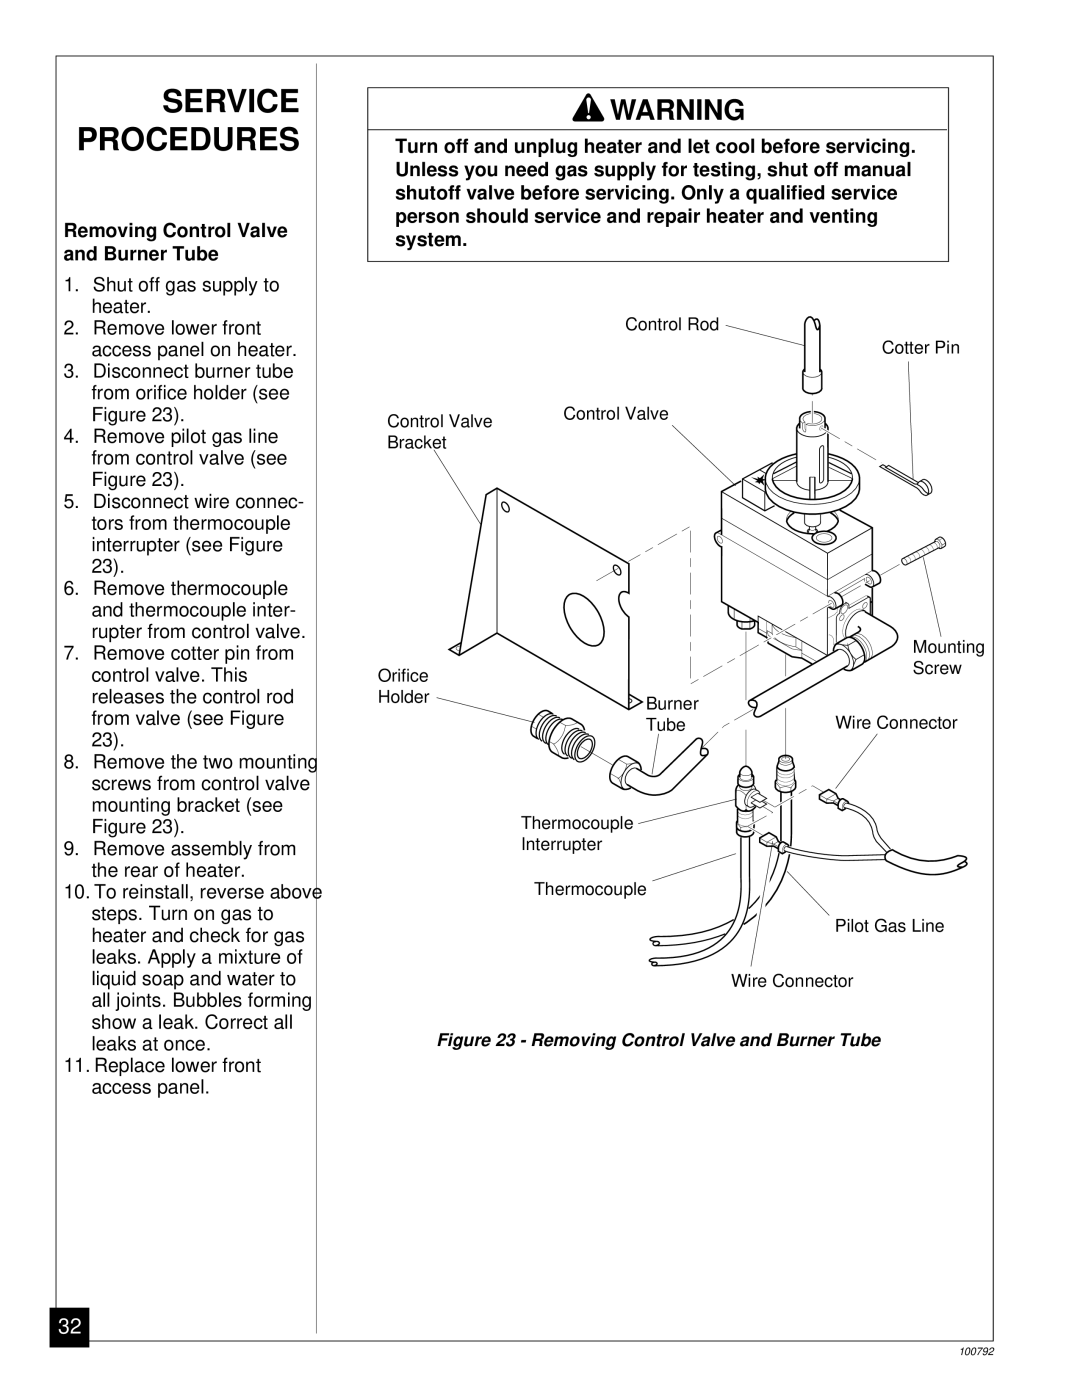
3.Disconnect burner tube from orifice holder (see Figure 23).
4.Remove pilot gas line from control valve (see Figure 23).
5.Disconnect wire connec- tors from thermocouple interrupter (see Figure 23).
6.Remove thermocouple and thermocouple inter- rupter from control valve.
7.Remove cotter pin from control valve. This releases the control rod from valve (see Figure 23).
8.Remove the two mounting screws from control valve mounting bracket (see Figure 23).
9.Remove assembly from the rear of heater.
10.To reinstall, reverse above steps. Turn on gas to heater and check for gas leaks. Apply a mixture of liquid soap and water to all joints. Bubbles forming show a leak. Correct all leaks at once.
11.Replace lower front access panel.
32
![]() WARNING
WARNING
Turn off and unplug heater and let cool before servicing. Unless you need gas supply for testing, shut off manual shutoff valve before servicing. Only a qualified service person should service and repair heater and venting system.
Control Rod
Cotter Pin
Control Valve | Control Valve |
| |
Bracket |
|
|
| Mounting |
Orifice |
| Screw |
|
| |
Holder | Burner |
|
| Wire Connector | |
| Tube |
Thermocouple ![]()
![]()
![]()
Interrupter
Thermocouple
Pilot Gas Line
Wire Connector
Figure 23 - Removing Control Valve and Burner Tube
100792