CAST IRON STOVE AND
Stove Body Assembly (Cont.)
7
CAST IRON STOVE AND DIRECT-VENT BURNER SYSTEM ASSEMBLY
Continued
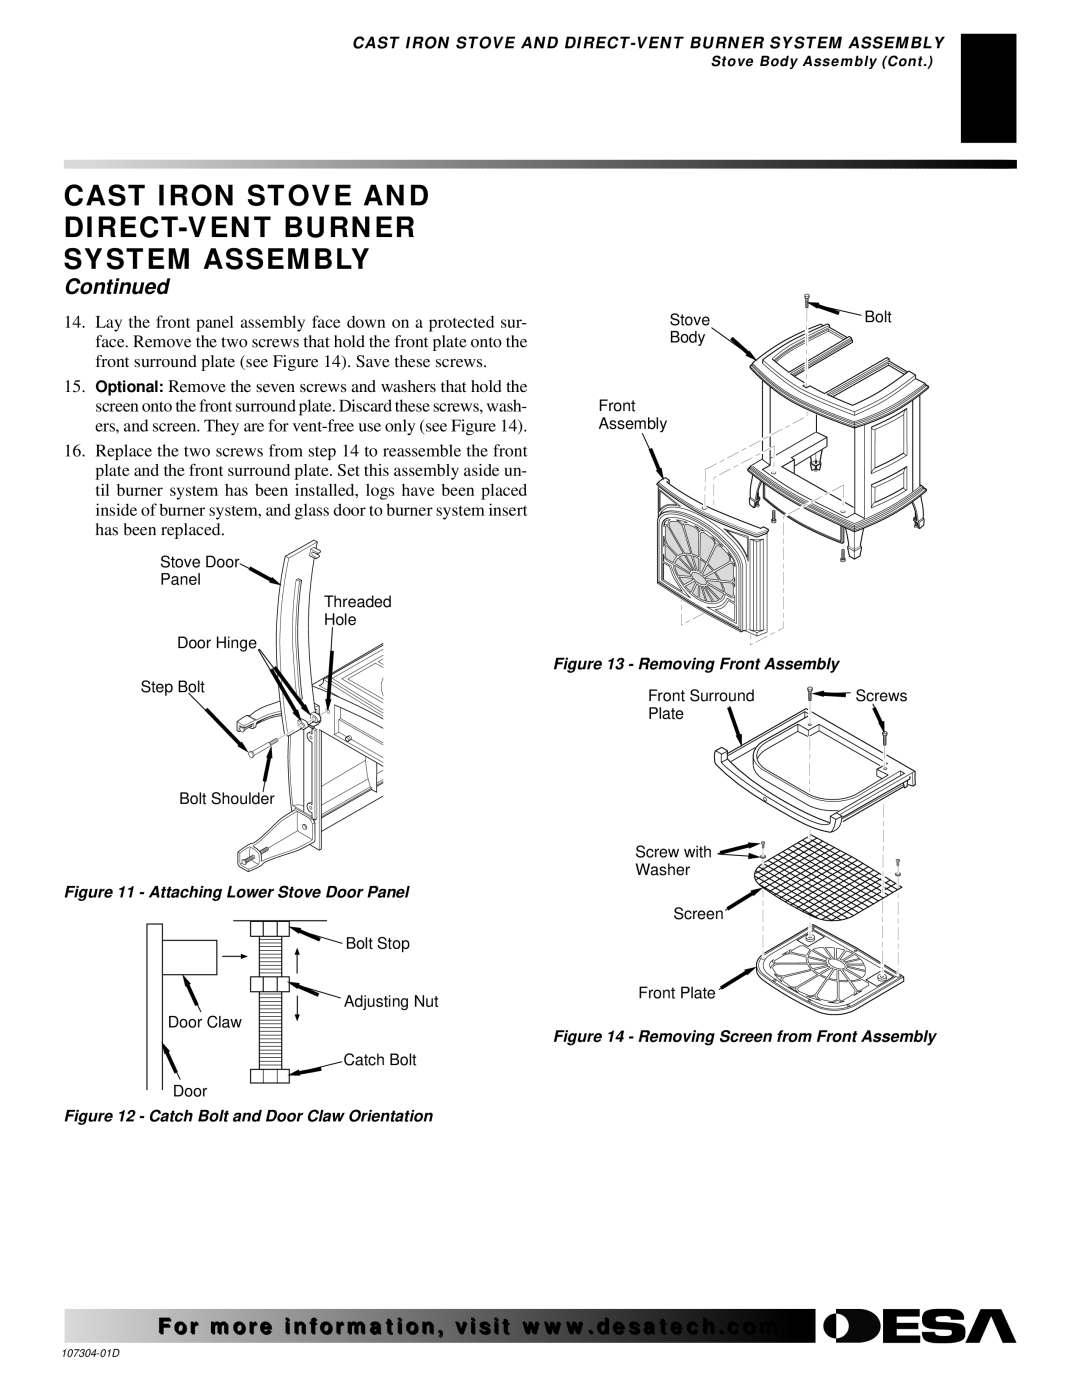
14.Lay the front panel assembly face down on a protected sur- face. Remove the two screws that hold the front plate onto the front surround plate (see Figure 14). Save these screws.
15.Optional: Remove the seven screws and washers that hold the screen onto the front surround plate. Discard these screws, wash- ers, and screen. They are for
16.Replace the two screws from step 14 to reassemble the front plate and the front surround plate. Set this assembly aside un- til burner system has been installed, logs have been placed inside of burner system, and glass door to burner system insert has been replaced.
Stove Door
Panel
Threaded
Hole
Door Hinge
Step Bolt
Bolt Shoulder
Figure 11 - Attaching Lower Stove Door Panel
![]() Bolt Stop
Bolt Stop
Adjusting Nut
Door Claw
Catch Bolt
Door
Figure 12 - Catch Bolt and Door Claw Orientation
Stove | Bolt |
Body |
|
Front
Assembly
Figure 13 - Removing Front Assembly
Front Surround | Screws |
Plate |
|
Screw with ![]()
![]()
Washer
Screen
Front Plate
Figure 14 - Removing Screen from Front Assembly
For more![]()
![]()
![]() visit www.
visit www.![]()
![]()
![]() .com
.com![]()
![]()
![]()
![]()
![]()