FIREPLACE INSTALLATION

22

Removing/Replacing Glass Door (Cont.)


Installing Lava Rock and Glowing Embers


FIREPLACE INSTALLATION

Continued

Removing Glass Door

If replacement of glass is necessary, the entire assembly, glass and frame, must be replaced. If glass is broken, wear gloves and tape the remaining fragments onto the frame.

1.Remove screen assembly by pushing the rod either left or right and then down and forward to remove screen/rod assembly from the firebox. Set assembly aside.

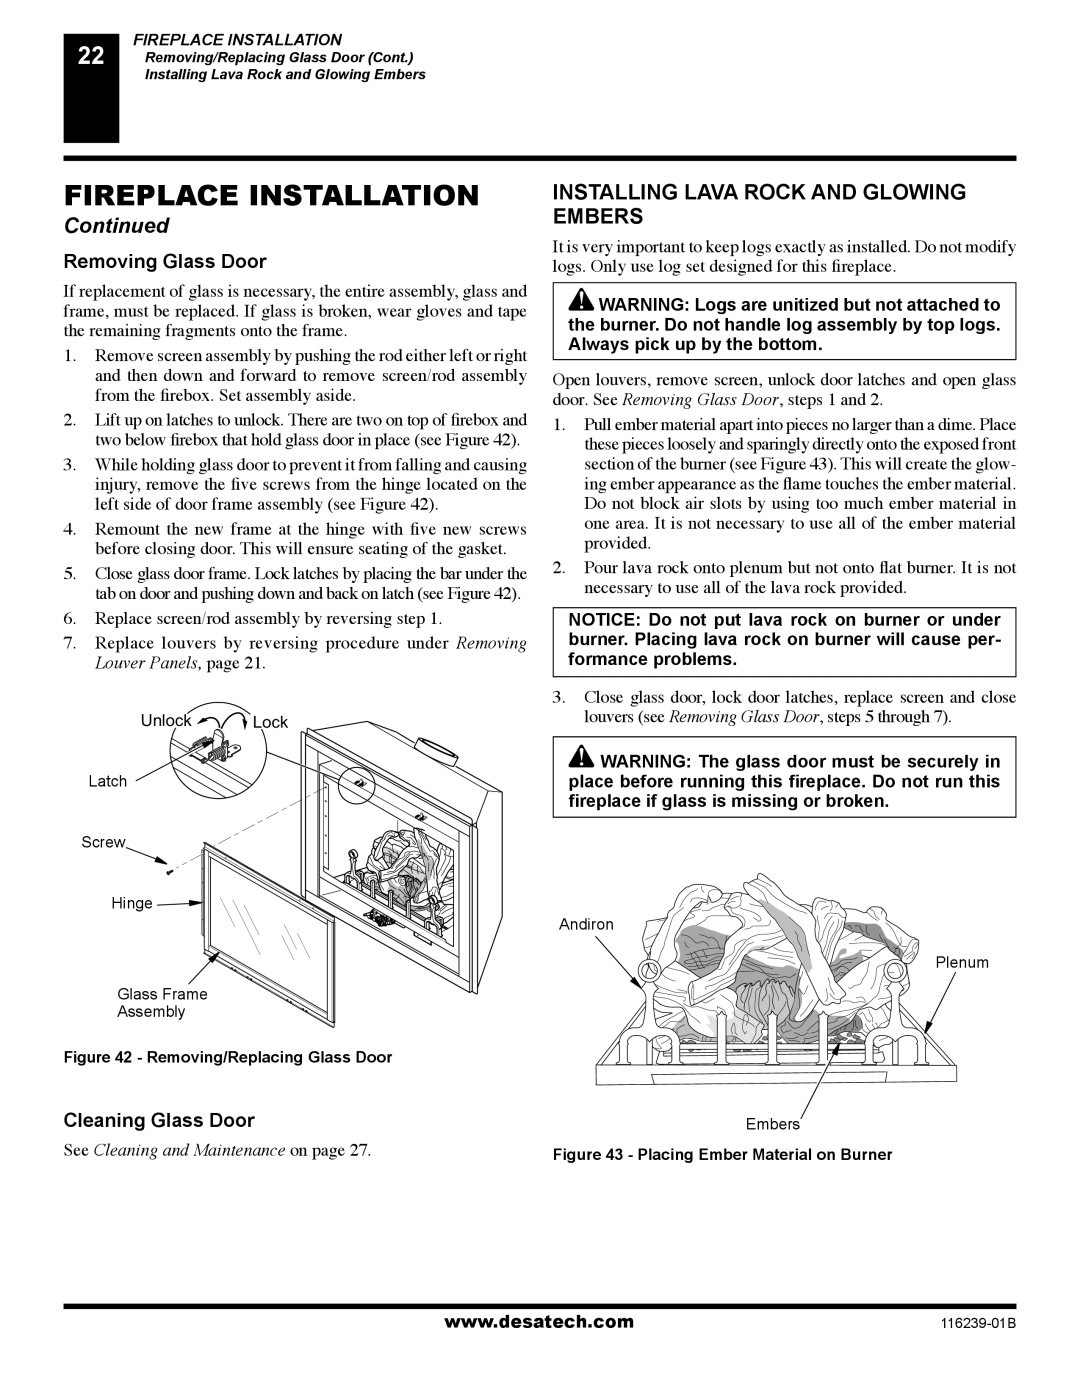
2.Lift up on latches to unlock. There are two on top of firebox and two below firebox that hold glass door in place (see Figure 42).

3.While holding glass door to prevent it from falling and causing injury, remove the five screws from the hinge located on the left side of door frame assembly (see Figure 42).

4.Remount the new frame at the hinge with five new screws before closing door. This will ensure seating of the gasket.

5.Close glass door frame. Lock latches by placing the bar under the tab on door and pushing down and back on latch (see Figure 42).

6.Replace screen/rod assembly by reversing step 1.

7.Replace louvers by reversing procedure under Removing Louver Panels, page 21.

Unlock Lock

Latch

Screw

Hinge

Glass Frame

Assembly

Figure 42 - Removing/Replacing Glass Door

INSTALLING LAVA ROCK AND GLOWING EMBERS

It is very important to keep logs exactly as installed. Do not modify logs. Only use log set designed for this fireplace.

WARNING: Logs are unitized but not attached to the burner. Do not handle log assembly by top logs. Always pick up by the bottom.

Open louvers, remove screen, unlock door latches and open glass door. See Removing Glass Door, steps 1 and 2.

1.Pull ember material apart into pieces no larger than a dime. Place these pieces loosely and sparingly directly onto the exposed front section of the burner (see Figure 43). This will create the glow- ing ember appearance as the flame touches the ember material. Do not block air slots by using too much ember material in one area. It is not necessary to use all of the ember material provided.

2.Pour lava rock onto plenum but not onto flat burner. It is not necessary to use all of the lava rock provided.

NOTICE: Do not put lava rock on burner or under burner. Placing lava rock on burner will cause per- formance problems.

3.Close glass door, lock door latches, replace screen and close louvers (see Removing Glass Door, steps 5 through 7).

WARNING: The glass door must be securely in place before running this fireplace. Do not run this fireplace if glass is missing or broken.

Andiron

Plenum

Cleaning Glass Door

Embers

See Cleaning and Maintenance on page 27.

Figure 43 - Placing Ember Material on Burner


www.desatech.com

116239-01B

Page 22
Image 22
Desa (V)KC42P SERIES, (V)KC42N Series Installing Lava Rock and Glowing Embers, Removing Glass Door, Cleaning Glass Door

(V)KC42N Series, (V)KC42P SERIES specifications

The Desa (V)KC42P SERIES and (V)KC42N Series represent a significant advancement in the field of heating solutions, designed to enhance comfort while optimizing energy efficiency. These innovative heating systems are engineered for residential and commercial applications, making them versatile for various environments.

One of the standout features of the Desa (V)KC42P and (V)KC42N Series is their advanced control technologies. Equipped with smart thermostatic controls, these units allow users to manage their heating needs with precision. The intuitive user interface provides an easy way to adjust settings, ensuring that the desired temperature is achieved while minimizing energy consumption.

The efficiency of the (V)KC42P and (V)KC42N Series is further enhanced by their state-of-the-art combustion technology. These models utilize a unique burner design that maximizes heat output while reducing emissions. This not only supports environmental sustainability but also ensures that users save on energy costs without compromising performance.

Safety is another paramount feature of these heating systems. The Desa series incorporates multiple fail-safes, including overheat protection and automatic shut-off mechanisms. These features are designed to provide peace of mind for users, knowing that their home or business is equipped with a system that prioritizes safety.

Durability and reliability are also hallmarks of the Desa (V)KC42P and (V)KC42N Series. Constructed with high-quality materials, these units are built to withstand the rigors of daily use while maintaining an aesthetically pleasing design. This ensures they complement any décor while delivering consistent performance across seasons.

In terms of installation, both series come with flexible options. They can be easily integrated into existing setups, making upgrades or replacements hassle-free. The user-friendly installation procedures reduce downtime, allowing users to enjoy the benefits of their new heating system almost immediately.

Additionally, the (V)KC42P and (V)KC42N Series are designed with versatility in mind. They can accommodate various heating methods, from forced air to radiant heating, making them suitable for different heating preferences and system requirements.

In summary, the Desa (V)KC42P and (V)KC42N Series are engineered to provide superior heating performance, energy efficiency, and safety. With advanced technology, durable construction, and user-friendly features, these heating solutions stand out in the market as reliable options for any heating need.