
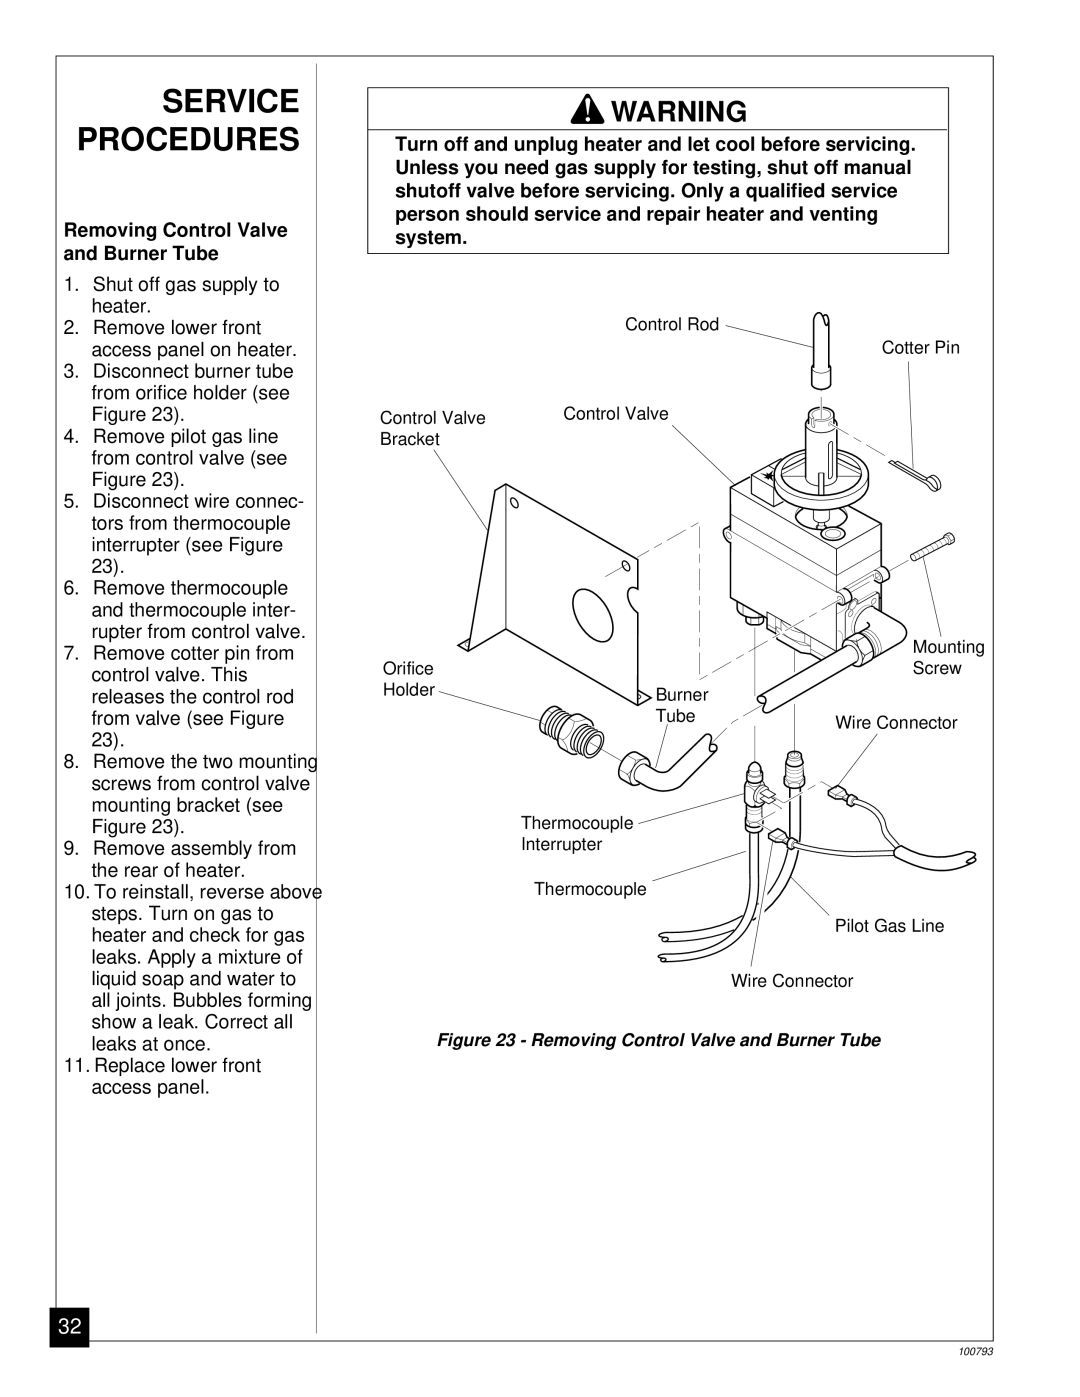
CGR50BPA, CGR65BPA, CGR65PA, CGR35PA, CGR50PA specifications
Desa Tech's CGR series, including the CGR50PA, CGR35PA, CGR65PA, CGR65BPA, and CGR50BPA, represents a cutting-edge line of gas logs designed for efficiency, reliability, and user-friendly operation. Each model combines modern engineering with top-tier technologies to deliver warmth and aesthetic appeal to any living space.The CGR50PA is known for its compact yet powerful heating capabilities, offering a maximum input of 50,000 BTUs. This model is ideal for smaller rooms, providing consistent warmth without taking up excessive space. Its advanced burner technology ensures a realistic flame appearance, enhancing the ambiance of any setting.
The CGR35PA stands out with its lower BTU output of 35,000, making it perfect for cozy spaces or homes looking for a supplemental heating source. This model emphasizes energy efficiency, utilizing a state-of-the-art control system that optimizes fuel consumption while maintaining performance and comfort.
In contrast, the CGR65PA is designed for larger areas, boasting an impressive output of 65,000 BTUs. This model features a dual burner system, which not only increases heat distribution but also adds to the visual appeal with varying flame heights. Its robust construction guarantees durability, and an easy-to-use remote control provides added convenience.
The CGR65BPA variant further increases efficiency with its built-in blower system, which circulates warm air throughout the room, ensuring even heating. This model is particularly useful in expansive living areas where traditional heating methods may fall short. Its innovative safety features, including an oxygen depletion sensor, provide peace of mind for users.
Lastly, the CGR50BPA combines the advantages of its siblings, offering a balanced heating solution for medium-sized rooms. With a blower and adjustable thermostat, this model allows users to tailor their heating experience. Each unit in the CGR series is compatible with natural gas or propane, maximizing versatility based on individual preferences or regional availability.
Overall, the Desa Tech CGR series epitomizes modern gas log technology, focusing on performance, efficiency, and safety, making them an excellent choice for anyone seeking reliable and attractive heating solutions.