TYPICAL OPERATIONS
CROSS-CUTTING
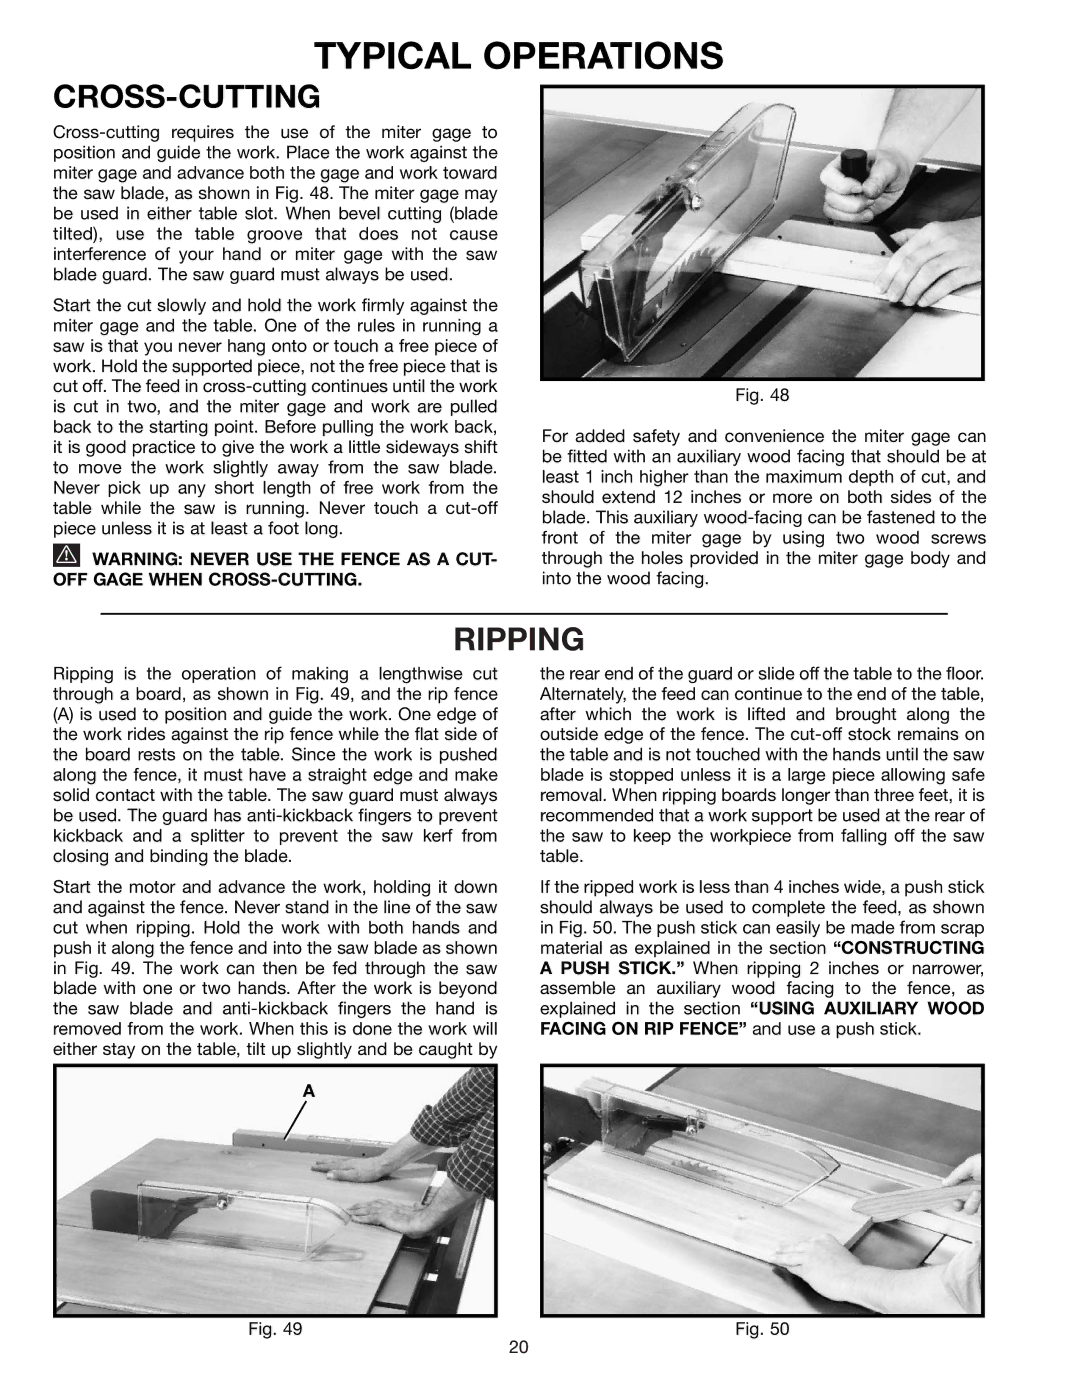
Start the cut slowly and hold the work firmly against the miter gage and the table. One of the rules in running a saw is that you never hang onto or touch a free piece of work. Hold the supported piece, not the free piece that is cut off. The feed in
![]() WARNING: NEVER USE THE FENCE AS A CUT- OFF GAGE WHEN
WARNING: NEVER USE THE FENCE AS A CUT- OFF GAGE WHEN
Fig. 48
For added safety and convenience the miter gage can be fitted with an auxiliary wood facing that should be at least 1 inch higher than the maximum depth of cut, and should extend 12 inches or more on both sides of the blade. This auxiliary
RIPPING
Ripping is the operation of making a lengthwise cut through a board, as shown in Fig. 49, and the rip fence
(A)is used to position and guide the work. One edge of the work rides against the rip fence while the flat side of the board rests on the table. Since the work is pushed along the fence, it must have a straight edge and make solid contact with the table. The saw guard must always be used. The guard has
Start the motor and advance the work, holding it down and against the fence. Never stand in the line of the saw cut when ripping. Hold the work with both hands and push it along the fence and into the saw blade as shown in Fig. 49. The work can then be fed through the saw blade with one or two hands. After the work is beyond the saw blade and
the rear end of the guard or slide off the table to the floor. Alternately, the feed can continue to the end of the table, after which the work is lifted and brought along the outside edge of the fence. The
If the ripped work is less than 4 inches wide, a push stick should always be used to complete the feed, as shown in Fig. 50. The push stick can easily be made from scrap material as explained in the section “CONSTRUCTING A PUSH STICK.” When ripping 2 inches or narrower, assemble an auxiliary wood facing to the fence, as explained in the section “USING AUXILIARY WOOD FACING ON RIP FENCE” and use a push stick.
A
Fig. 49 | Fig. 50 |
20
