ADJUSTING FENCE
POSITIVE STOPS
The fence on your jointer is equipped with positive stops at the most used fence positions of 90 degrees and 45 degrees right and left. To check and adjust the positive stops, proceed as follows:
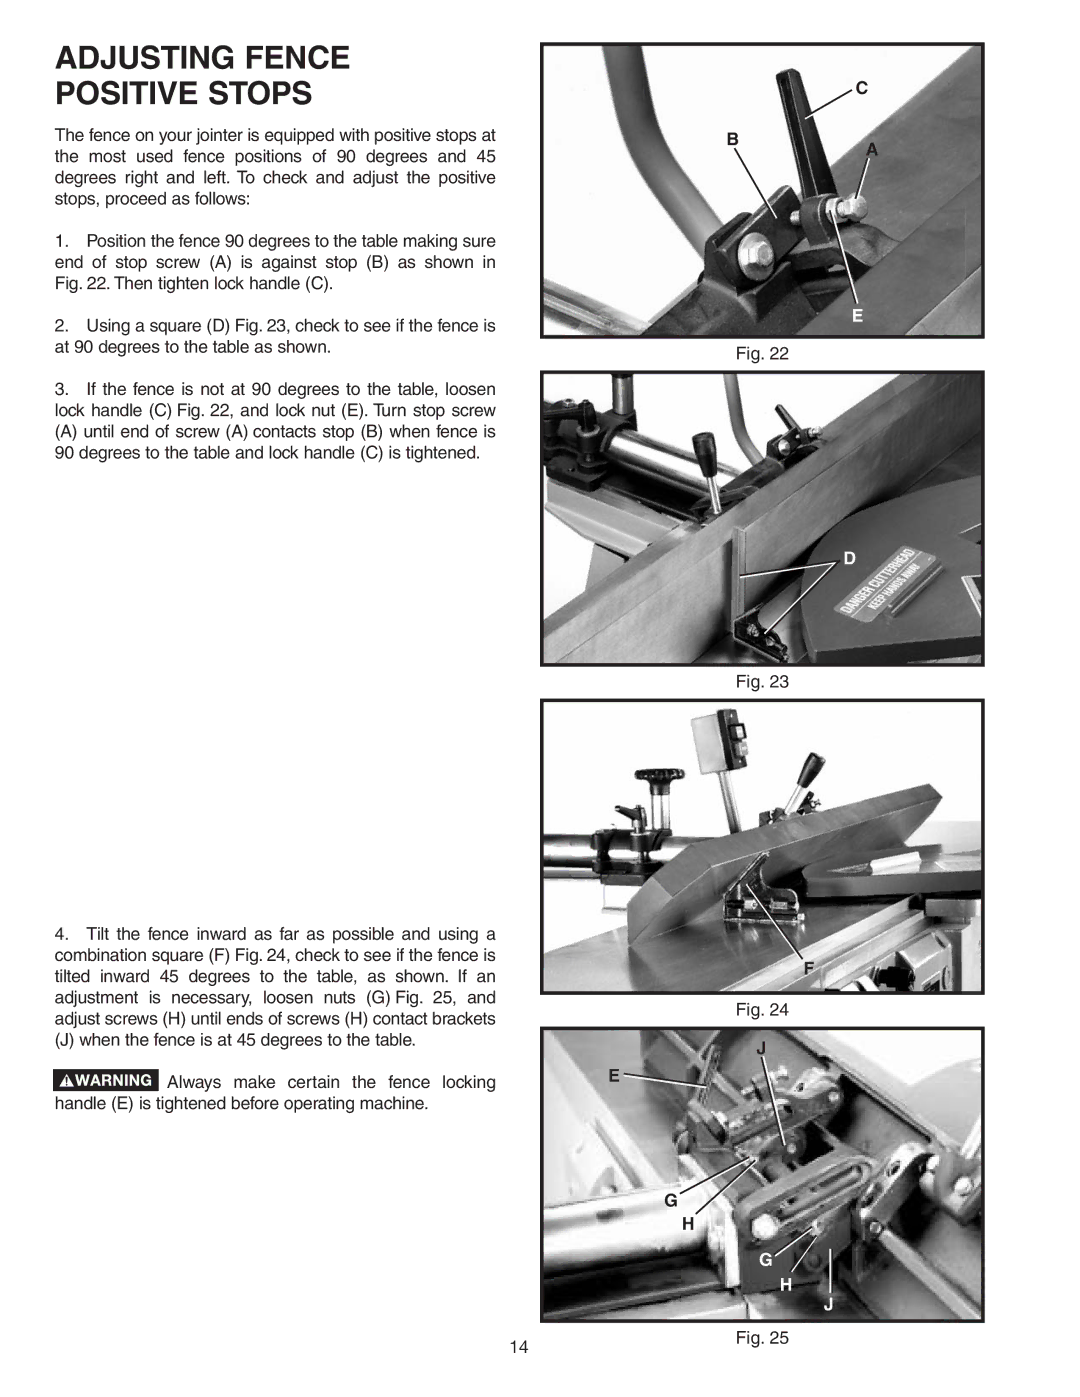
1.Position the fence 90 degrees to the table making sure end of stop screw (A) is against stop (B) as shown in Fig. 22. Then tighten lock handle (C).
2.Using a square (D) Fig. 23, check to see if the fence is at 90 degrees to the table as shown.
3.If the fence is not at 90 degrees to the table, loosen lock handle (C) Fig. 22, and lock nut (E). Turn stop screw
(A) until end of screw (A) contacts stop (B) when fence is
90degrees to the table and lock handle (C) is tightened.
4.Tilt the fence inward as far as possible and using a combination square (F) Fig. 24, check to see if the fence is tilted inward 45 degrees to the table, as shown. If an adjustment is necessary, loosen nuts (G) Fig. 25, and adjust screws (H) until ends of screws (H) contact brackets
(J) when the fence is at 45 degrees to the table.
![]() Always make certain the fence locking handle (E) is tightened before operating machine.
Always make certain the fence locking handle (E) is tightened before operating machine.
14
C
B
A
E
Fig. 22
D
Fig. 23
F
Fig. 24
J
E ![]()
G
H
G
H
J
Fig. 25