FENCE
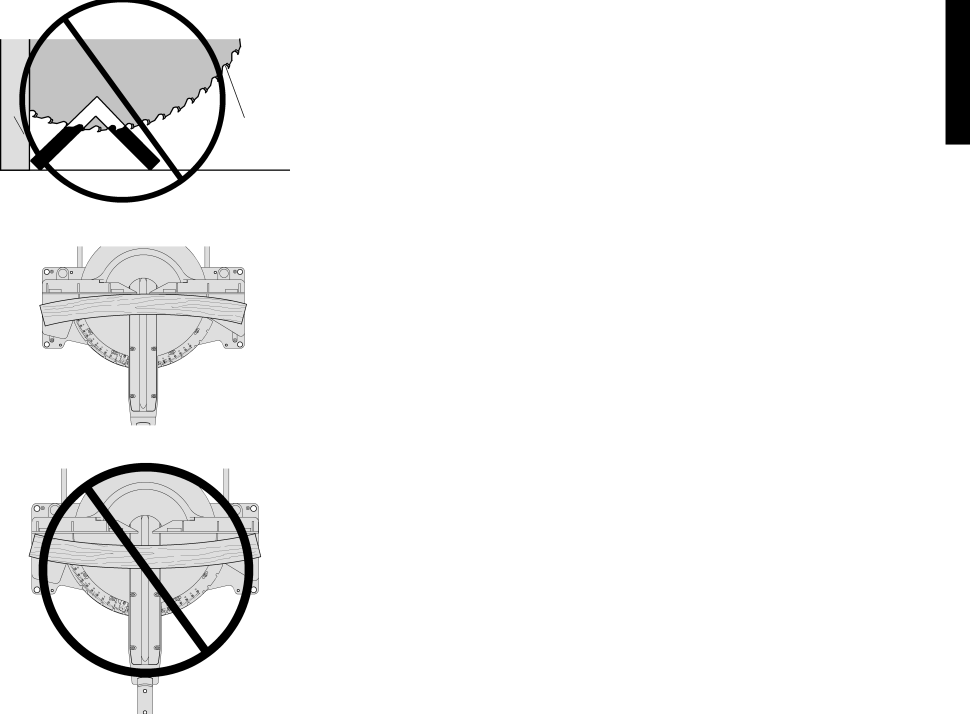
FIG. 34
FIG. 35
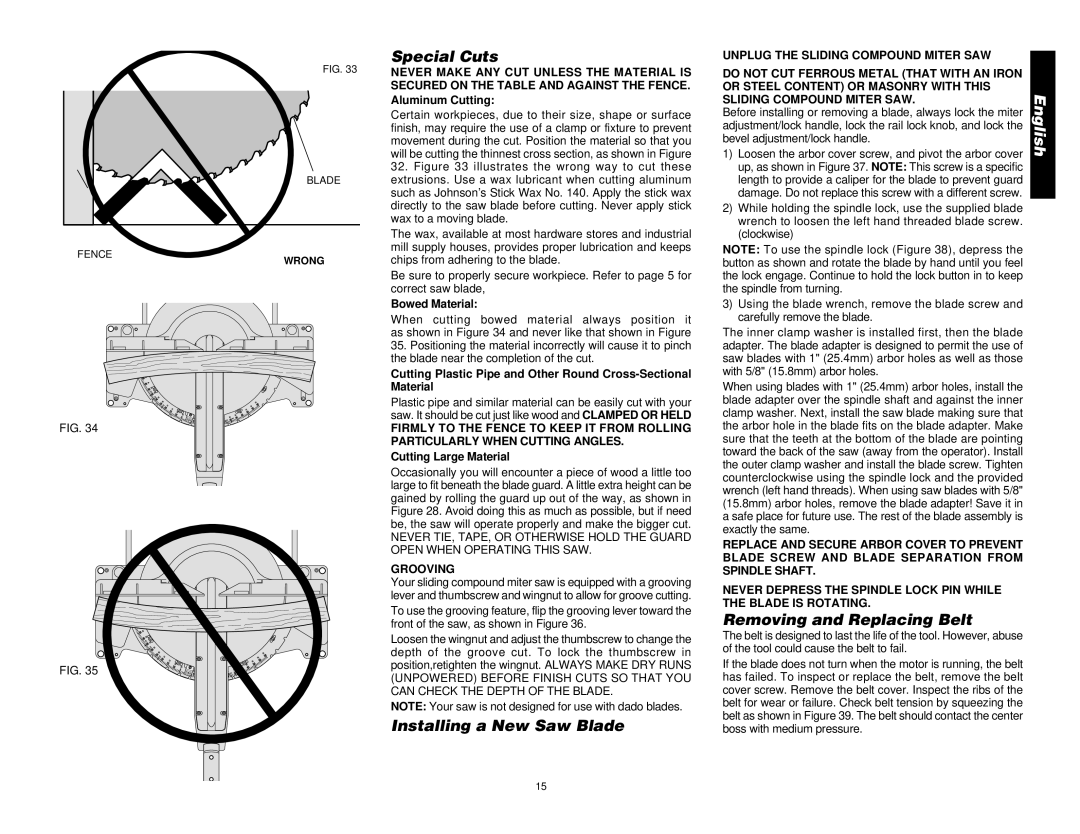
FIG. 33
BLADE
WRONG
Special Cuts
NEVER MAKE ANY CUT UNLESS THE MATERIAL IS SECURED ON THE TABLE AND AGAINST THE FENCE. Aluminum Cutting:
Certain workpieces, due to their size, shape or surface finish, may require the use of a clamp or fixture to prevent movement during the cut. Position the material so that you will be cutting the thinnest cross section, as shown in Figure
32.Figure 33 illustrates the wrong way to cut these extrusions. Use a wax lubricant when cutting aluminum such as Johnson’s Stick Wax No. 140. Apply the stick wax directly to the saw blade before cutting. Never apply stick wax to a moving blade.
The wax, available at most hardware stores and industrial mill supply houses, provides proper lubrication and keeps chips from adhering to the blade.
Be sure to properly secure workpiece. Refer to page 5 for correct saw blade,
Bowed Material:
When cutting bowed material always position it as shown in Figure 34 and never like that shown in Figure
35.Positioning the material incorrectly will cause it to pinch the blade near the completion of the cut.
Cutting Plastic Pipe and Other Round
Plastic pipe and similar material can be easily cut with your saw. It should be cut just like wood and CLAMPED OR HELD
FIRMLY TO THE FENCE TO KEEP IT FROM ROLLING PARTICULARLY WHEN CUTTING ANGLES.
Cutting Large Material
Occasionally you will encounter a piece of wood a little too large to fit beneath the blade guard. A little extra height can be gained by rolling the guard up out of the way, as shown in Figure 28. Avoid doing this as much as possible, but if need be, the saw will operate properly and make the bigger cut.
NEVER TIE, TAPE, OR OTHERWISE HOLD THE GUARD OPEN WHEN OPERATING THIS SAW.
GROOVING
Your sliding compound miter saw is equipped with a grooving lever and thumbscrew and wingnut to allow for groove cutting.
To use the grooving feature, flip the grooving lever toward the front of the saw, as shown in Figure 36.
Loosen the wingnut and adjust the thumbscrew to change the depth of the groove cut. To lock the thumbscrew in position,retighten the wingnut. ALWAYS MAKE DRY RUNS (UNPOWERED) BEFORE FINISH CUTS SO THAT YOU CAN CHECK THE DEPTH OF THE BLADE.
NOTE: Your saw is not designed for use with dado blades.
Installing a New Saw Blade
UNPLUG THE SLIDING COMPOUND MITER SAW
DO NOT CUT FERROUS METAL (THAT WITH AN IRON OR STEEL CONTENT) OR MASONRY WITH THIS SLIDING COMPOUND MITER SAW.
Before installing or removing a blade, always lock the miter adjustment/lock handle, lock the rail lock knob, and lock the bevel adjustment/lock handle.
1)Loosen the arbor cover screw, and pivot the arbor cover up, as shown in Figure 37. NOTE: This screw is a specific length to provide a caliper for the blade to prevent guard damage. Do not replace this screw with a different screw.
2)While holding the spindle lock, use the supplied blade wrench to loosen the left hand threaded blade screw. (clockwise)
NOTE: To use the spindle lock (Figure 38), depress the button as shown and rotate the blade by hand until you feel the lock engage. Continue to hold the lock button in to keep the spindle from turning.
3)Using the blade wrench, remove the blade screw and carefully remove the blade.
The inner clamp washer is installed first, then the blade adapter. The blade adapter is designed to permit the use of saw blades with 1" (25.4mm) arbor holes as well as those with 5/8" (15.8mm) arbor holes.
When using blades with 1" (25.4mm) arbor holes, install the blade adapter over the spindle shaft and against the inner clamp washer. Next, install the saw blade making sure that the arbor hole in the blade fits on the blade adapter. Make sure that the teeth at the bottom of the blade are pointing toward the back of the saw (away from the operator). Install the outer clamp washer and install the blade screw. Tighten counterclockwise using the spindle lock and the provided wrench (left hand threads). When using saw blades with 5/8" (15.8mm) arbor holes, remove the blade adapter! Save it in a safe place for future use. The rest of the blade assembly is exactly the same.
REPLACE AND SECURE ARBOR COVER TO PREVENT BLADE SCREW AND BLADE SEPARATION FROM SPINDLE SHAFT.
NEVER DEPRESS THE SPINDLE LOCK PIN WHILE THE BLADE IS ROTATING.
Removing and Replacing Belt
The belt is designed to last the life of the tool. However, abuse of the tool could cause the belt to fail.
If the blade does not turn when the motor is running, the belt has failed. To inspect or replace the belt, remove the belt cover screw. Remove the belt cover. Inspect the ribs of the belt for wear or failure. Check belt tension by squeezing the belt as shown in Figure 39. The belt should contact the center boss with medium pressure.
English
15