CHECKING AND ADJUSTING TABLE PARALLEL TO DRUM
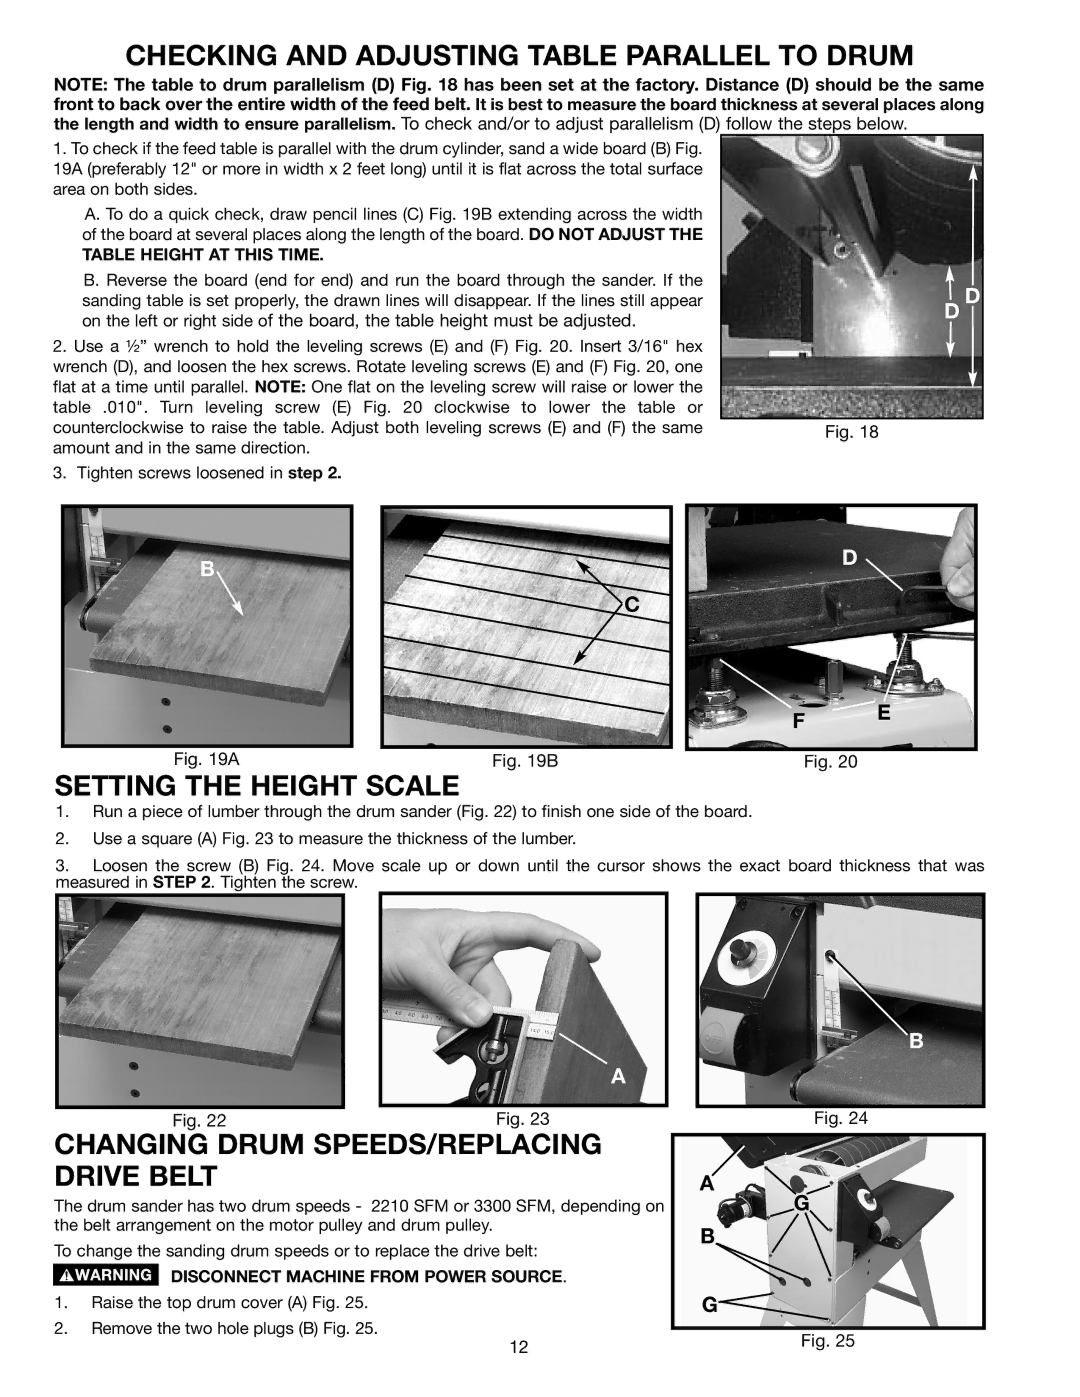
NOTE: The table to drum parallelism (D) Fig. 18 has been set at the factory. Distance (D) should be the same front to back over the entire width of the feed belt. It is best to measure the board thickness at several places along the length and width to ensure parallelism. To check and/or to adjust parallelism (D) follow the steps below.
1.To check if the feed table is parallel with the drum cylinder, sand a wide board (B) Fig. 19A (preferably 12" or more in width x 2 feet long) until it is flat across the total surface area on both sides.
A.To do a quick check, draw pencil lines (C) Fig. 19B extending across the width of the board at several places along the length of the board. DO NOT ADJUST THE
TABLE HEIGHT AT THIS TIME.
B.Reverse the board (end for end) and run the board through the sander. If the sanding table is set properly, the drawn lines will disappear. If the lines still appear on the left or right side of the board, the table height must be adjusted.
2.Use a ½” wrench to hold the leveling screws (E) and (F) Fig. 20. Insert 3/16" hex wrench (D), and loosen the hex screws. Rotate leveling screws (E) and (F) Fig. 20, one flat at a time until parallel. NOTE: One flat on the leveling screw will raise or lower the table .010". Turn leveling screw (E) Fig. 20 clockwise to lower the table or counterclockwise to raise the table. Adjust both leveling screws (E) and (F) the same amount and in the same direction.
3.Tighten screws loosened in step 2.
D
D
Fig. 18
B |
|
| C |
Fig. 19A | Fig. 19B |
SETTING THE HEIGHT SCALE
D
F ![]() E
E
Fig. 20
1.Run a piece of lumber through the drum sander (Fig. 22) to finish one side of the board.
2.Use a square (A) Fig. 23 to measure the thickness of the lumber.
3.Loosen the screw (B) Fig. 24. Move scale up or down until the cursor shows the exact board thickness that was measured in STEP 2. Tighten the screw.
A
Fig. 22 | Fig. 23 |
CHANGING DRUM SPEEDS/REPLACING DRIVE BELT
The drum sander has two drum speeds - 2210 SFM or 3300 SFM, depending on the belt arrangement on the motor pulley and drum pulley.
To change the sanding drum speeds or to replace the drive belt:
DISCONNECT MACHINE FROM POWER SOURCE.
1.Raise the top drum cover (A) Fig. 25.
2.Remove the two hole plugs (B) Fig. 25.
B
Fig. 24
A![]()
![]()
G
B![]()
G![]()
12 | Fig. 25 |
|
