INSTALLATION
2-2 ADJUSTING THE PROJECTOR IMAGE
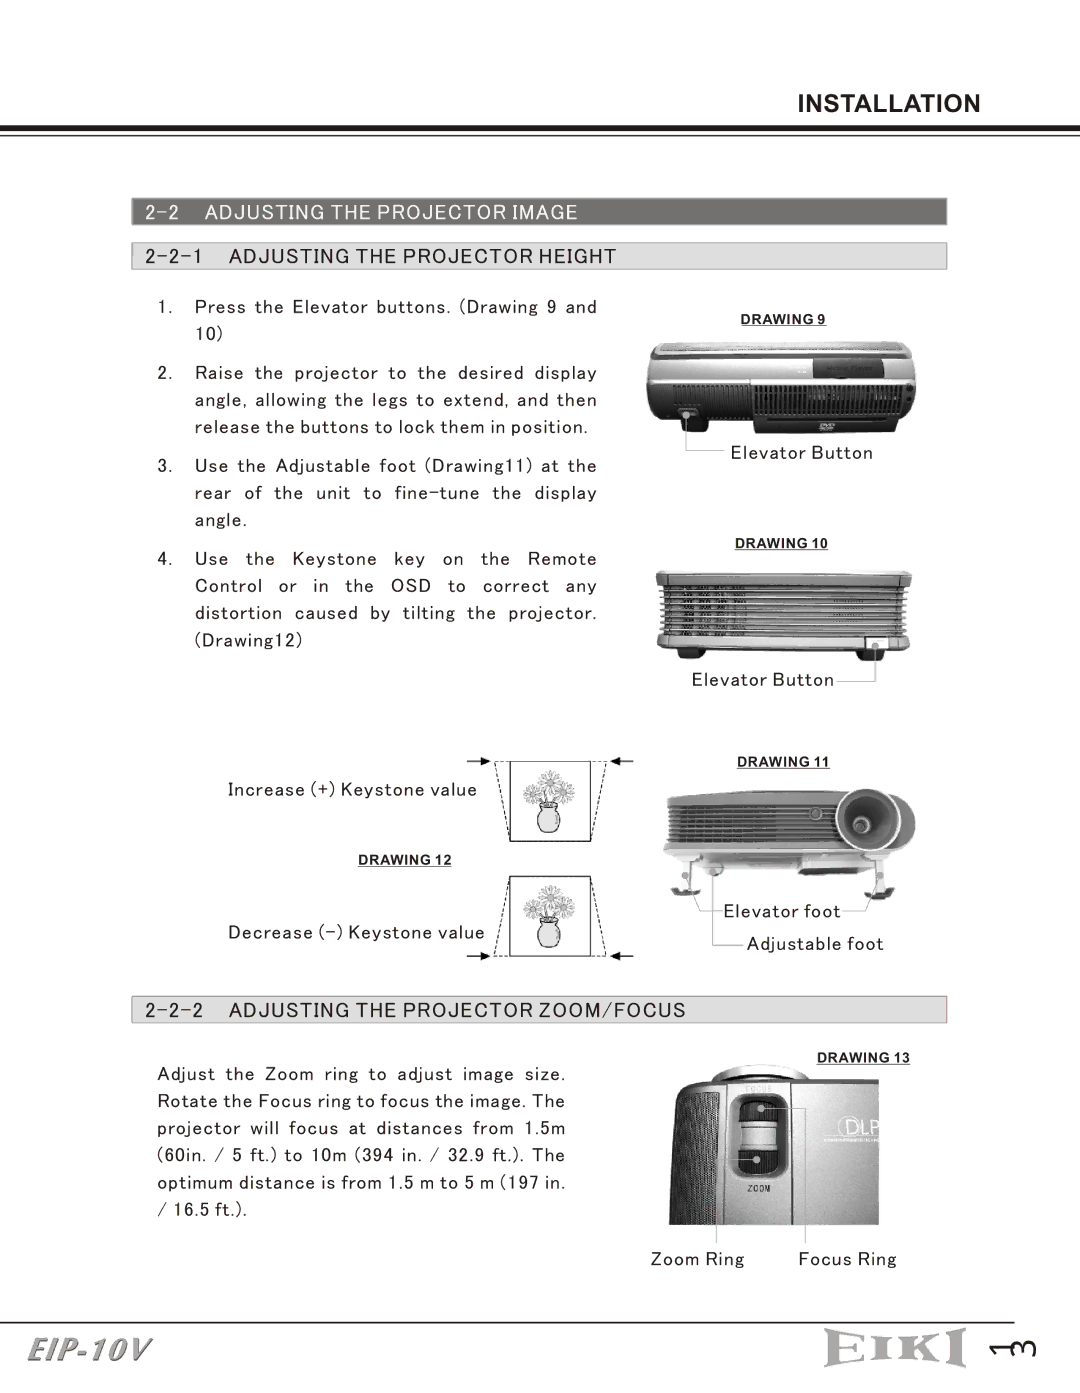
2-2-1 ADJUSTING THE PROJECTOR HEIGHT
1.Press the Elevator buttons. (Drawing 9 and 10)
2.Raise the projector to the desired display angle, allowing the legs to extend, and then release the buttons to lock them in position.
3.Use the Adjustable foot (Drawing11) at the rear of the unit to
4. Use the Keystone key on the Remote Control or in the OSD to correct any distortion caused by tilting the projector. (Drawing12)
DRAWING 9
![]()
![]() Elevator Button
Elevator Button
DRAWING 10
Elevator Button![]()
![]()
DRAWING 11
Increase (+) Keystone value
DRAWING 12
![]()
![]() Elevator foot
Elevator foot![]()
![]()
Decrease | Adjustable foot |
|
2-2-2 ADJUSTING THE PROJECTOR ZOOM/FOCUS
DRAWING 13
Adjust the Zoom ring to adjust image size. Rotate the Focus ring to focus the image. The projector will focus at distances from 1.5m (60in. / 5 ft.) to 10m (394 in. / 32.9 ft.). The optimum distance is from 1.5 m to 5 m (197 in. / 16.5 ft.).
Zoom Ring | Focus Ring |
밐 뺩