Maintenance and Cleaning
Lamp Replacement
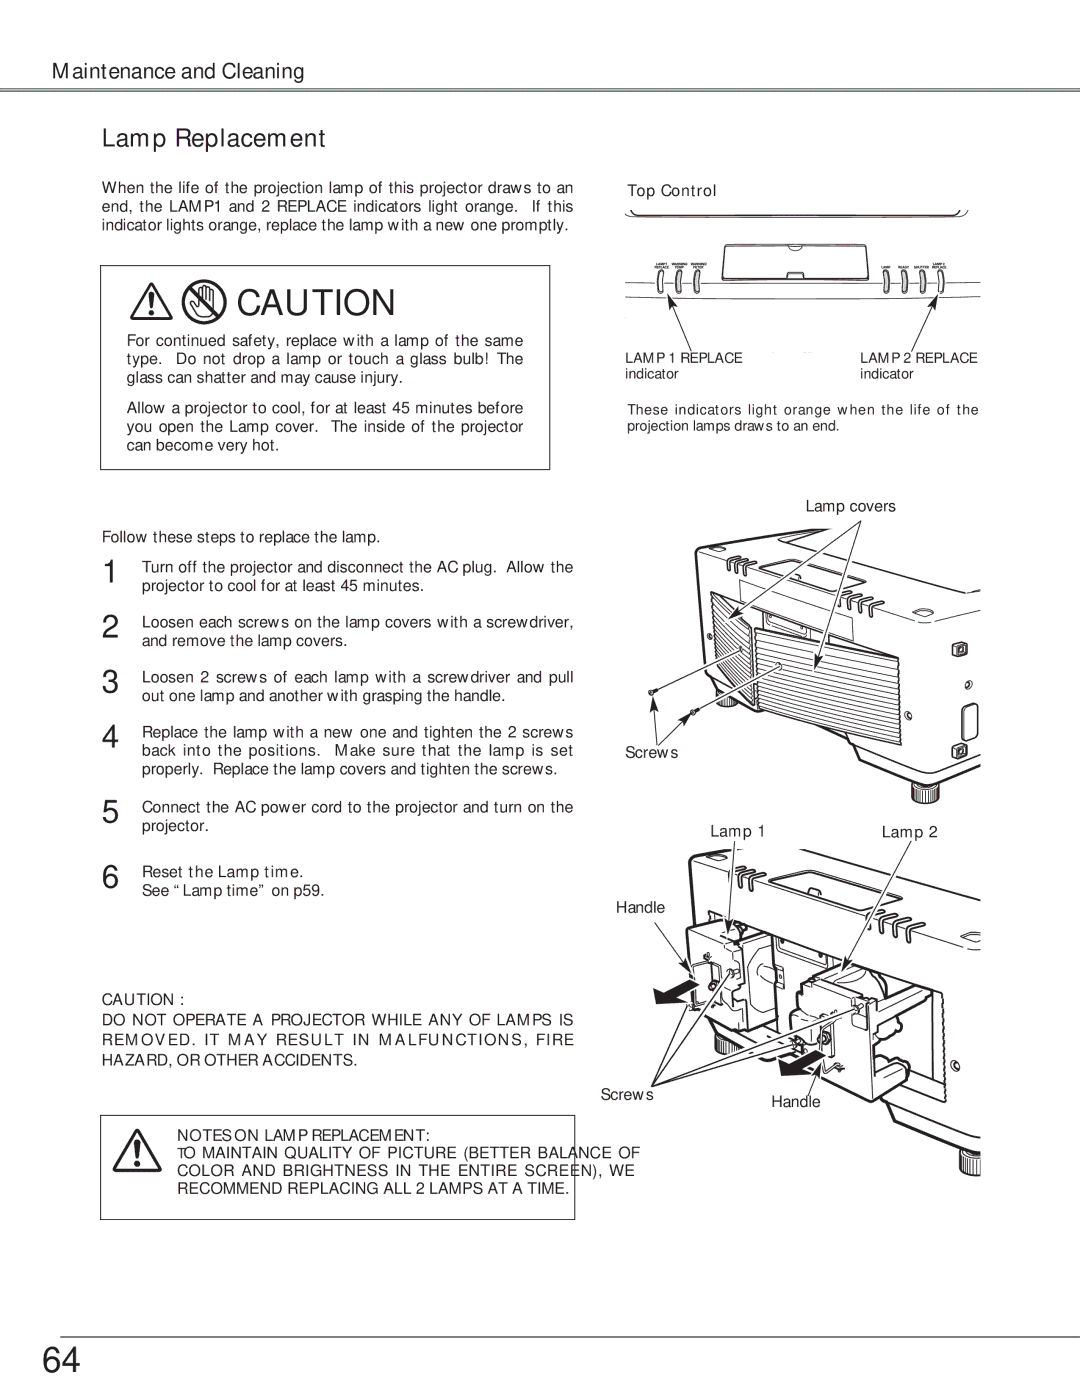
When the life of the projection lamp of this projector draws to an | Top Control |
end, the LAMP1 and 2 REPLACE indicators light orange. If this |
|
indicator lights orange, replace the lamp with a new one promptly. |
|
![]()
![]() CAUTION
CAUTION
For continued safety, replace with a lamp of the same type. Do not drop a lamp or touch a glass bulb! The glass can shatter and may cause injury.
Allow a projector to cool, for at least 45 minutes before you open the Lamp cover. The inside of the projector can become very hot.
LAMP 1 REPLACE | LAMP 2 REPLACE |
indicator | indicator |
These indicators light orange when the life of the projection lamps draws to an end.
Follow these steps to replace the lamp.
1
2
3
4 Replace the lamp with a new one and tighten the 2 screws back into the positions. Make sure that the lamp is set properly. Replace the lamp covers and tighten the screws.
5 | Connect the AC power cord to the projector and turn on the |
| projector. |
6 | Reset the Lamp time. |
| See “Lamp time” on p59. |
CAUTION :
DO NOT OPERATE A PROJECTOR WHILE ANY OF LAMPS IS REMOVED. IT MAY RESULT IN MALFUNCTIONS, FIRE HAZARD, OR OTHER ACCIDENTS.
NOTES ON LAMP REPLACEMENT:
TO MAINTAIN QUALITY OF PICTURE (BETTER BALANCE OF COLOR AND BRIGHTNESS IN THE ENTIRE SCREEN), WE RECOMMEND REPLACING ALL 2 LAMPS AT A TIME.
Lamp covers
Screws
Lamp 1 | Lamp 2 |
Handle
ScrewsHandle
64