Manuals
/
Elation Professional
/
Computer Equipment
/
Projector
Elation Professional
250B
user manual
Power Wash Color Wheel Orientation
Models:
250B
1
35
40
40
Download
40 pages
20.66 Kb
32
33
34
35
36
37
38
39
Specifications
Install
Warranty
Adjust the DMX- Address D001
Fuse Replacement
Safety
Power Wash
Features and Functions
Stand alone mode
Page 35
Image 35
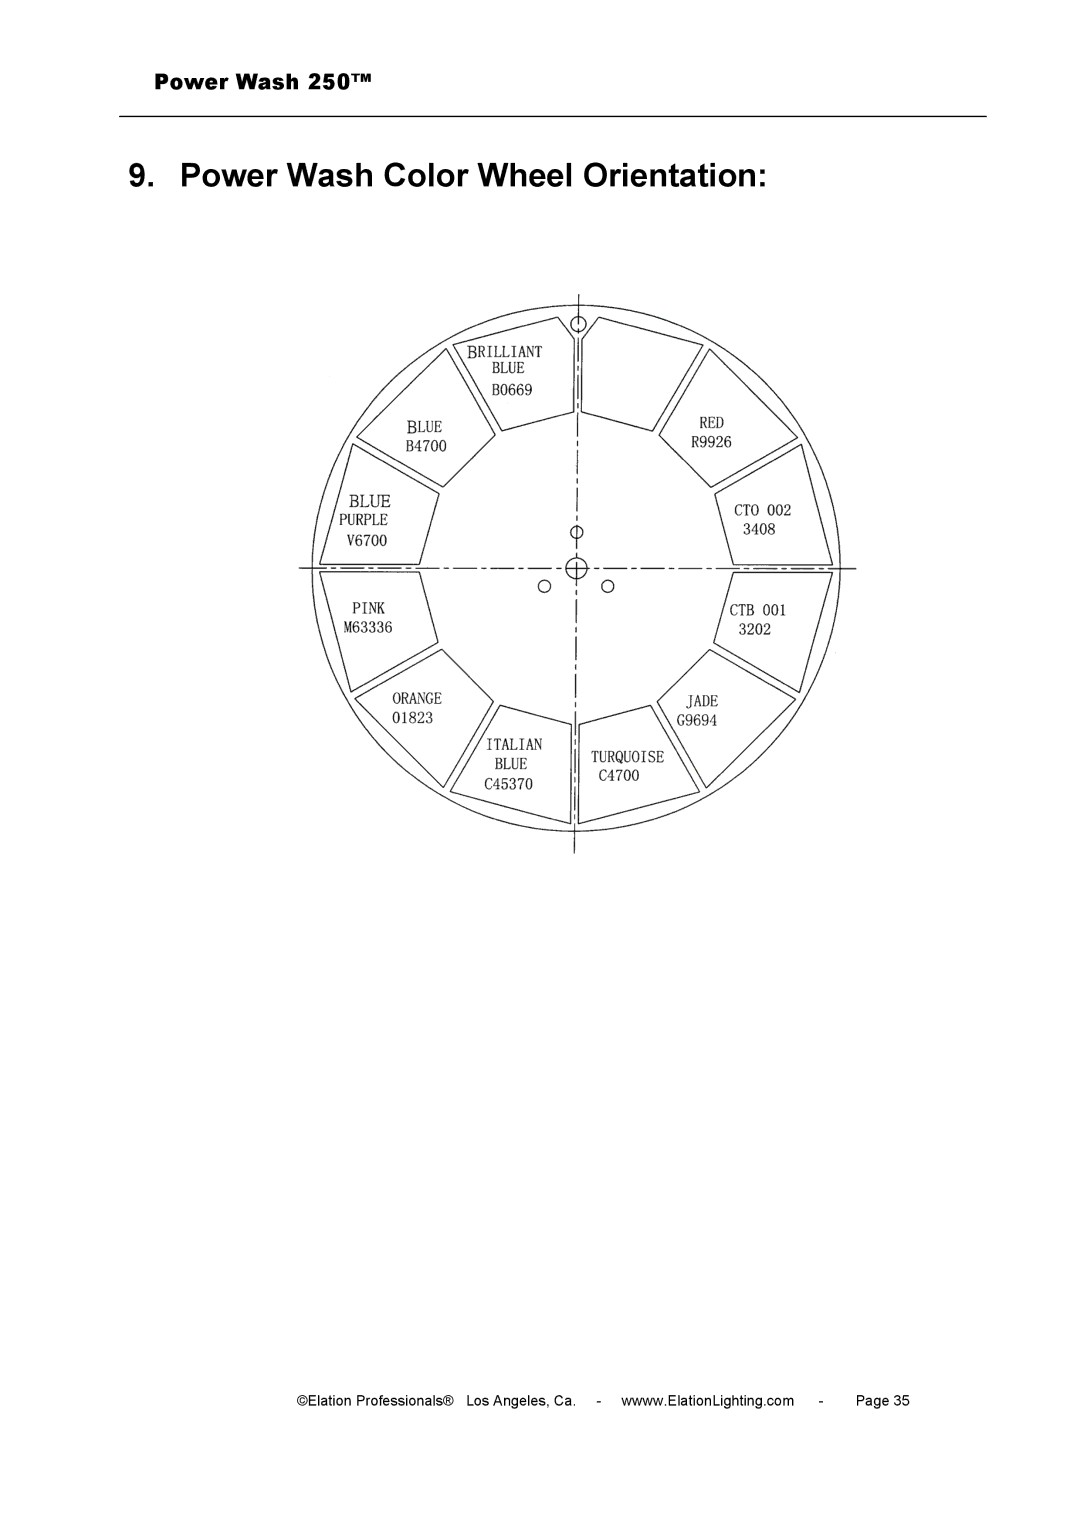
Power Wash 250™
9. Power Wash Color Wheel Orientation:
©Elation Professionals® Los Angeles, Ca. - wwww.ElationLighting.com
-
Page 35
Page 34
Page 36
Page 35
Image 35
Page 34
Page 36
Contents
Software Version Revised 6/2003
Power Wash
Table of contents
Operation
DMX Channel Selection DMX Protocol Service and Maintenance
Fuse Replacement Maintenance and Cleaning
Color Wheel Oreintation Technical Specification Warranty
Mailsupport@ElationLighting.com
Power Wash
Safety Instructions
Features and Functions
Power Wash
Installation
Mounting
Securing the Power Wash
Connections
Power supply
Power Wash
Fuse Requirements
Tilt
Menu Field
Level D001
Dfse Feed Eflg
Clre
Audio Program Audi
Adjust the DMX- Address D001
Test Program Test
Fcol
Lamp
Rese
Time
000 255
Rtlt
Spec
Manu
Disp
Laau
Dlof
Dmxi
Fans
Temp
99 +
Adju
Dfse
Eflg
Feed
Operation
Stand alone mode
Master/Slave mode
DMX control mode
Power Wash
DMX HEX
DMX Channel Selection DMX Protocol
Lamp OFF
Lamp Change
Safety Guidelines
Lamp Optimization
Removing the Lamp
Power Wash
Fuse Replacement
Cleaning Frequency rule-of-thumb
Maintenance and Cleaning the Power Wash 250B
1Safety Regulations
Page
Power Wash Color Wheel Orientation
Technical Specification
Year 730 Days Limited Warranty
Power Wash
Power Wash
Power Wash
Top
Page
Image
Contents