Care and Cleaning 29
Adjusting The Coffee Grinder
The mesh of the coffee grinder blades is
![]() Warning
Warning
•Coffee will pour into a cup you put under the coffee dispenser tube during the adjustment process. To avoid burns, keep body parts and clothing clear of the dispenser and drip tray areas.
•Do not attempt to adjust the grinder when the grinder is not on. Damage to the grinder blades may occur.
The grinder is adjusted while it is running, using the adjustment wrench supplied with your coffee maker.
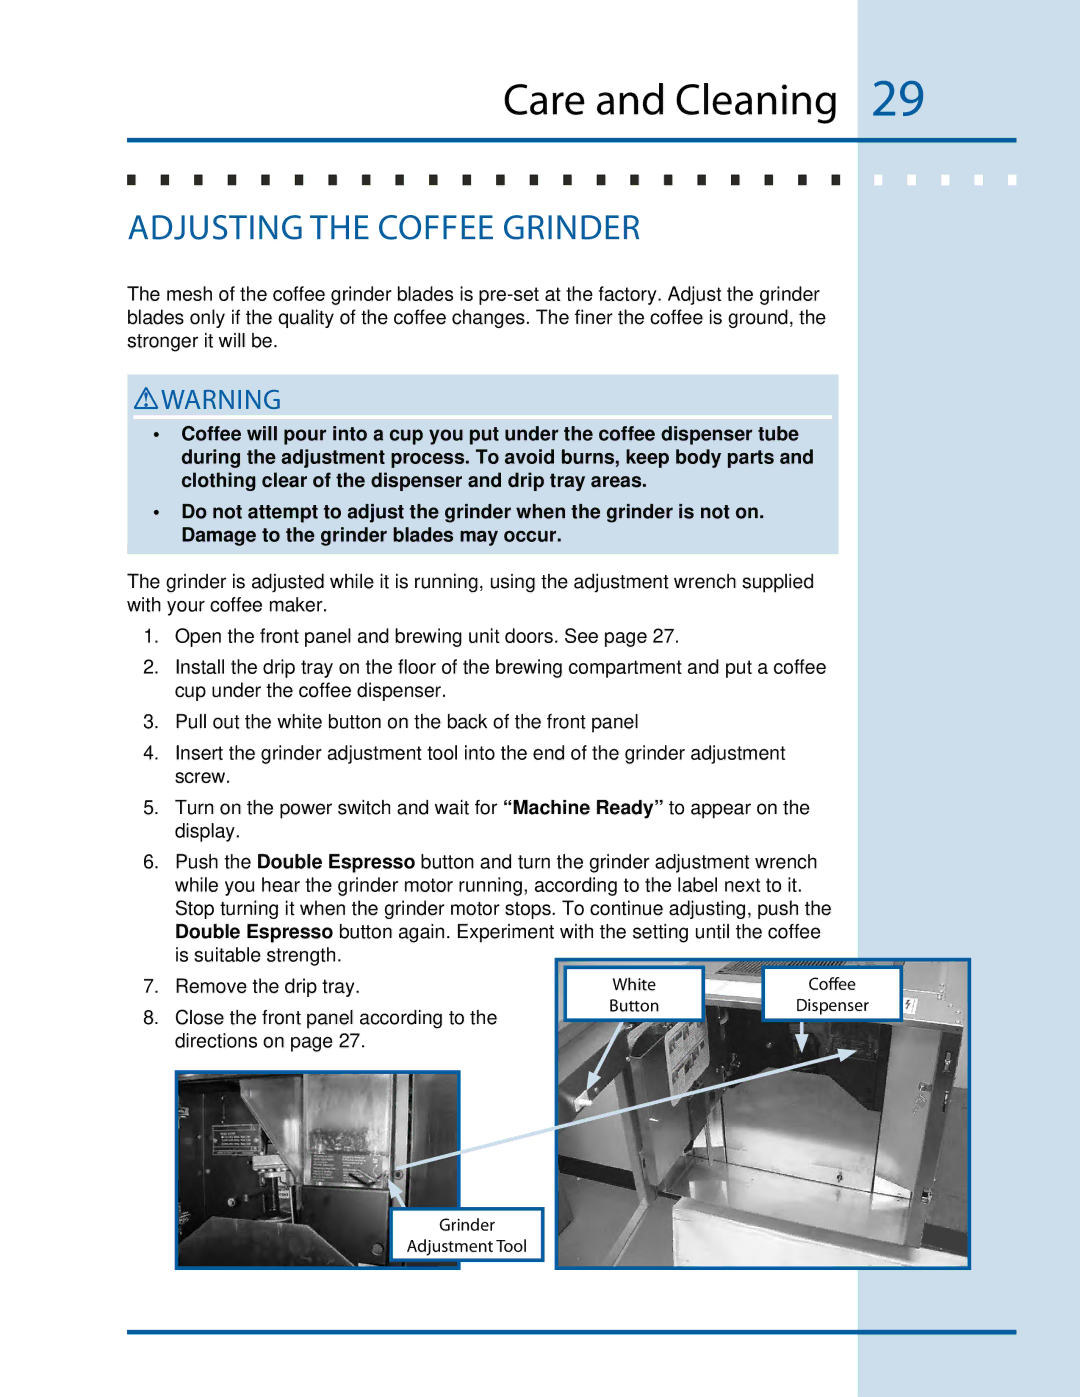
1.Open the front panel and brewing unit doors. See page 27.
2.Install the drip tray on the floor of the brewing compartment and put a coffee cup under the coffee dispenser.
3.Pull out the white button on the back of the front panel
4.Insert the grinder adjustment tool into the end of the grinder adjustment screw.
5.Turn on the power switch and wait for “Machine Ready” to appear on the display.
6.Push the Double Espresso button and turn the grinder adjustment wrench while you hear the grinder motor running, according to the label next to it. Stop turning it when the grinder motor stops. To continue adjusting, push the Double Espresso button again. Experiment with the setting until the coffee is suitable strength.
7. | Remove the drip tray. | White |
|
| Coffee |
8. | Close the front panel according to the | Button |
| Dispenser | |
|
|
|
| ||
|
|
|
| ||
| directions on page 27. |
|
|
|
|
|
|
|
|
| |
Grinder
Adjustment Tool