
EFC 630 specifications
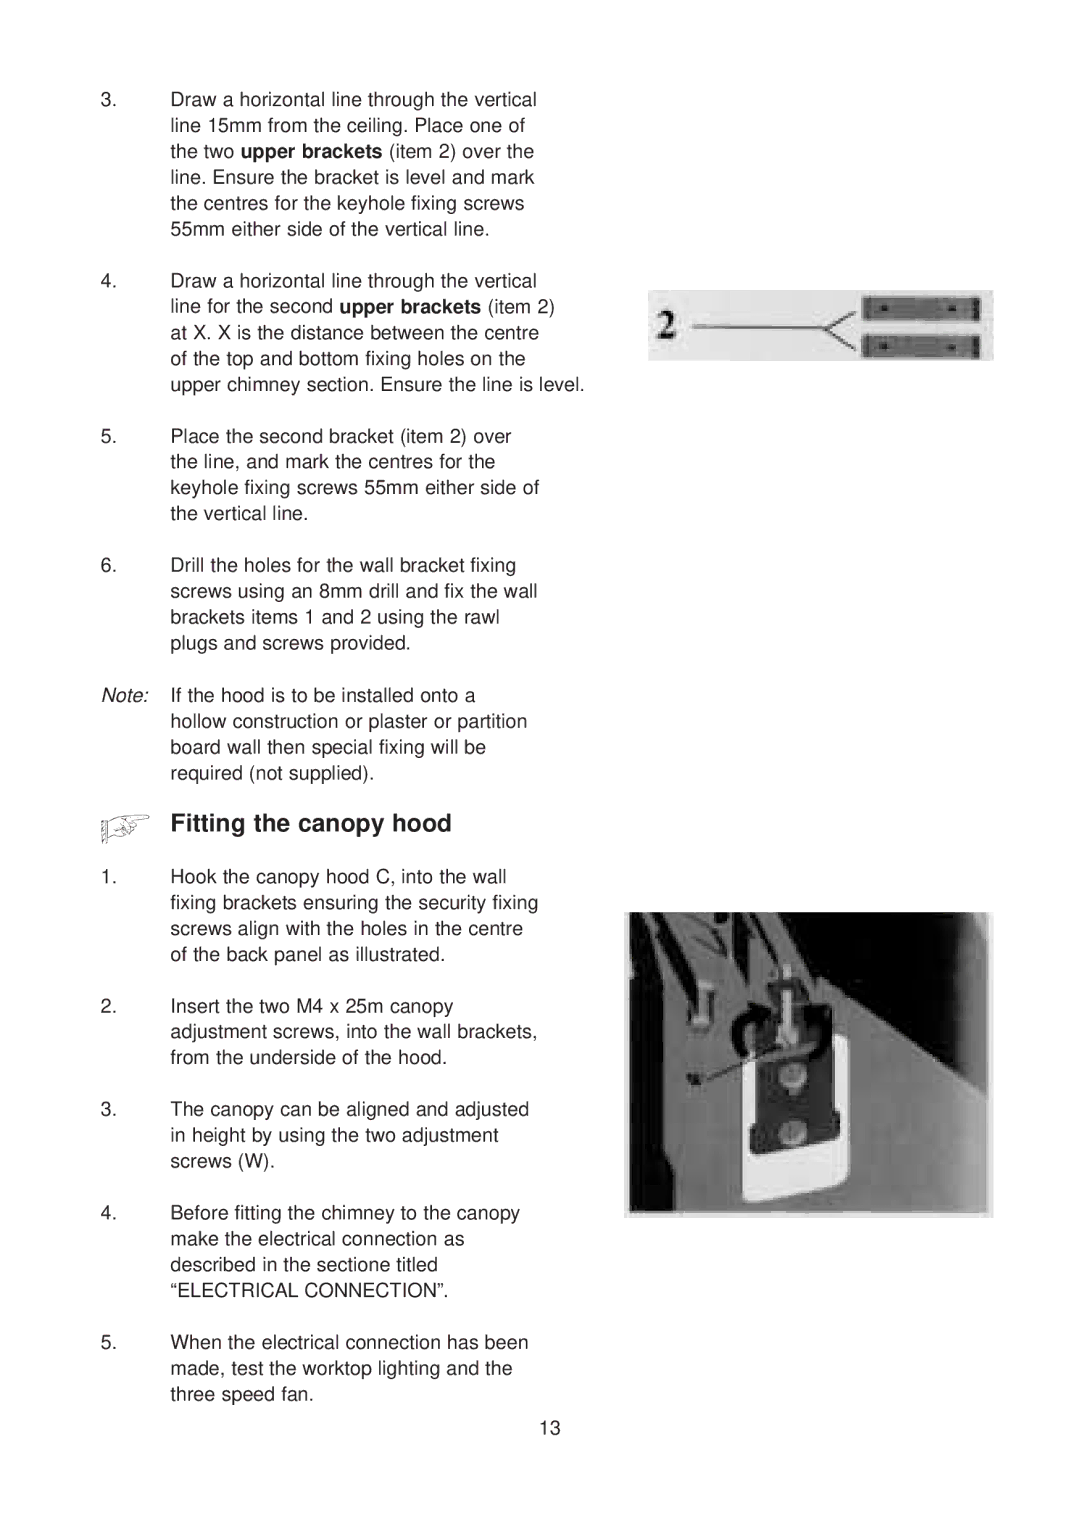
The Electrolux EFC 630 is a high-performance kitchen hood that exemplifies innovation and efficiency in your cooking space. Designed to ensure optimal air quality, this model combines sleek aesthetics with advanced technology, making it a popular choice for modern kitchens.One of the standout features of the EFC 630 is its powerful extraction system. It boasts a highly efficient motor that provides superior airflow, capable of removing cooking odors, smoke, and steam effectively. With multiple speed settings, users can customize the extraction rate according to their cooking needs, ensuring a pleasant cooking environment.
An important aspect of the EFC 630 is its quiet operation. Even at higher speeds, the hood minimizes noise levels, allowing for conversation and enjoyment in the kitchen without distraction. This is particularly beneficial during family gatherings or cooking sessions with friends.
The design of the Electrolux EFC 630 is another highlight. It features a sleek, contemporary style with clean lines and a stylish stainless steel finish. This modern appearance means that it not only functions well but also enhances the overall aesthetic of any kitchen. The hood is designed to be wall-mounted, making it a practical solution for various kitchen layouts.
Technology plays a crucial role in the efficiency of the EFC 630. It includes an innovative filter system, which captures grease and impurities from the air, ensuring that the kitchen remains clean and fresh. The filters are washable, allowing for easy maintenance and longevity in performance.
Additionally, the EFC 630 is equipped with integrated LED lighting, providing illumination over the cooking area. This not only improves visibility but also adds an energy-efficient lighting solution, contributing to lower energy bills.
The Electrolux EFC 630 embodies a perfect blend of form and function, making it an ideal choice for both avid cooks and casual users. With its robust performance, quiet operation, and modern design, this kitchen hood is designed to meet the demands of contemporary cooking while enhancing the ambiance of your kitchen. Those looking for a reliable and stylish solution to maintain air quality in the home will find the EFC 630 to be an exceptional addition to their culinary space.