24electrolux
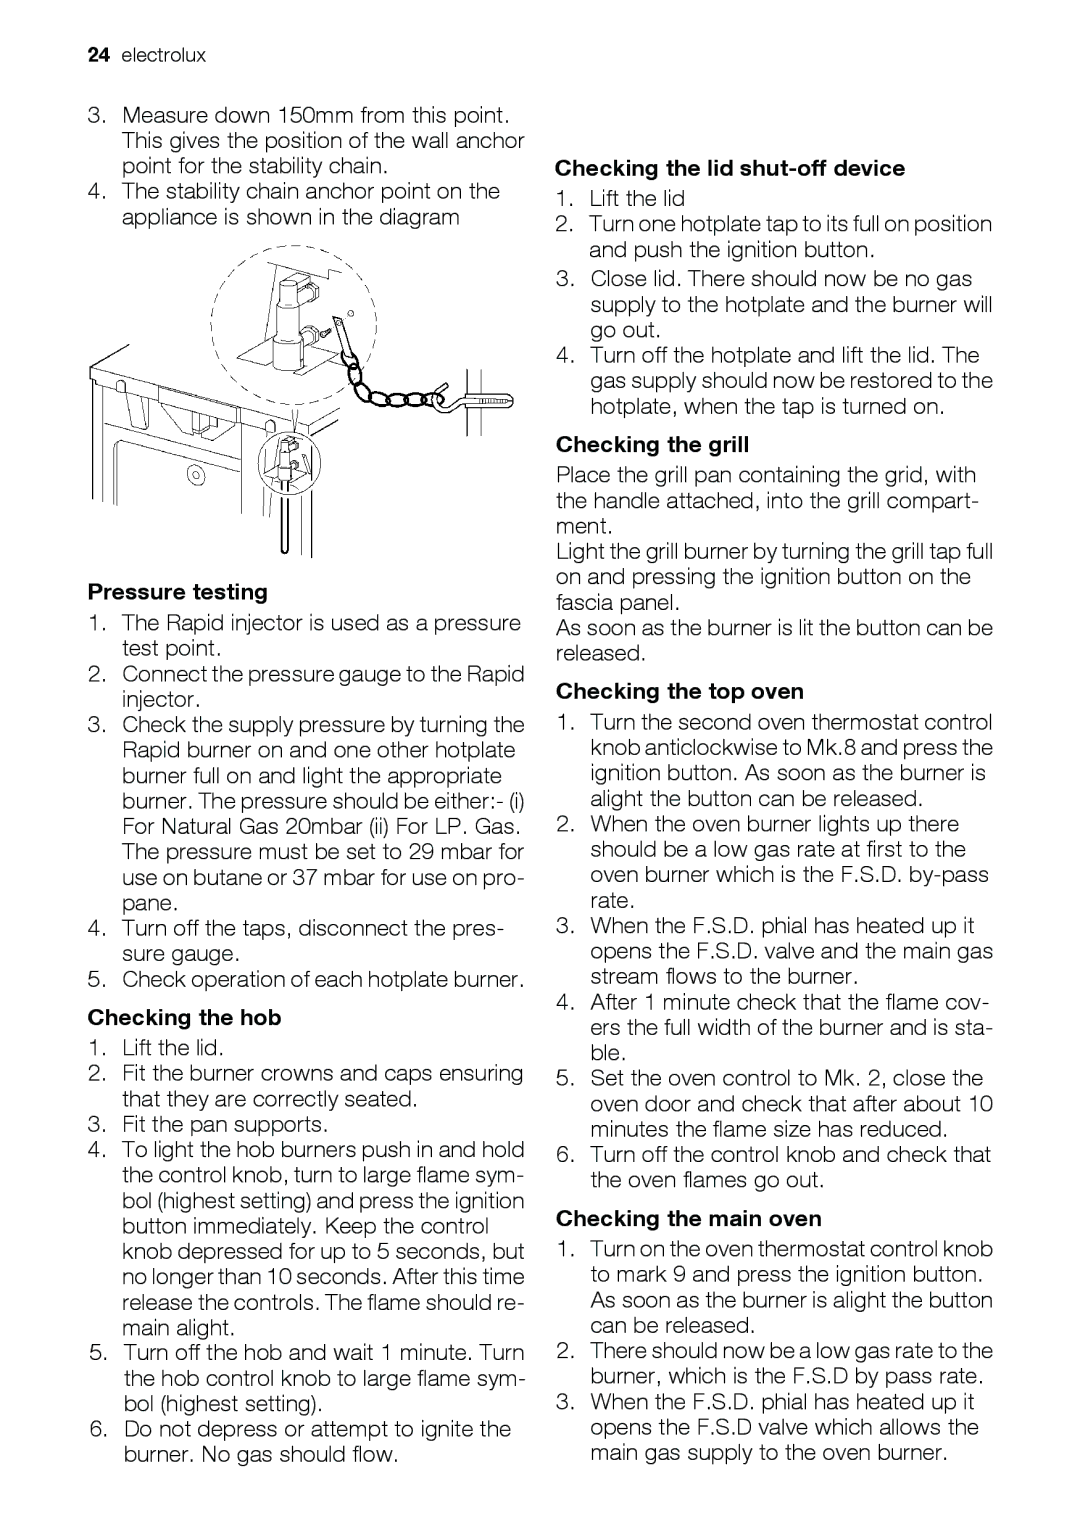
3.Measure down 150mm from this point. This gives the position of the wall anchor point for the stability chain.
4.The stability chain anchor point on the appliance is shown in the diagram
Pressure testing
1.The Rapid injector is used as a pressure test point.
2.Connect the pressure gauge to the Rapid injector.
3.Check the supply pressure by turning the Rapid burner on and one other hotplate burner full on and light the appropriate burner. The pressure should be either:- (i) For Natural Gas 20mbar (ii) For LP. Gas. The pressure must be set to 29 mbar for use on butane or 37 mbar for use on pro- pane.
4.Turn off the taps, disconnect the pres- sure gauge.
5.Check operation of each hotplate burner.
Checking the hob
1.Lift the lid.
2.Fit the burner crowns and caps ensuring that they are correctly seated.
3.Fit the pan supports.
4.To light the hob burners push in and hold the control knob, turn to large flame sym- bol (highest setting) and press the ignition button immediately. Keep the control knob depressed for up to 5 seconds, but no longer than 10 seconds. After this time release the controls. The flame should re- main alight.
5.Turn off the hob and wait 1 minute. Turn the hob control knob to large flame sym- bol (highest setting).
6.Do not depress or attempt to ignite the burner. No gas should flow.
Checking the lid shut-off device
1.Lift the lid
2.Turn one hotplate tap to its full on position and push the ignition button.
3.Close lid. There should now be no gas supply to the hotplate and the burner will go out.
4.Turn off the hotplate and lift the lid. The gas supply should now be restored to the hotplate, when the tap is turned on.
Checking the grill
Place the grill pan containing the grid, with the handle attached, into the grill compart- ment.
Light the grill burner by turning the grill tap full on and pressing the ignition button on the fascia panel.
As soon as the burner is lit the button can be released.
Checking the top oven
1.Turn the second oven thermostat control knob anticlockwise to Mk.8 and press the ignition button. As soon as the burner is alight the button can be released.
2.When the oven burner lights up there should be a low gas rate at first to the oven burner which is the F.S.D.
3.When the F.S.D. phial has heated up it opens the F.S.D. valve and the main gas stream flows to the burner.
4.After 1 minute check that the flame cov- ers the full width of the burner and is sta- ble.
5.Set the oven control to Mk. 2, close the oven door and check that after about 10 minutes the flame size has reduced.
6.Turn off the control knob and check that the oven flames go out.
Checking the main oven
1.Turn on the oven thermostat control knob to mark 9 and press the ignition button. As soon as the burner is alight the button can be released.
2.There should now be a low gas rate to the burner, which is the F.S.D by pass rate.
3.When the F.S.D. phial has heated up it opens the F.S.D valve which allows the main gas supply to the oven burner.
