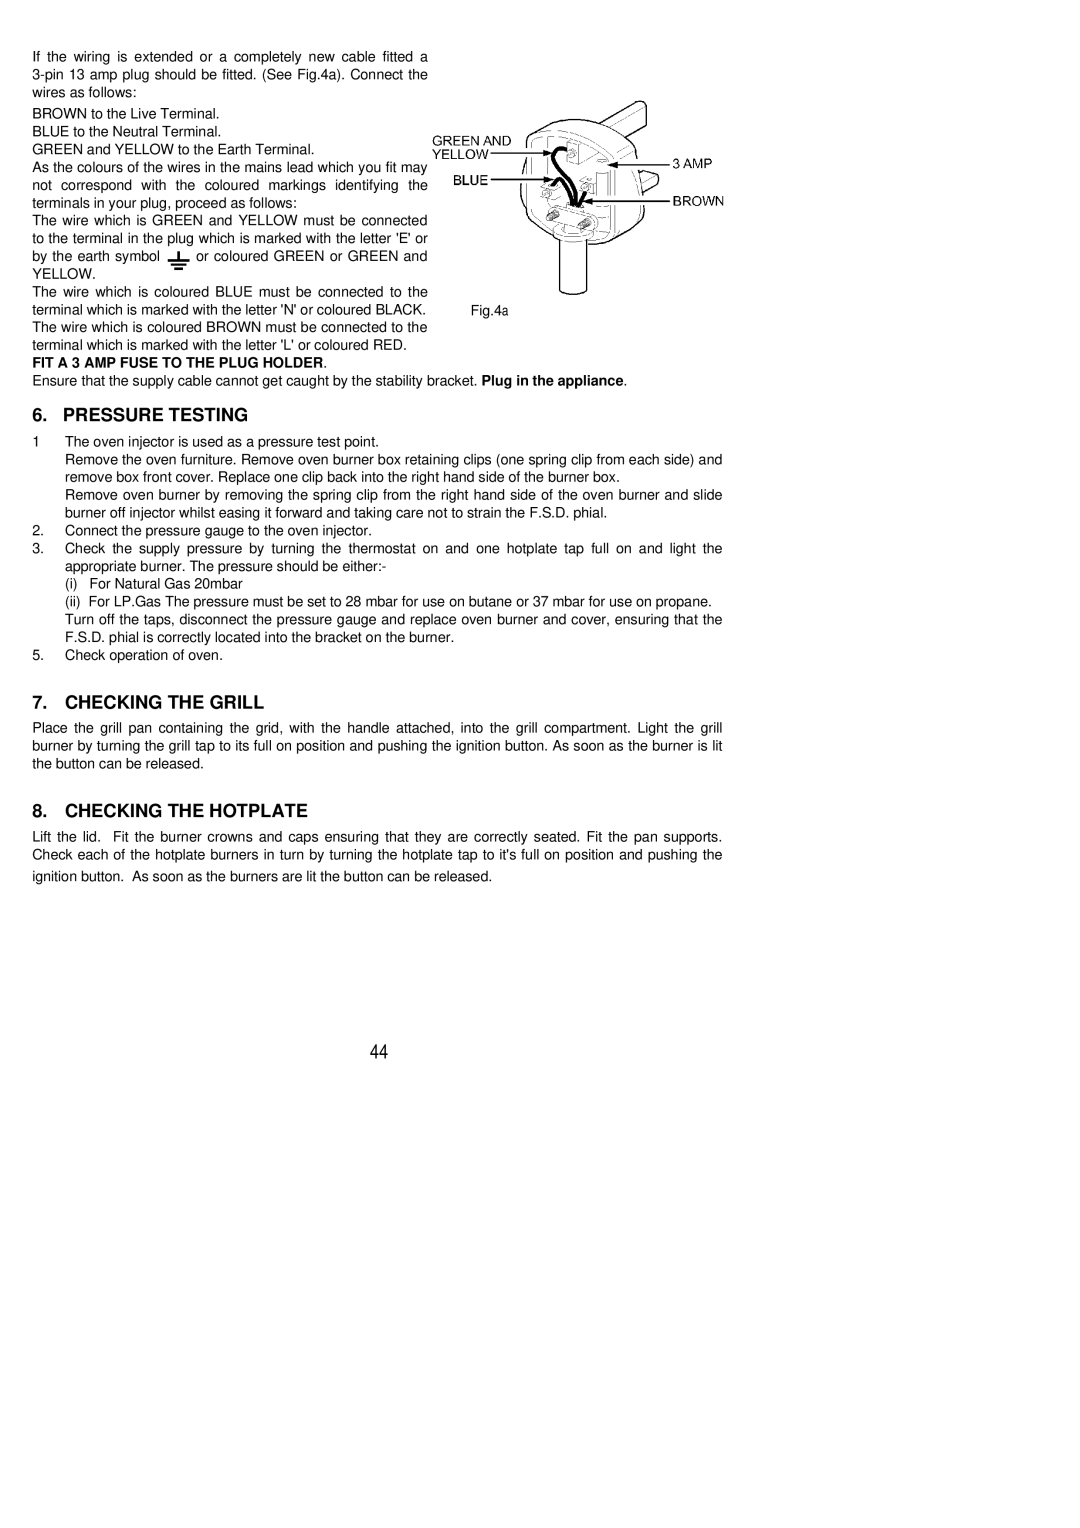
Fig.4a

If the wiring is extended or a completely new cable fitted a 3-pin 13 amp plug should be fitted. (See Fig.4a). Connect the wires as follows:

BROWN to the Live Terminal. BLUE to the Neutral Terminal.

GREEN and YELLOW to the Earth Terminal.

As the colours of the wires in the mains lead which you fit may not correspond with the coloured markings identifying the terminals in your plug, proceed as follows:

The wire which is GREEN and YELLOW must be connected to the terminal in the plug which is marked with the letter 'E' or

by the earth symbol or coloured GREEN or GREEN and

YELLOW.

The wire which is coloured BLUE must be connected to the terminal which is marked with the letter 'N' or coloured BLACK. The wire which is coloured BROWN must be connected to the terminal which is marked with the letter 'L' or coloured RED.

FIT A 3 AMP FUSE TO THE PLUG HOLDER.

Ensure that the supply cable cannot get caught by the stability bracket. Plug in the appliance.

6. PRESSURE TESTING

1 The oven injector is used as a pressure test point.

Remove the oven furniture. Remove oven burner box retaining clips (one spring clip from each side) and remove box front cover. Replace one clip back into the right hand side of the burner box.

Remove oven burner by removing the spring clip from the right hand side of the oven burner and slide burner off injector whilst easing it forward and taking care not to strain the F.S.D. phial.

2.Connect the pressure gauge to the oven injector.

3.Check the supply pressure by turning the thermostat on and one hotplate tap full on and light the appropriate burner. The pressure should be either:-

(i)For Natural Gas 20mbar

(ii)For LP.Gas The pressure must be set to 28 mbar for use on butane or 37 mbar for use on propane. Turn off the taps, disconnect the pressure gauge and replace oven burner and cover, ensuring that the F.S.D. phial is correctly located into the bracket on the burner.

5.Check operation of oven.

7. CHECKING THE GRILL

Place the grill pan containing the grid, with the handle attached, into the grill compartment. Light the grill burner by turning the grill tap to its full on position and pushing the ignition button. As soon as the burner is lit the button can be released.

8. CHECKING THE HOTPLATE

Lift the lid. Fit the burner crowns and caps ensuring that they are correctly seated. Fit the pan supports. Check each of the hotplate burners in turn by turning the hotplate tap to it's full on position and pushing the

ignition button. As soon as the burners are lit the button can be released.

44

Page 44
Image 44
Electrolux SG 551 installation instructions Pressure Testing, Checking the Grill, Checking the Hotplate

SG 551 specifications

The Electrolux SG 551 is a state-of-the-art vacuum cleaner designed to meet the demands of modern households. Known for its powerful suction capabilities and advanced filtration system, the SG 551 combines efficiency with user-friendly features, making it a popular choice among consumers.

One of the standout characteristics of the Electrolux SG 551 is its strong suction power, which is facilitated by a robust motor. This allows the vacuum to effectively pick up dirt, dust, and debris from various surfaces, including carpets, hardwood floors, and upholstery. Its adjustable suction settings enable users to tailor the vacuum's performance based on the type of flooring being cleaned, ensuring optimal results with ease.

Incorporating advanced technology, the SG 551 features a Multi-Cyclonic Filtration System. This system enhances dust separation, reducing the amount of dust that escapes back into the air. This not only helps to maintain a cleaner environment but also ensures that the vacuum's filters last longer, requiring less frequent replacements. The HEPA filtration option available in some models traps allergens and fine particles, making it an excellent choice for allergy sufferers.

The Electrolux SG 551 is designed for convenience and ease of use. Its lightweight construction makes it easy to maneuver, allowing users to glide seamlessly from room to room. The vacuum is equipped with a range of accessories, including a crevice tool, dusting brush, and upholstery nozzle, providing versatility for different cleaning tasks. These attachments are conveniently stored on the vacuum, ensuring that they are always accessible when needed.

Another notable feature of the SG 551 is its quiet operation. Electrolux has engineered this vacuum with noise-reduction technology, making it a preferable option for those who wish to clean without disturbing family members or neighbors.

The ergonomically designed handle provides a comfortable grip, making it easier for users to control the vacuum during extended cleaning sessions. Additionally, the vacuum has a compact design, allowing for easy storage in tight spaces.

In conclusion, the Electrolux SG 551 combines power, efficiency, and convenience in one comprehensive package. With its superior suction, advanced filtration, and user-friendly features, it stands out as an excellent choice for anyone looking to maintain a clean and healthy home. This vacuum not only meets the essential cleaning needs but also enhances the overall cleaning experience for users.