BYPASSING & ISOLATING (continued)
RETURN TO SERVICE
This procedure explains how to return the Automatic Transfer Switch to service after inspection and maintenance. Observe the ATS POSITION lights on the STATUS INDICATOR panel.
1.Install the Transfer Switch into the enclosure. Carefully follow directions on page
!
Close enclosure door to prevent personal injury in case of electrical system fault.
2..Install the Isolation Handle (through the door) and turn it clockwise (approximately 7 or 8 turns) until the TEST light comes on, DISCONNECTED light off.
NOTE: If the emergency source is available, the Automatic Transfer Switch may operate to the emergency position. If it does, operate the door– mounted RESET TO NORMAL toggle switch.
Electrical Operation Test: This procedure will check the electrical operation of the Automatic Transfer Switch without interrupting the load. It still should be Bypassed and in the TEST position. The engine starting control should be in the automatic position.
Transfer Test
Perform the
The isolating contacts cannot be closed until the Transfer Switch is in the same position as the Bypass Switch.
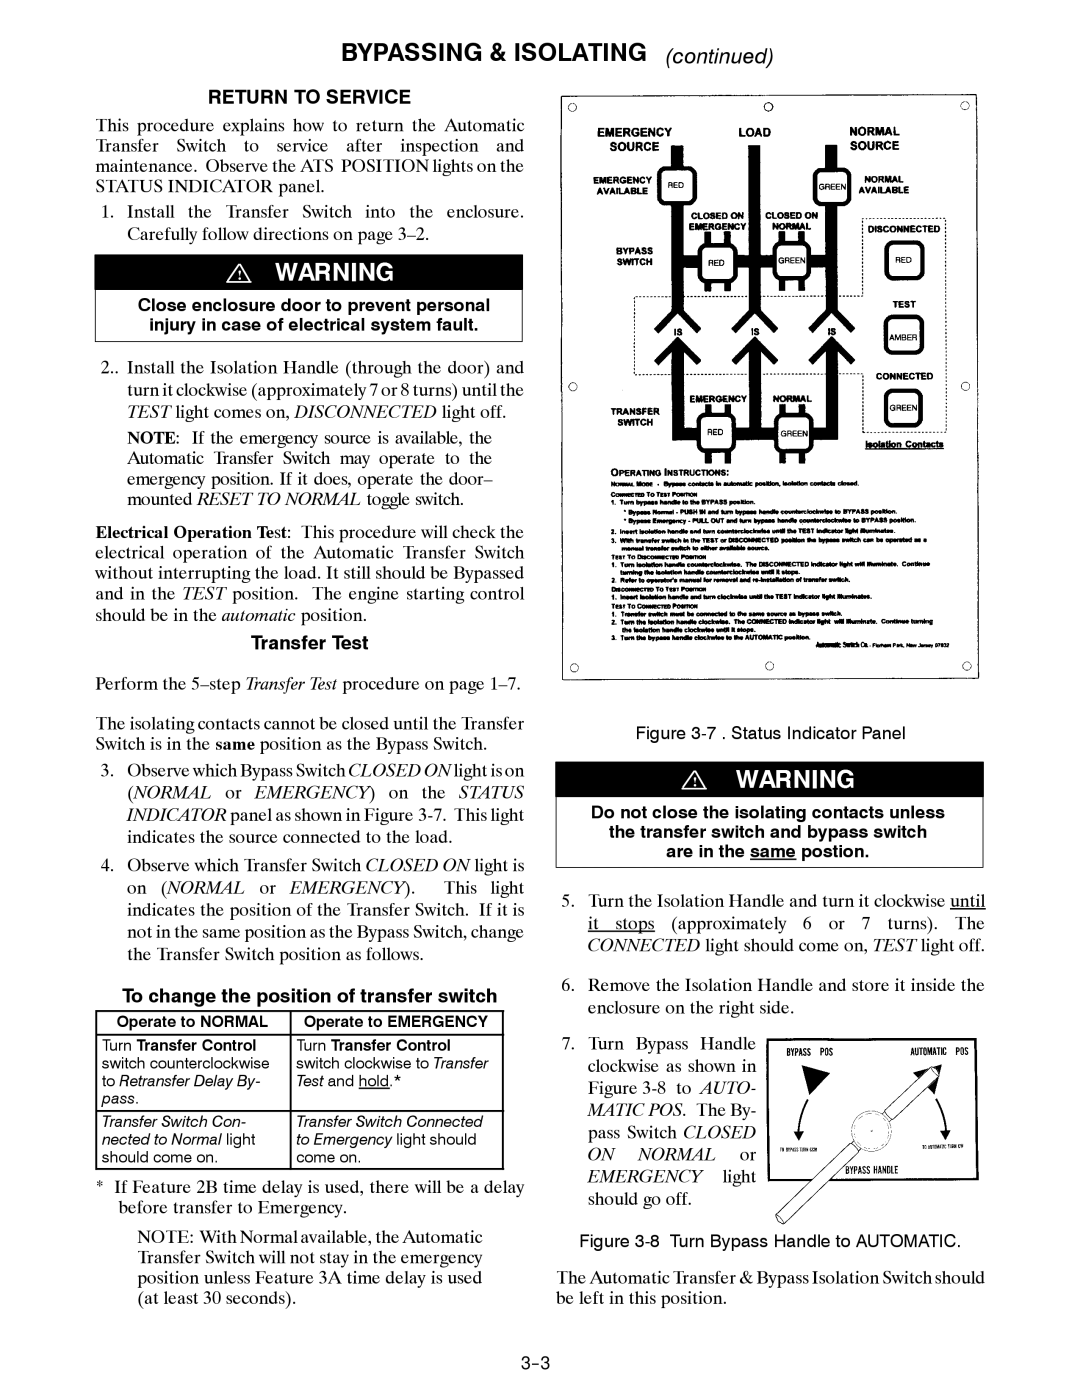
3.Observe which Bypass Switch CLOSED ON light is on (NORMAL or EMERGENCY) on the STATUS INDICATOR panel as shown in Figure
4.Observe which Transfer Switch CLOSED ON light is on (NORMAL or EMERGENCY). This light indicates the position of the Transfer Switch. If it is not in the same position as the Bypass Switch, change the Transfer Switch position as follows.
To change the position of transfer switch
Operate to NORMAL | Operate to EMERGENCY |
Turn Transfer Control | Turn Transfer Control |
switch counterclockwise | switch clockwise to Transfer |
to Retransfer Delay By- | Test and hold.* |
pass. |
|
Transfer Switch Con- | Transfer Switch Connected |
nected to Normal light | to Emergency light should |
should come on. | come on. |
*If Feature 2B time delay is used, there will be a delay before transfer to Emergency.
NOTE: With Normal available, the Automatic Transfer Switch will not stay in the emergency position unless Feature 3A time delay is used (at least 30 seconds).
Figure 3-7 . Status Indicator Panel
!
Do not close the isolating contacts unless
the transfer switch and bypass switch
are in the same postion.
5.Turn the Isolation Handle and turn it clockwise until it stops (approximately 6 or 7 turns). The CONNECTED light should come on, TEST light off.
6.Remove the Isolation Handle and store it inside the enclosure on the right side.
7.Turn Bypass Handle clockwise as shown in Figure
Figure 3-8 Turn Bypass Handle to AUTOMATIC.
The Automatic Transfer & Bypass Isolation Switch should be left in this position.
