Installation
INSIDE VERTICAL INSTALLATIONS:
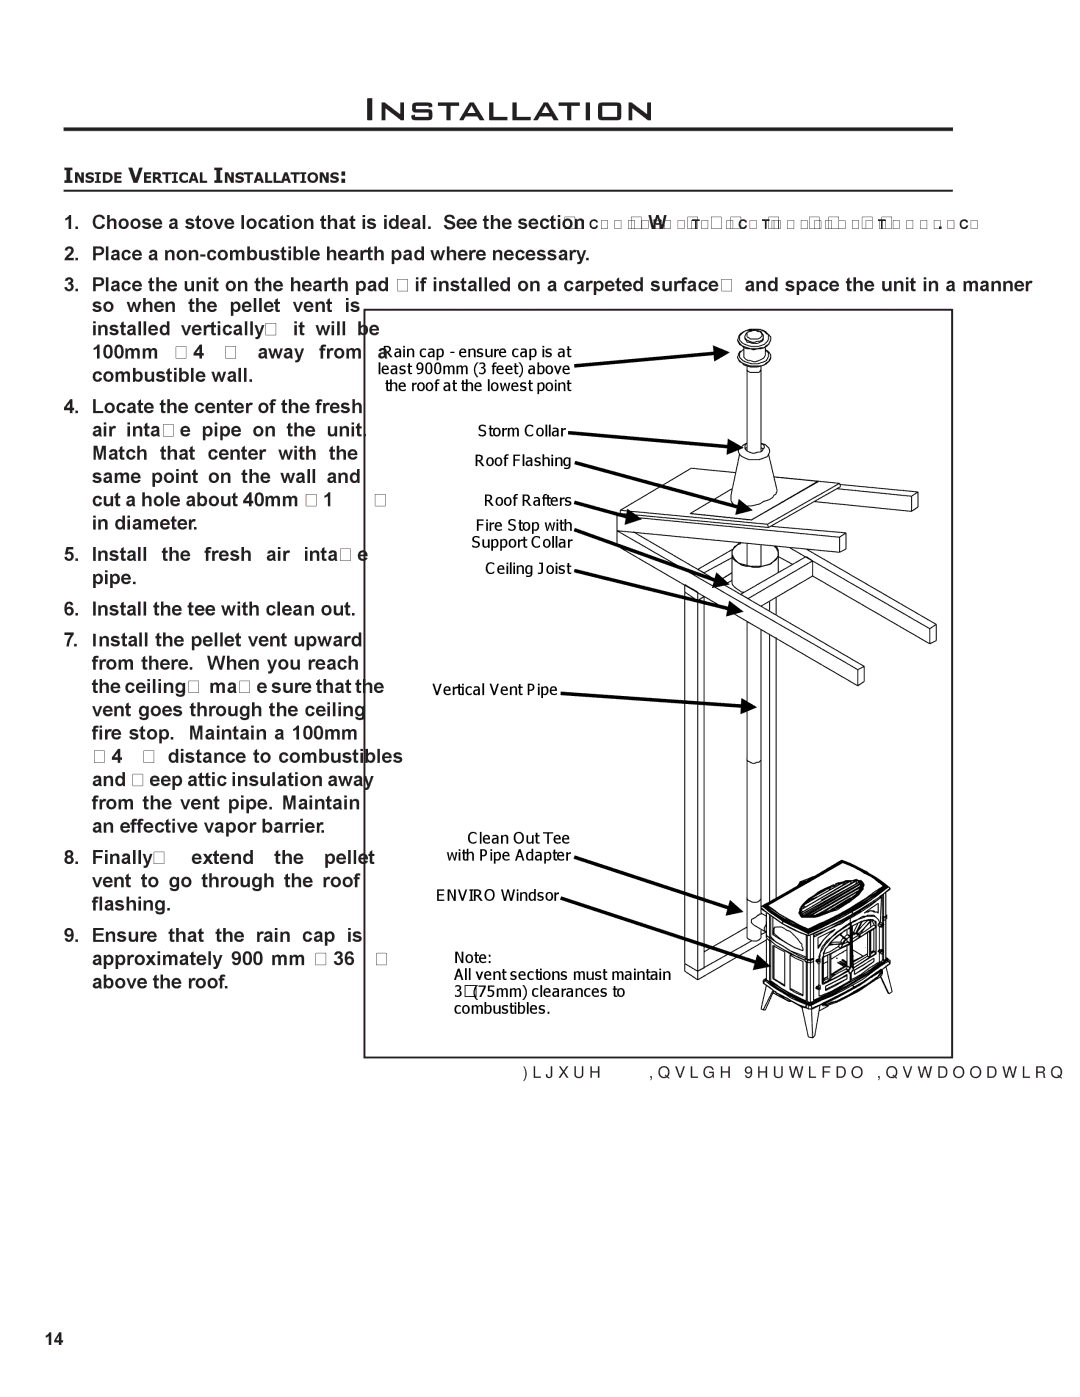
1.Choose a stove location that is ideal. See the section “DECIDING WHERE TO LOCATE YOUR PELLET APPLIANCE.”
2.Place a
3.Place the unit on the hearth pad (if installed on a carpeted surface) and space the unit in a manner so when the pellet vent is
installed vertically, it will be 100mm (4”) away from a combustible wall.
4. Locate the center of the fresh air intake pipe on the unit. Match that center with the same point on the wall and cut a hole about 40mm (15⁄8”) in diameter.
5. Install the fresh air intake pipe.
6. Install the tee with clean out.
7. | Install the pellet vent upward |
| |
| from there. When you reach |
| |
| the ceiling, make sure that the | Vertical Vent Pipe | |
| vent goes through the ceiling |
| |
| fire stop. Maintain a 100mm |
| |
| (4”) distance to combustibles |
| |
| and keep attic insulation away |
| |
| from the vent pipe. Maintain |
| |
| an effective vapor barrier. | Clean Out Tee | |
8. | Finally, extend the pellet | ||
with Pipe Adapter | |||
| vent to go through the roof | ENVIRO Windsor | |
| flashing. | ||
|
| ||
9. | Ensure that the rain cap is |
| |
| approximately 900 mm (36”) | Note: | |
| above the roof. | All vent sections must maintain | |
|
| 3" (75mm) clearances to | |
|
| combustibles. | |
|
| Figure 13: Inside Vertical Installation. |
14
