Installation
THERMOSTAT INSTALLATION:
1.Install the wall thermostat (12 or 24 Volt rated) in a location that is not to close too the unit but will effectively heat the desired area.
2.Connect the Thermostat or Timer using an 2 x 18 gauge wire from the unit to the thermostat.
If the unit has been placed in the HI / LOW mode, the unit will be taken to a low or idle setting when the thermostat is not calling for heat. When the thermostat calls for heat, the unit will go to the setting that is displayed on the control board Heat Indicator. If the heat in the room becomes to great, the high limit switch may turn the stove off and the switch will have to be manually reset. To reset the high limit switch, remove the right cabinet side. The switch is found behind the control panel. Avoid setting off the high limit switch.
Figure 21: Thermostat wire placement.
SLIDER/DAMPER SETTING:
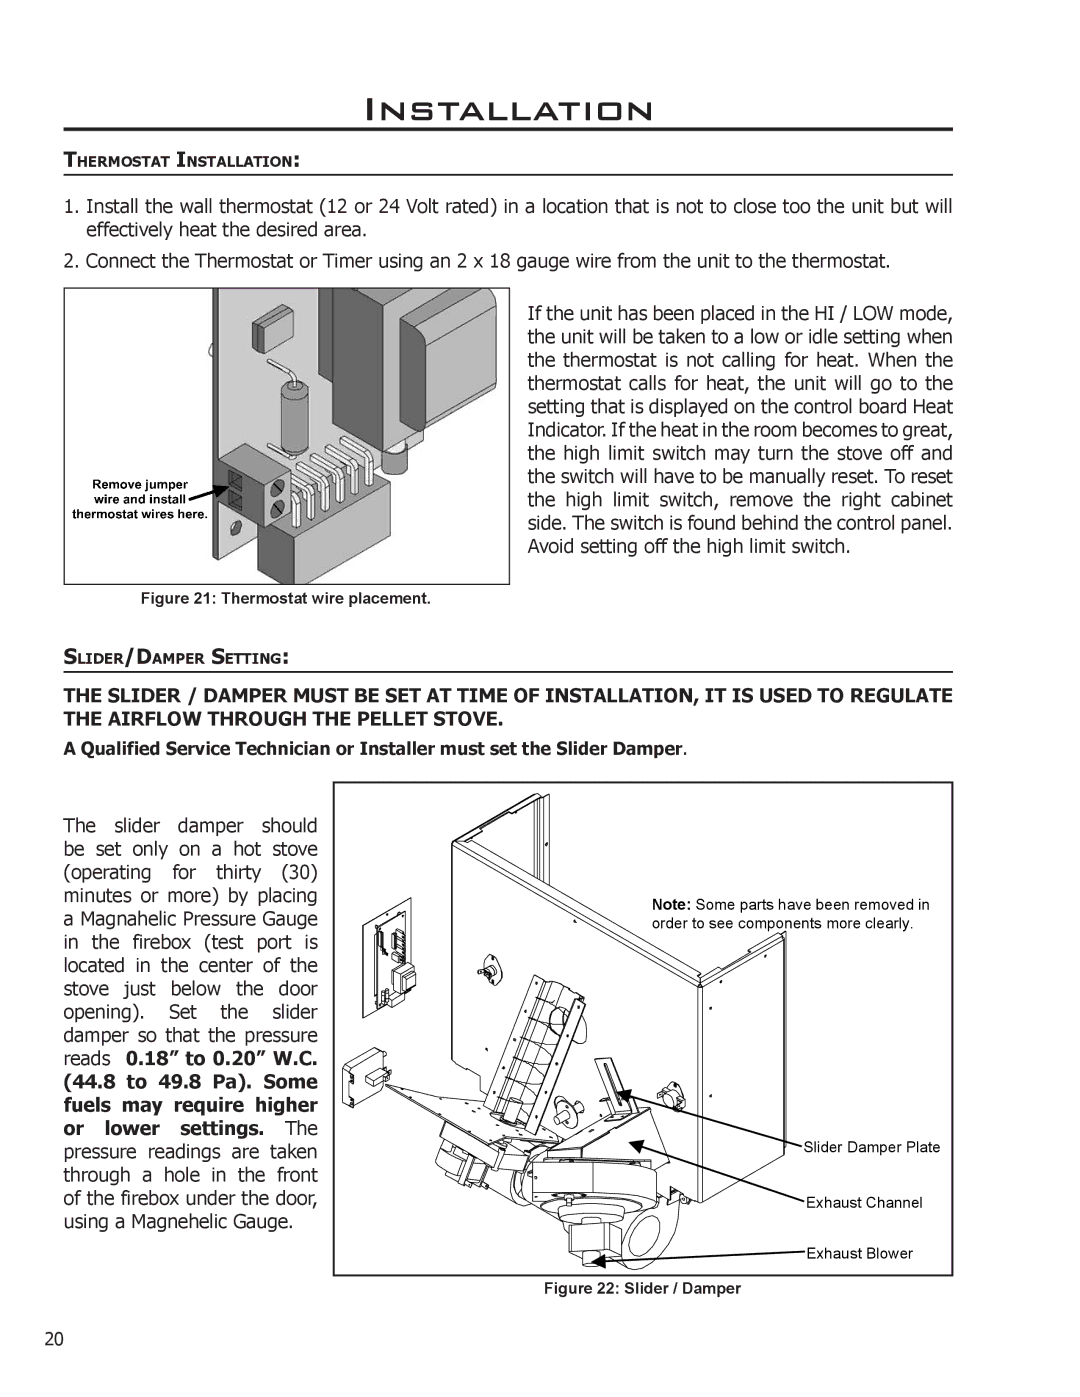
THE SLIDER / DAMPER MUST BE SET AT TIME OF INSTALLATION, IT IS USED TO REGULATE THE AIRFLOW THROUGH THE PELLET STOVE.
A Qualified Service Technician or Installer must set the Slider Damper.
The slider damper should be set only on a hot stove (operating for thirty (30) minutes or more) by placing a Magnahelic Pressure Gauge in the firebox (test port is located in the center of the stove just below the door opening). Set the slider damper so that the pressure reads 0.18” to 0.20” W.C. (44.8 to 49.8 Pa). Some fuels may require higher or lower settings. The pressure readings are taken through a hole in the front of the firebox under the door, using a Magnehelic Gauge.
Note: Some parts have been removed in order to see components more clearly.
Slider Damper Plate
Exhaust Channel
Exhaust Blower
Figure 22: Slider / Damper
20
