EPSON LQ-2080
Removing the front push tractor
To remove the tractor from the front push position, follow these steps:
1.Remove any paper from the tractor as described in the previous section.
2.Turn off the printer.
3.Open the front paper guide by pulling the tab at the center of the guide. Then remove the guide by grasping both sides and pulling it straight out of the printer.
4.Press the tractor lock tabs, tilt the tractor up, and lift it out of the printer.
5.Replace the front paper guide by sliding it along the printer mounting slots until it locks in place. Then close the front paper guide.
Using the Rear Push Tractor
To use the rear push tractor, load continuous paper in the rear slot. For information on when to use the rear push tractor, see “Available Paper Paths” on page 8.
Loading paper onto the rear push tractor
If a tractor is installed in the pull position, you need to remove it and install the paper tension unit
Note:
To avoid paper jams, it is best to load thick multipart forms using the front or bottom slot and pull or front push tractor.
Caution:
Do not load continuous paper with labels in the rear paper slot; the labels may come off their backing sheet inside the printer and cause a paper jam.
To load paper onto the rear push tractor, follow these steps:
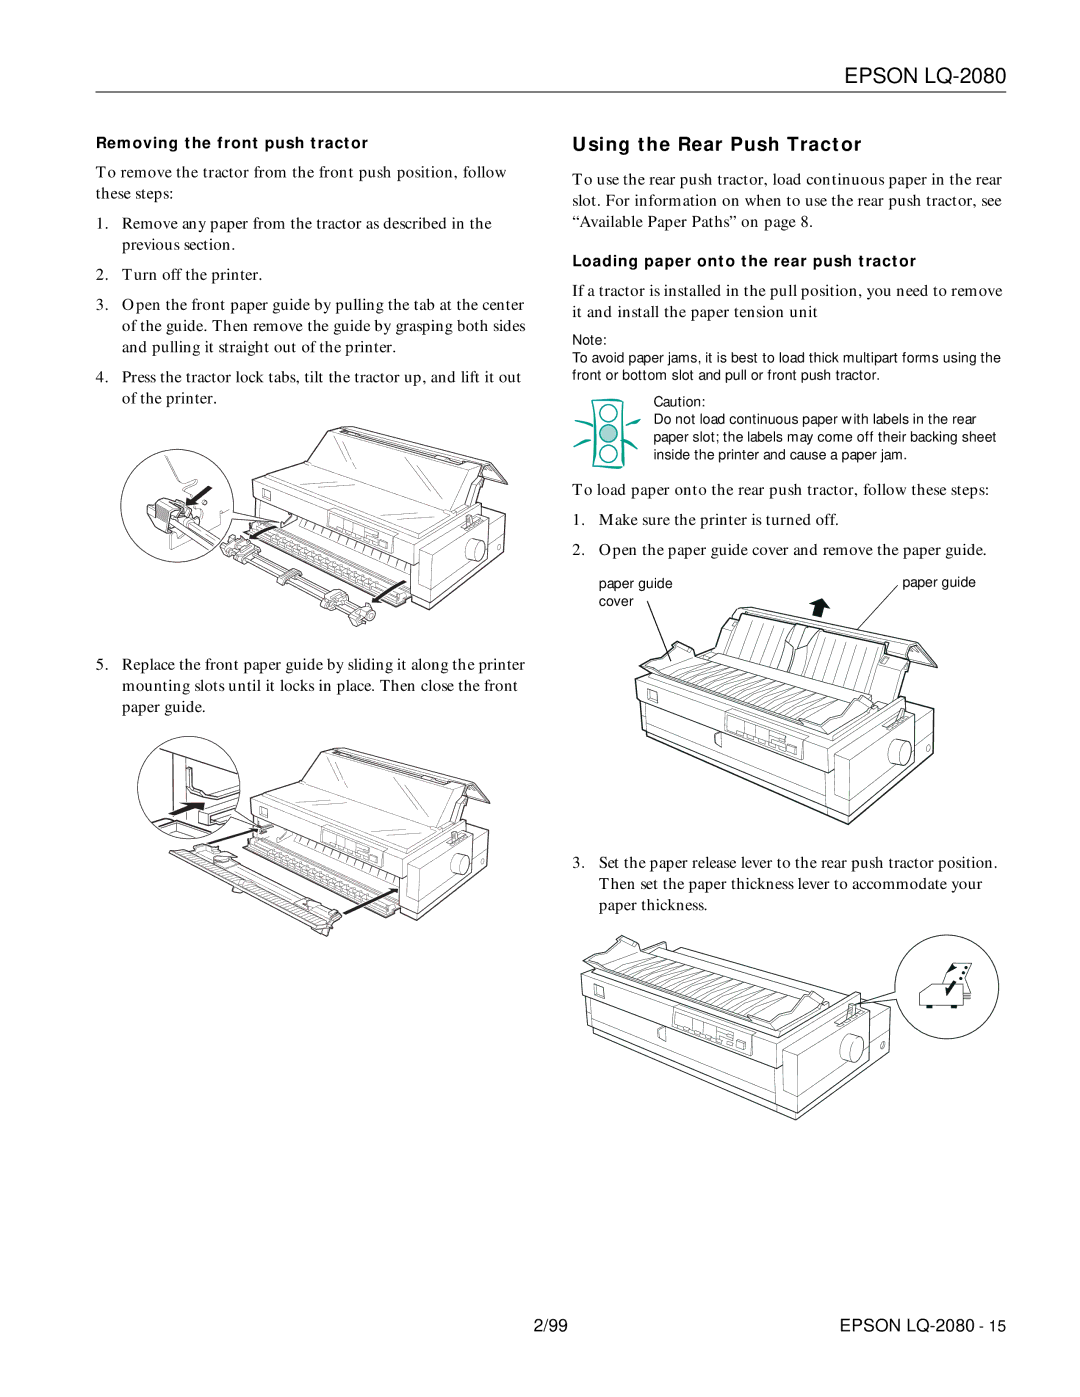
1.Make sure the printer is turned off.
2.Open the paper guide cover and remove the paper guide.
paper guide | paper guide |
cover
3.Set the paper release lever to the rear push tractor position. Then set the paper thickness lever to accommodate your paper thickness.
2/99 | EPSON |