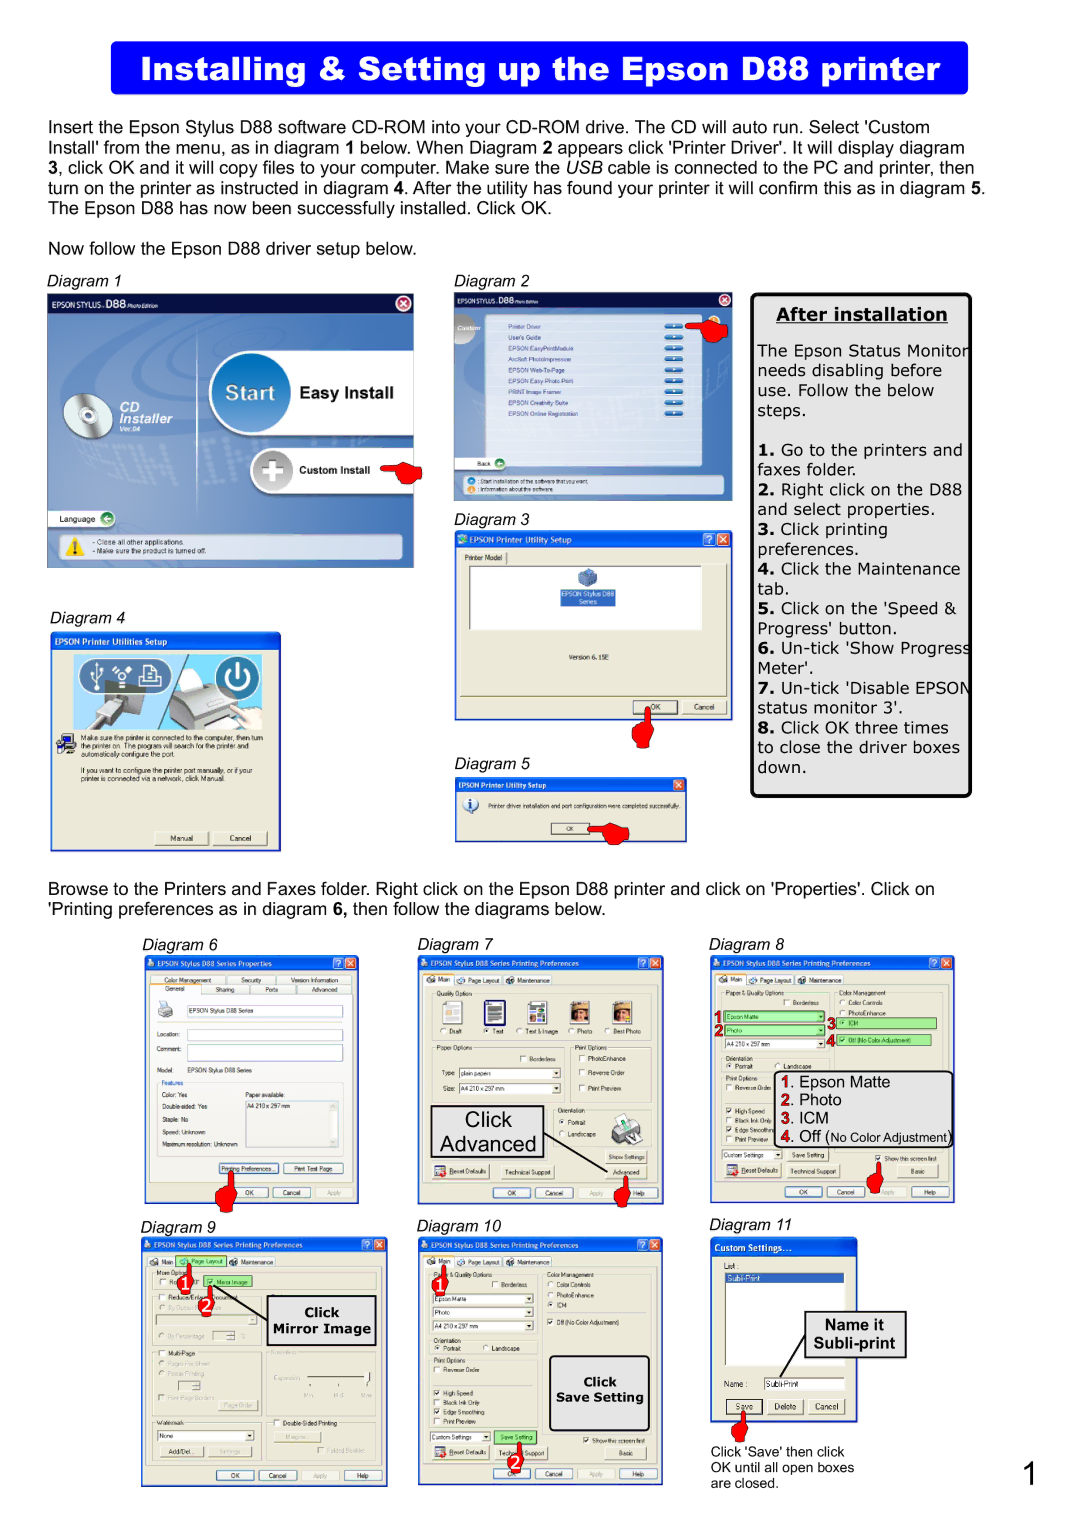
Installing & Setting up the Epson D88 printer
Insert the Epson Stylus D88 software
3, click OK and it will copy files to your computer. Make sure the USB cable is connected to the PC and printer, then turn on the printer as instructed in diagram 4. After the utility has found your printer it will confirm this as in diagram 5. The Epson D88 has now been successfully installed. Click OK.
Now follow the Epson D88 driver setup below.
Diagram 1 | Diagram 2 |
Diagram 3
Diagram 4
Diagram 5
After installation
The Epson Status Monitor needs disabling before use. Follow the below steps.
1.Go to the printers and faxes folder.
2.Right click on the D88 and select properties.
3.Click printing preferences.
4.Click the Maintenance tab.
5.Click on the 'Speed & Progress' button.
6.
7.
8.Click OK three times to close the driver boxes down.
Browse to the Printers and Faxes folder. Right click on the Epson D88 printer and click on 'Properties'. Click on 'Printing preferences as in diagram 6, then follow the diagrams below.
Diagram 6 | Diagram 7 | Diagram 8 |
Click
Advanced
1 | 3 | |
2 | ||
4 | ||
|
1. Epson Matte
2. Photo
3. ICM
4. Off (No Color Adjustment)
Diagram 9 | Diagram 10 | Diagram 11 |
1 | 1 |
|
2Click
Mirror Image | Name it |
|
|
| |
| Click |
|
| Save Setting |
|
2 | Click 'Save' then click | 1 |
OK until all open boxes | ||
| are closed. |