Installation and Operation, cont’d
5. | Reliable earthing (grounding) — Maintain reliable |
| grounding of |
| attention to supply connections other than direct |
| connections to the branch circuit (e.g., use of power strips). |
Mounting on a standard or VersaTools rack shelf | |
1. | If feet were previously attached to the bottom of the YCS, |
| remove them. |
2. | Mount the YCS SW2 A on the rack shelf, using two |
| 3/16" screws in opposite (diagonal) corners to secure the |
| unit to the shelf (see figure |
3. | Install blank panel(s) or other unit(s) on the rack shelf as |
| desired. |
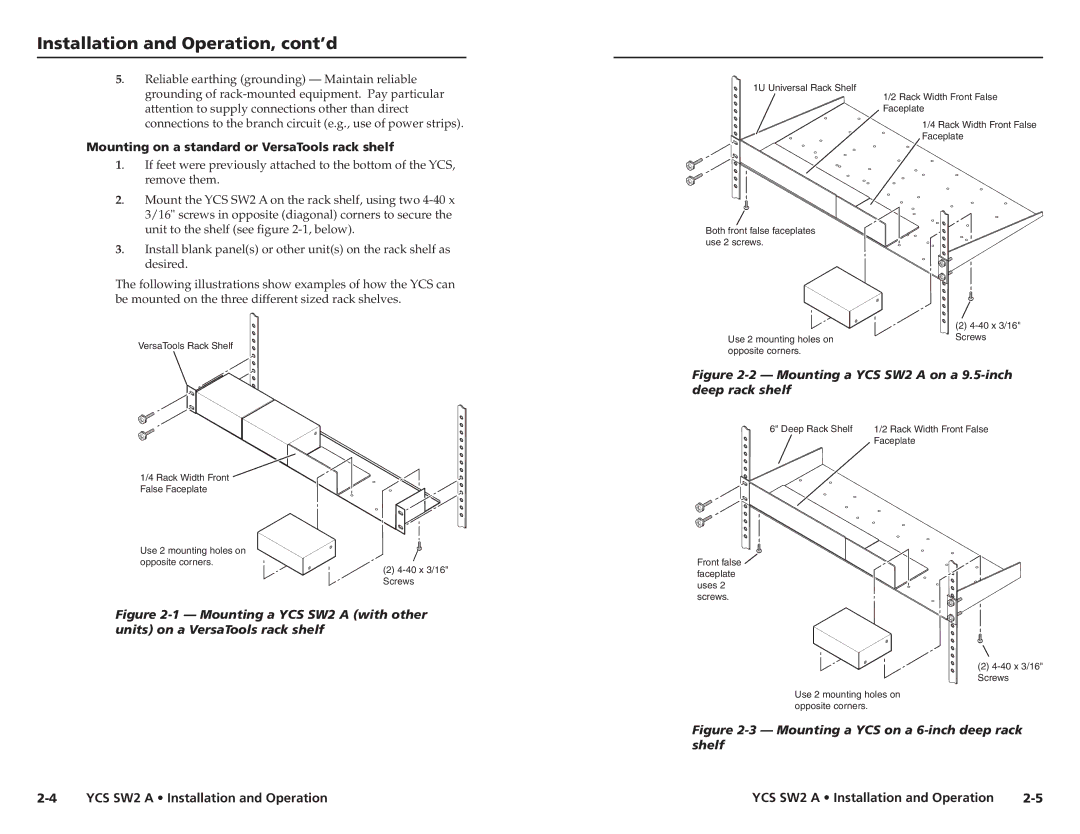
The following illustrations show examples of how the YCS can be mounted on the three different sized rack shelves.
VersaTools Rack Shelf
1U Universal Rack Shelf
Both front false faceplates use 2 screws.
Use 2 mounting holes on opposite corners.
1/2 Rack Width Front False
Faceplate
1/4 Rack Width Front False
Faceplate
(2)
1/4 Rack Width Front ![]()
False Faceplate
Use 2 mounting holes on
opposite corners.
(2)
Figure 2-1 — Mounting a YCS SW2 A (with other units) on a VersaTools rack shelf
Figure 2-2 — Mounting a YCS SW2 A on a 9.5-inch deep rack shelf
6" Deep Rack Shelf 1/2 Rack Width Front False
Faceplate
Front false ![]() faceplate uses 2 screws.
faceplate uses 2 screws.
(2)
Use 2 mounting holes on opposite corners.
Figure 2-3 — Mounting a YCS on a 6-inch deep rack shelf
YCS SW2 A • Installation and Operation | YCS SW2 A • Installation and Operation |