3 41 01 091 21 0.book Seite 13 Dienstag, 24. Juli 2007 3:32 15
MULTIMASTER FMM 250 / MULTIMASTER FMM 250 Q | EN | ||
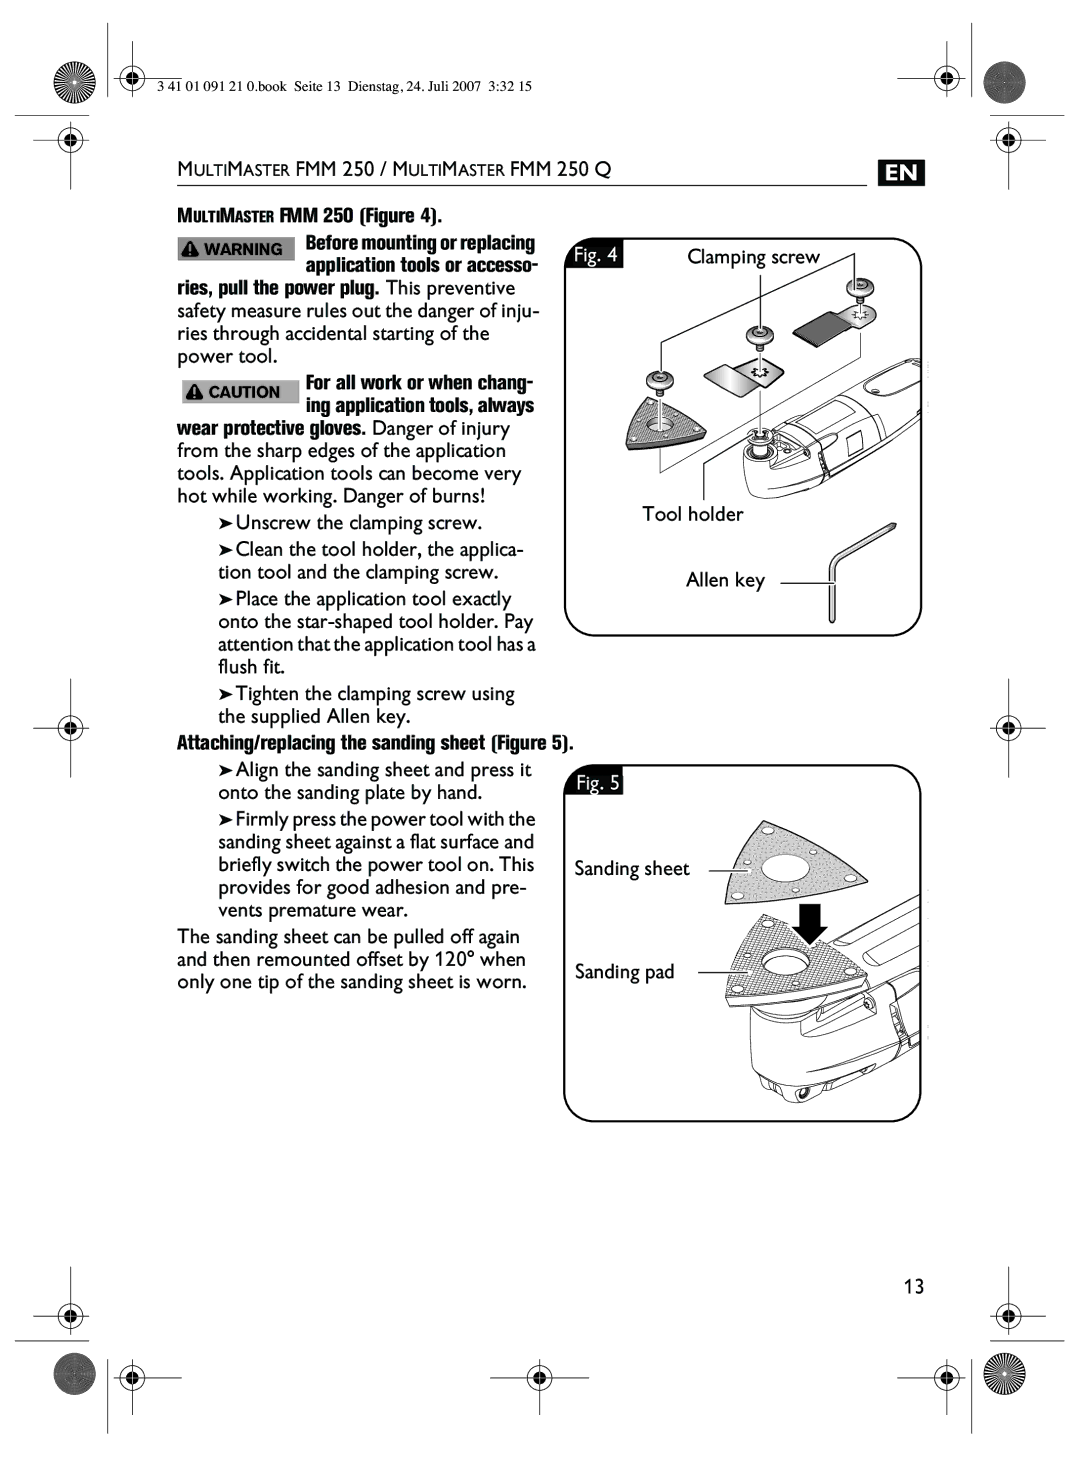
MULTIMASTER FMM 250 (Figure 4). |
|
| |
WARNING | Beforemountingorreplacing | Fig. 4 | Clamping screw |
| application tools or accesso- | ||
|
|
| |
ries, pull the power plug. This preventive |
|
| |
safety measure rules out the danger of inju- |
|
| |
ries through accidental starting of the |
|
| |
power tool. |
|
|
|
CAUTION | For all work or when chang- |
|
|
| ing application tools, always |
|
|
wear protective gloves. Danger of injury |
|
| |
from the sharp edges of the application |
|
| |
tools. Application tools can become very |
|
| |
hot while working. Danger of burns! |
| Tool holder | |
➤ Unscrew the clamping screw. |
| ||
|
| ||
➤Clean the tool holder, the applica-
tion tool and the clamping screw. | Allen key |
|
➤Place the application tool exactly
onto the
➤Tighten the clamping screw using the supplied Allen key.
Attaching/replacing the sanding sheet (Figure 5).
➤ Align the sanding sheet and press it |
|
| |
Fig. 5 |
| ||
onto the sanding plate by hand. |
| ||
|
| ||
➤ Firmly press the power tool with the |
|
| |
sanding sheet against a flat surface and |
|
| |
briefly switch the power tool on. This | Sanding sheet | ||
provides for good adhesion and pre- |
|
| |
vents premature wear. |
|
| |
The sanding sheet can be pulled off again |
|
| |
and then remounted offset by 120° when | Sanding pad | ||
only one tip of the sanding sheet is worn. | |||
|
| ||
13
