SC4/UF
BASIC OPERATION
INITIAL SETUP
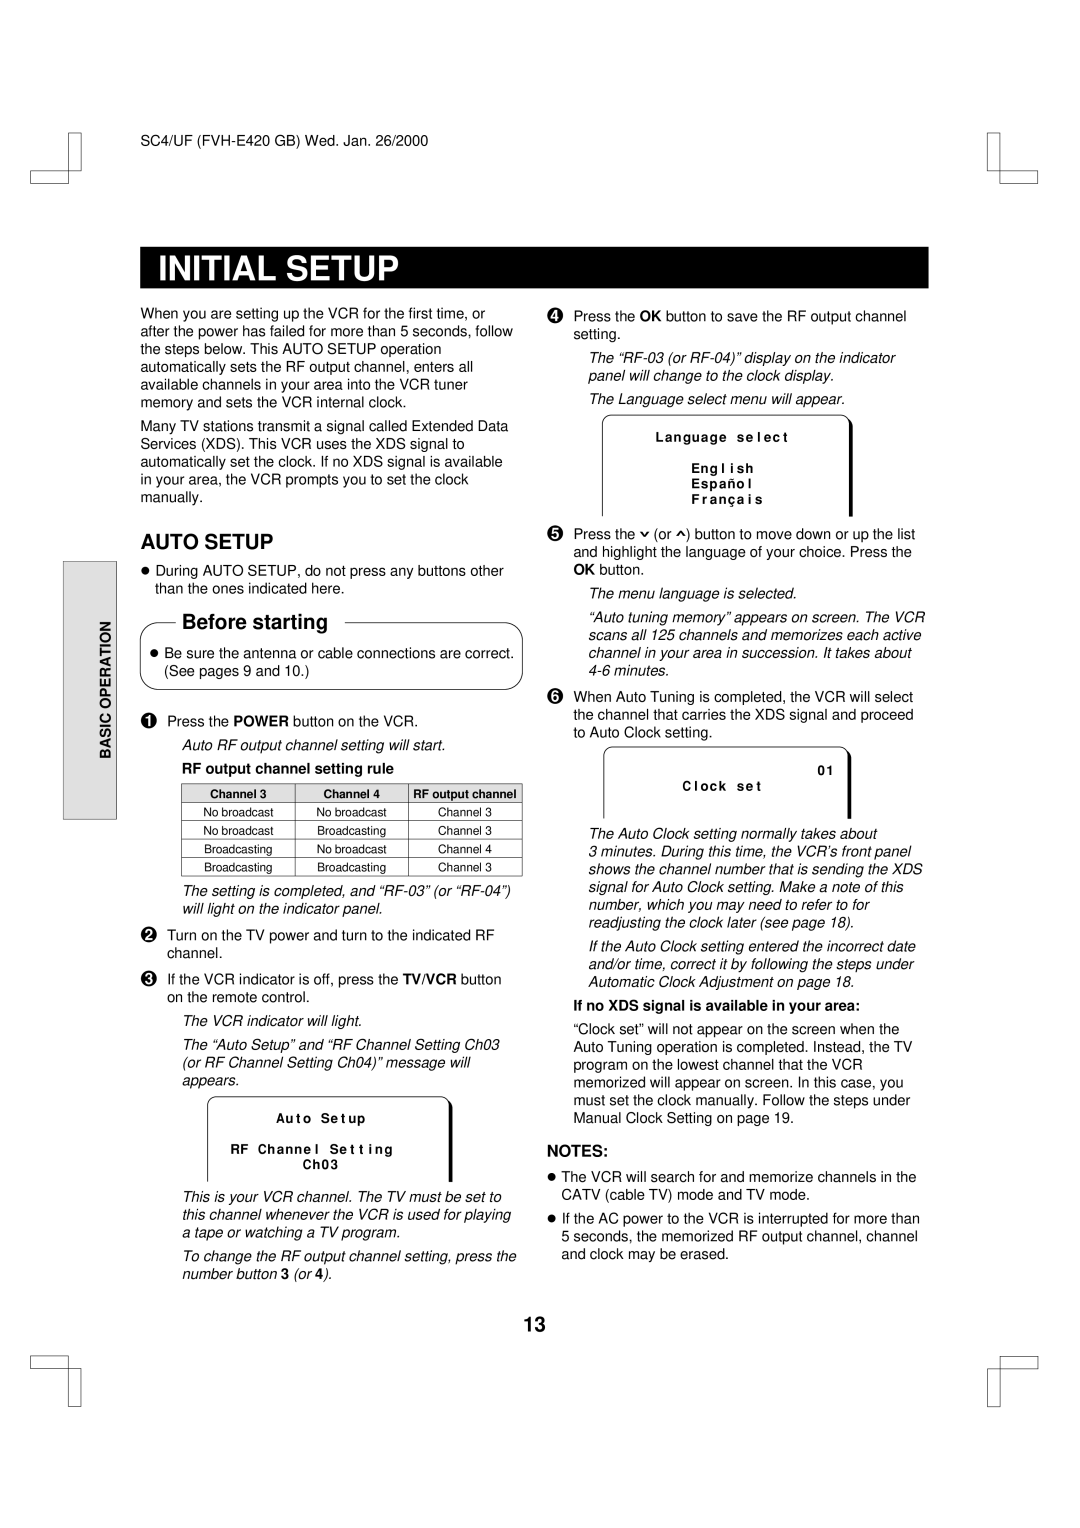
When you are setting up the VCR for the first time, or after the power has failed for more than 5 seconds, follow the steps below. This AUTO SETUP operation automatically sets the RF output channel, enters all available channels in your area into the VCR tuner memory and sets the VCR internal clock.
Many TV stations transmit a signal called Extended Data Services (XDS). This VCR uses the XDS signal to automatically set the clock. If no XDS signal is available in your area, the VCR prompts you to set the clock manually.
AUTO SETUP
œDuring AUTO SETUP, do not press any buttons other than the ones indicated here.
Before starting
œ Be sure the antenna or cable connections are correct. (See pages 9 and 10.)
1 Press the POWER button on the VCR.
Auto RF output channel setting will start.
RF output channel setting rule
Channel 3 | Channel 4 | RF output channel |
No broadcast | No broadcast | Channel 3 |
No broadcast | Broadcasting | Channel 3 |
Broadcasting | No broadcast | Channel 4 |
Broadcasting | Broadcasting | Channel 3 |
|
|
|
The setting is completed, and
2Turn on the TV power and turn to the indicated RF channel.
3If the VCR indicator is off, press the TV/VCR button on the remote control.
The VCR indicator will light.
The “Auto Setup” and “RF Channel Setting Ch03 (or RF Channel Setting Ch04)” message will appears.
@@@@@@@Auto@Setup
@@RF@Channel@Setting
@@@@@@@@@@Ch03
This is your VCR channel. The TV must be set to this channel whenever the VCR is used for playing a tape or watching a TV program.
To change the RF output channel setting, press the number button 3 (or 4).
4Press the OK button to save the RF output channel setting.
The
The Language select menu will appear.
@@@@Language@select
@@@@@@@@English
@@@@@@@@Español
@@@@@@@@Français
5Press the ù (or û) button to move down or up the list and highlight the language of your choice. Press the OK button.
The menu language is selected.
“Auto tuning memory” appears on screen. The VCR scans all 125 channels and memorizes each active channel in your area in succession. It takes about
6When Auto Tuning is completed, the VCR will select the channel that carries the XDS signal and proceed to Auto Clock setting.
@@@@@@@@@@@@@@@@@@@@@@01
@@@@@@@Clock@set
The Auto Clock setting normally takes about
3 minutes. During this time, the VCR’s front panel shows the channel number that is sending the XDS signal for Auto Clock setting. Make a note of this number, which you may need to refer to for readjusting the clock later (see page 18).
If the Auto Clock setting entered the incorrect date and/or time, correct it by following the steps under Automatic Clock Adjustment on page 18.
If no XDS signal is available in your area:
“Clock set” will not appear on the screen when the Auto Tuning operation is completed. Instead, the TV program on the lowest channel that the VCR memorized will appear on screen. In this case, you must set the clock manually. Follow the steps under Manual Clock Setting on page 19.
NOTES:
œThe VCR will search for and memorize channels in the CATV (cable TV) mode and TV mode.
œIf the AC power to the VCR is interrupted for more than 5 seconds, the memorized RF output channel, channel and clock may be erased.
13
