
V2820 specifications
The FoodSaver V2820 is a renowned vacuum sealer designed to preserve food freshness, flavor, and nutritional value while extending shelf life. This innovative kitchen appliance utilizes advanced vacuum sealing technology, making it an essential tool for home chefs and meal preppers alike.One of the standout features of the FoodSaver V2820 is its powerful suction capability. The machine effectively removes air from specially designed vacuum bags, creating an airtight seal that prevents spoilage and freezer burn. By eliminating air exposure, the FoodSaver helps to lock in flavor and nutrients, making it ideal for storing meats, vegetables, fruits, and even dairy products.
The V2820 also offers versatile sealing options. Users can choose between a regular vacuum sealing mode for everyday items and a gentle sealing mode specifically designed for delicate foods such as fruits and baked goods. This flexibility ensures that food items, regardless of their texture or composition, can be safely stored without compromising their integrity.
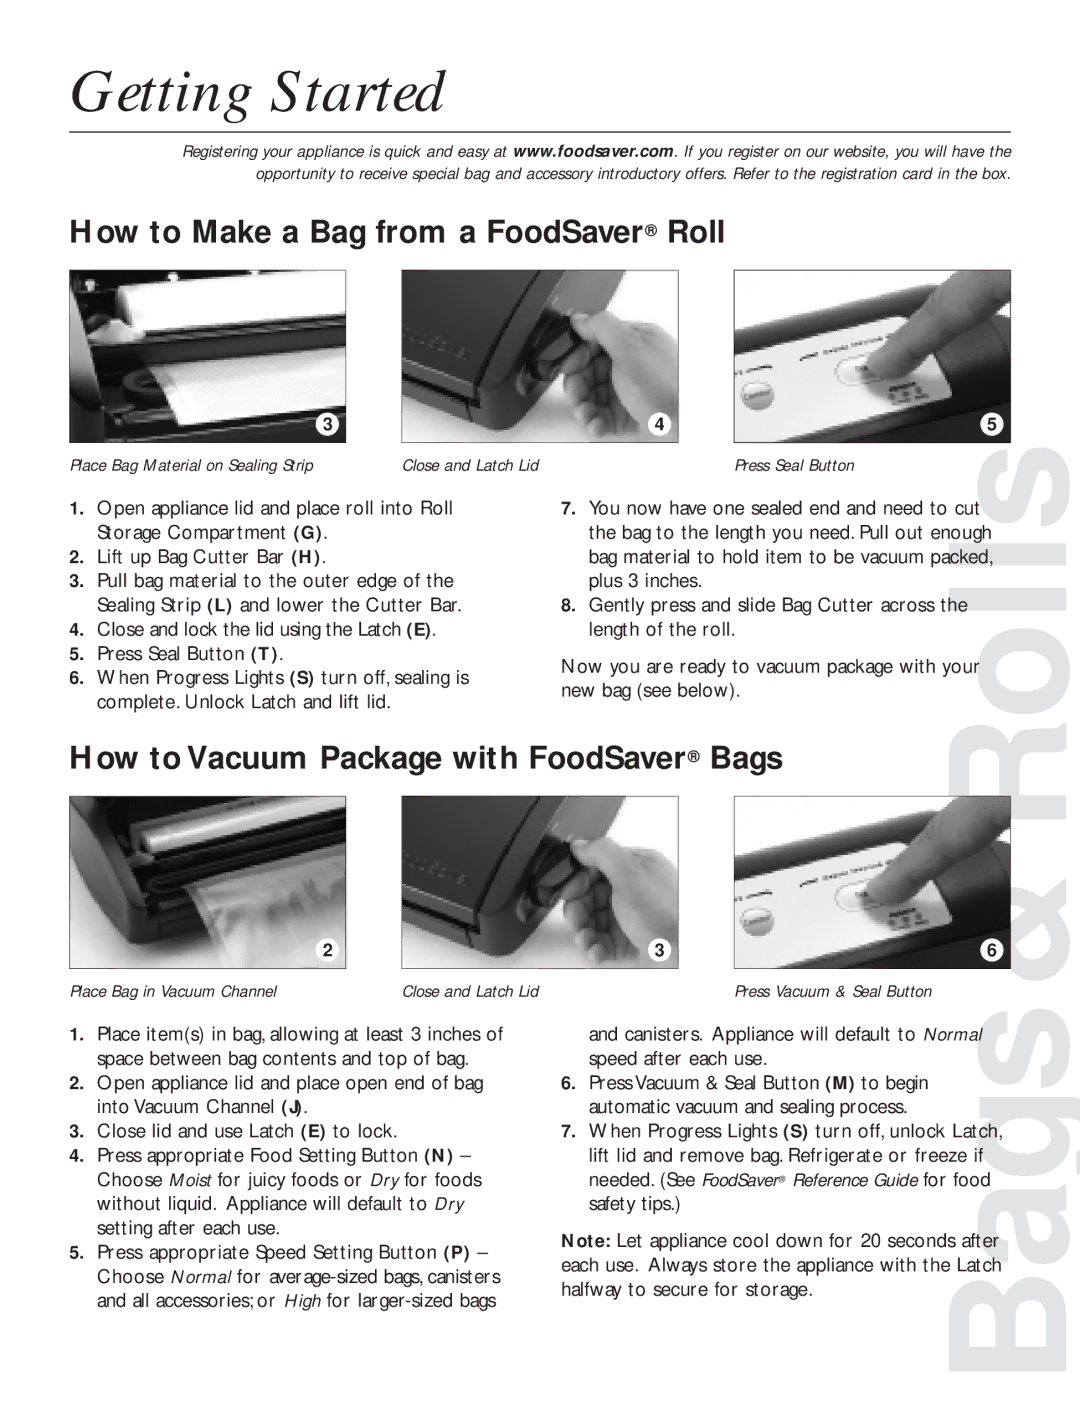
Equipped with a built-in roll storage and cutter, the FoodSaver V2820 makes it convenient to create custom-sized bags to suit different food types. This eliminates waste and allows users to package items efficiently. The machine supports sealing not just vacuum bags but also canisters, jar sealer attachments, and even marinading containers, broadening its usability.
Another notable feature is its automatic sealing function. The user-friendly interface simplifies the sealing process, allowing anyone to preserve food without extensive training. The LED indicators guide through each step, providing a hassle-free experience for both beginners and seasoned users.
Durable construction and a sleek design make the FoodSaver V2820 an attractive addition to any kitchen countertop. The machine is designed for longevity, ensuring that it can withstand regular use without degrading performance.
As food safety and preservation continue to be paramount in today’s culinary landscape, the FoodSaver V2820 stands out as a reliable and efficient solution. Whether you're looking to batch cook and store meals, tackle leftovers, or prepare items for sous vide cooking, this vacuum sealer promises to deliver outstanding results, all while saving space and reducing food waste.