all required RPM modules and media connectors installed. There may be cases where a different RPM connector is desired, making it necessary to exchange one RPM type for another. The replacement procedures described inthe next two sections should only
be performed by a trained technician.
3.4.1Exchanging RPMs in the Magnum 200X
STOP!!!
Be sure the power cord is unplugged from the chassis before attempting to remove
and/or replace an PM card.
Failure to do so may result in damage to the unit
and will void the warranty.
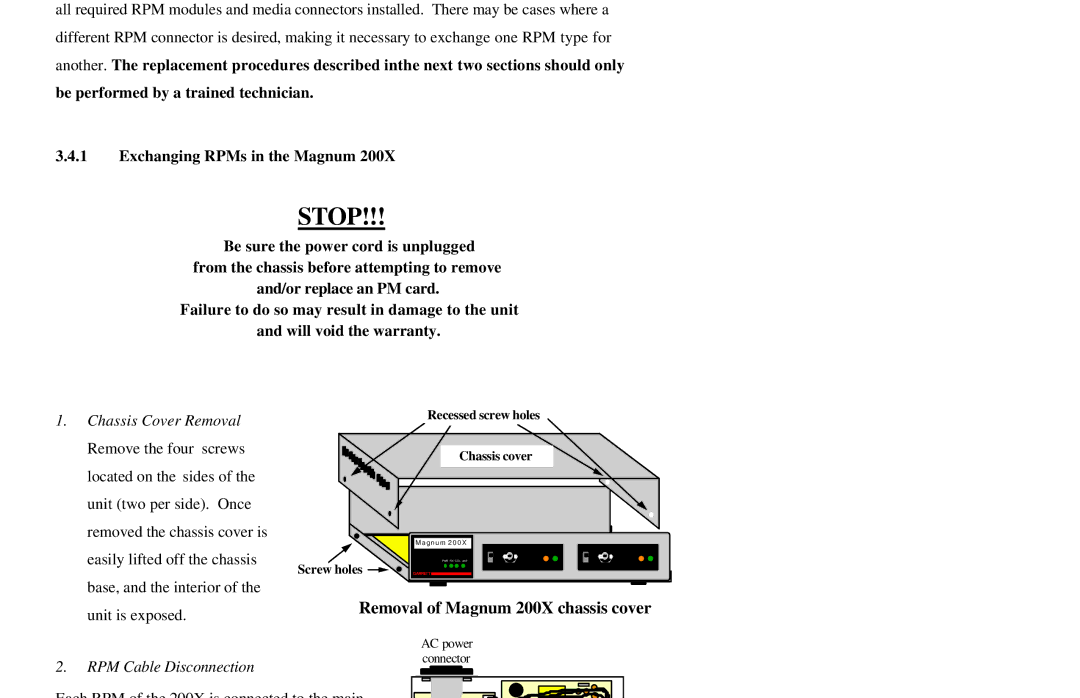
1. | Chassis Cover Removal |
| Recessed screw holes |
|
| ||
| Remove the four screws |
| Chassis cover |
| located on the sides of the |
|
|
| unit (two per side). Once |
|
|
| removed the chassis cover is |
| Magnum 200X |
| easily lifted off the chassis |
| |
|
| eu | |
|
| Screw holes | PWR RX COL JAB |
|
| GARRETT | |
|
|
| |
| base, and the interior of the |
|
|
| unit is exposed. | Removal of Magnum 200X chassis cover | |
|
|
| |
|
|
| AC power |
2. | RPM Cable Disconnection |
| connector |
|
| ||
Each RPM of the 200X is connected to the main |
| ||