GBC 1264WF/1244WF | Operation Manual |
Tips for Creating a Decal
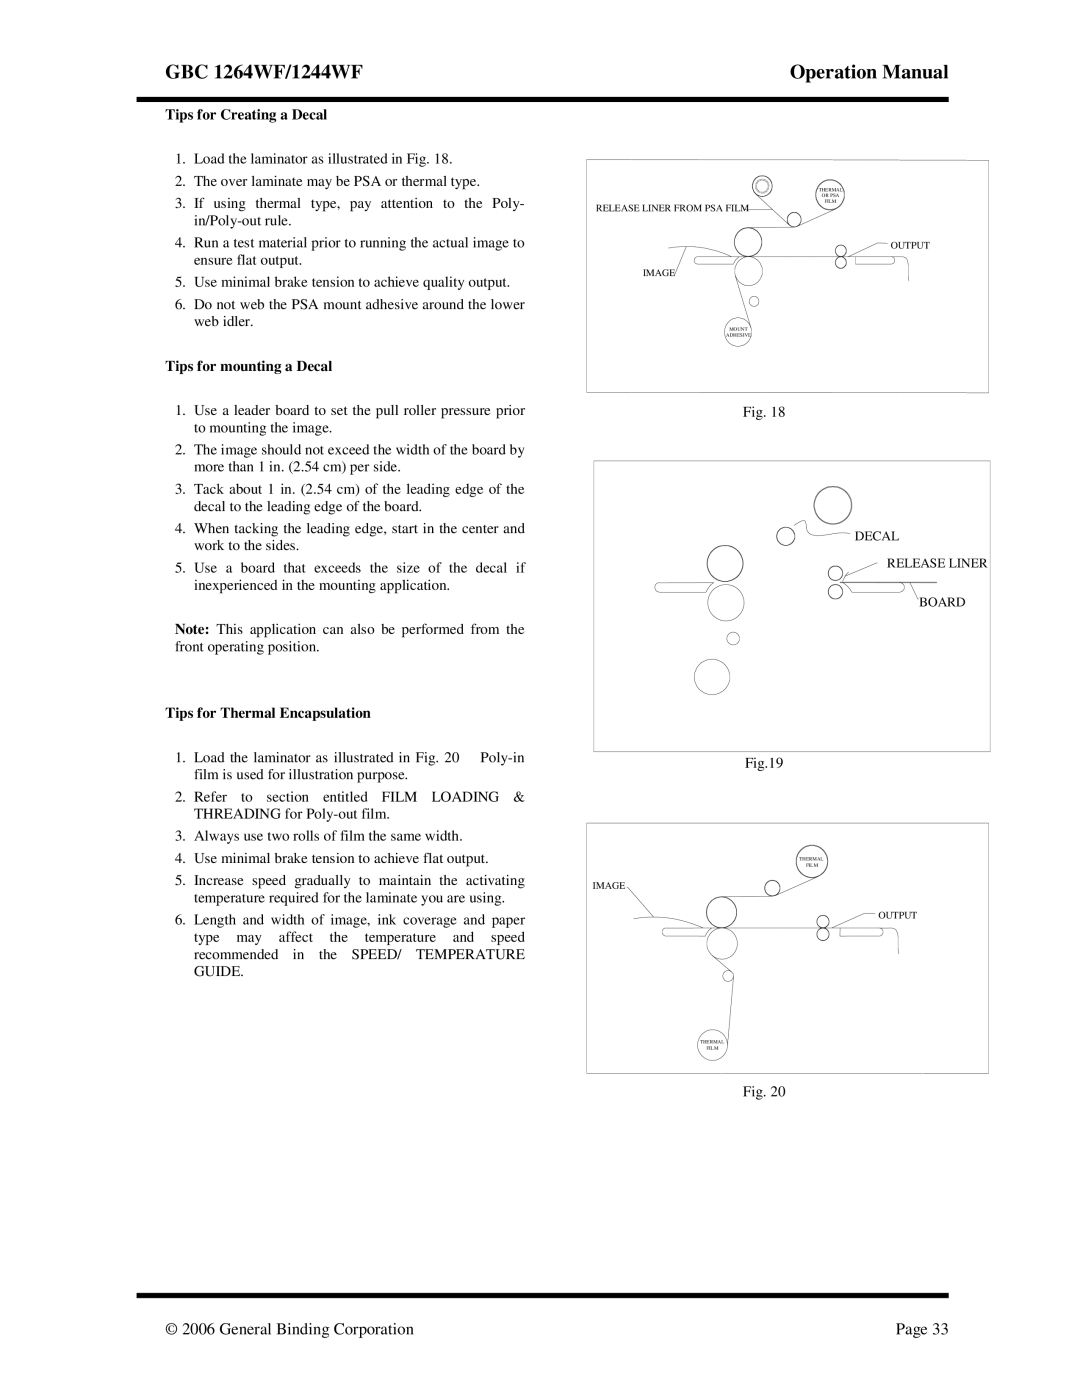
1.Load the laminator as illustrated in Fig. 18.
2.The over laminate may be PSA or thermal type.
3.If using thermal type, pay attention to the Poly-
4.Run a test material prior to running the actual image to ensure flat output.
5.Use minimal brake tension to achieve quality output.
6.Do not web the PSA mount adhesive around the lower web idler.
THERMAL
OR PSA
FILM
RELEASE LINER FROM PSA FILM
![]() OUTPUT
OUTPUT
IMAGE
MOUNT
ADHESIVE
Tips for mounting a Decal
1.Use a leader board to set the pull roller pressure prior to mounting the image.
2.The image should not exceed the width of the board by more than 1 in. (2.54 cm) per side.
3.Tack about 1 in. (2.54 cm) of the leading edge of the decal to the leading edge of the board.
4.When tacking the leading edge, start in the center and work to the sides.
5.Use a board that exceeds the size of the decal if inexperienced in the mounting application.
Note: This application can also be performed from the front operating position.
Tips for Thermal Encapsulation
1. Load the laminator as illustrated in Fig. 20
2.Refer to section entitled FILM LOADING & THREADING for
3.Always use two rolls of film the same width.
4.Use minimal brake tension to achieve flat output.
5.Increase speed gradually to maintain the activating temperature required for the laminate you are using.
6.Length and width of image, ink coverage and paper type may affect the temperature and speed recommended in the SPEED/ TEMPERATURE GUIDE.
Fig. 18
![]() DECAL
DECAL
RELEASE LINER
BOARD
Fig.19
THERMAL
FILM
IMAGE
![]() OUTPUT
OUTPUT
THERMAL
FILM
Fig. 20
© 200 6 General Binding Corporation | Page 33 |