Preparing to install the refrigerator.
Read these instructions completely and carefully.Water Supply to the Icemaker
You will need to connect the icemaker to a cold | A water supply kit (containing copper tubing, |
water line. | shutoff valve, fittings and instructions) is available |
| at extra cost from your dealer or from Parts and |
| Accessories, |
Refrigerator Location
Install it on a floor strong enough to support it fully loaded.
Clearances
Safety Instructions Operating Instructions
Allow the following clearances for ease of installation, proper air circulation and plumbing and electrical connections.
| 24′ Model | 28′ Model | 30′ Model |
Sides | 1/8″ (3 mm) | 1/8″ (3 mm) | 1/8″ (3 mm) |
Top | 1″ (25 mm) | 1/8″ (3 mm) | 1/8″ (3 mm) |
Back | 1/2″ (13 mm) | 1/2″ (13 mm) | 1/2″ (13 mm) |
If the refrigerator is against a wall on either side, allow 3/4″ (19 mm) on each side for a 90° door opening.
90°
Leveling Rollers
The rollers have 2 purposes:1 | The rollers can be adjusted so the refrigerator is |
firmly positioned on the floor and does not rock |
back and forth.
2 Rollers allow you to move the refrigerator away from the wall for cleaning.
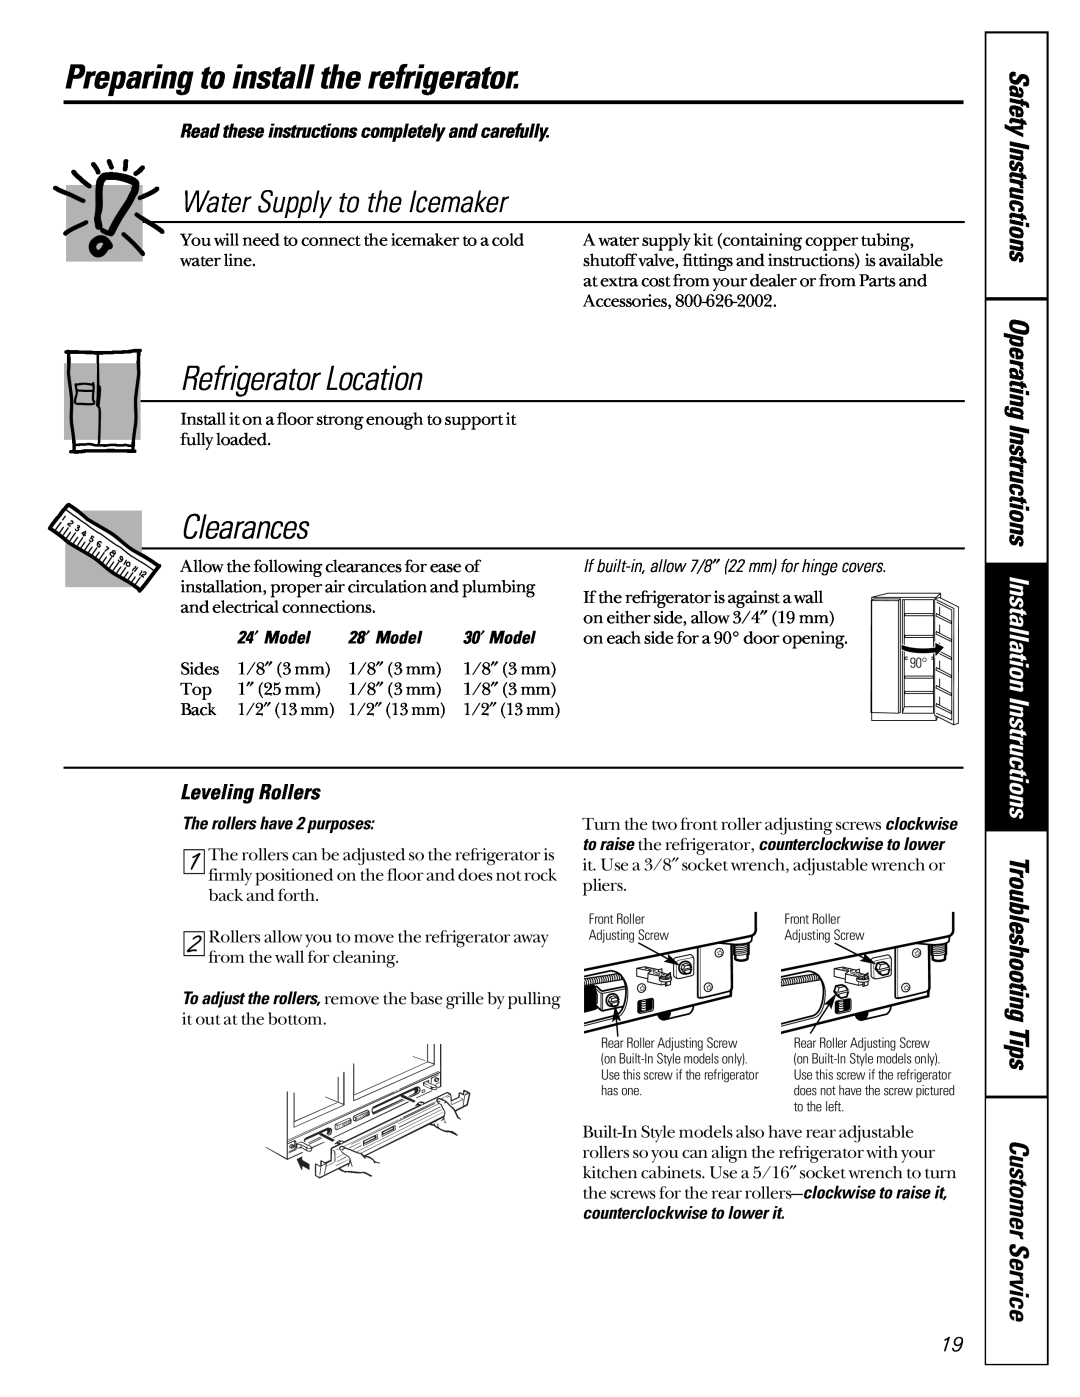
To adjust the rollers, remove the base grille by pulling it out at the bottom.
Turn the two front roller adjusting screws clockwise to raise the refrigerator, counterclockwise to lower it. Use a 3/8″ socket wrench, adjustable wrench or pliers.
Front Roller | Front Roller |
Adjusting Screw | Adjusting Screw |
Rear Roller Adjusting Screw | Rear Roller Adjusting Screw |
(on | (on |
Use this screw if the refrigerator | Use this screw if the refrigerator |
has one. | does not have the screw pictured |
| to the left. |
Troubleshooting Tips
Customer Service
19