Installation Instructions
WINDOW INSTALLATION—OPTIONAL (cont.)
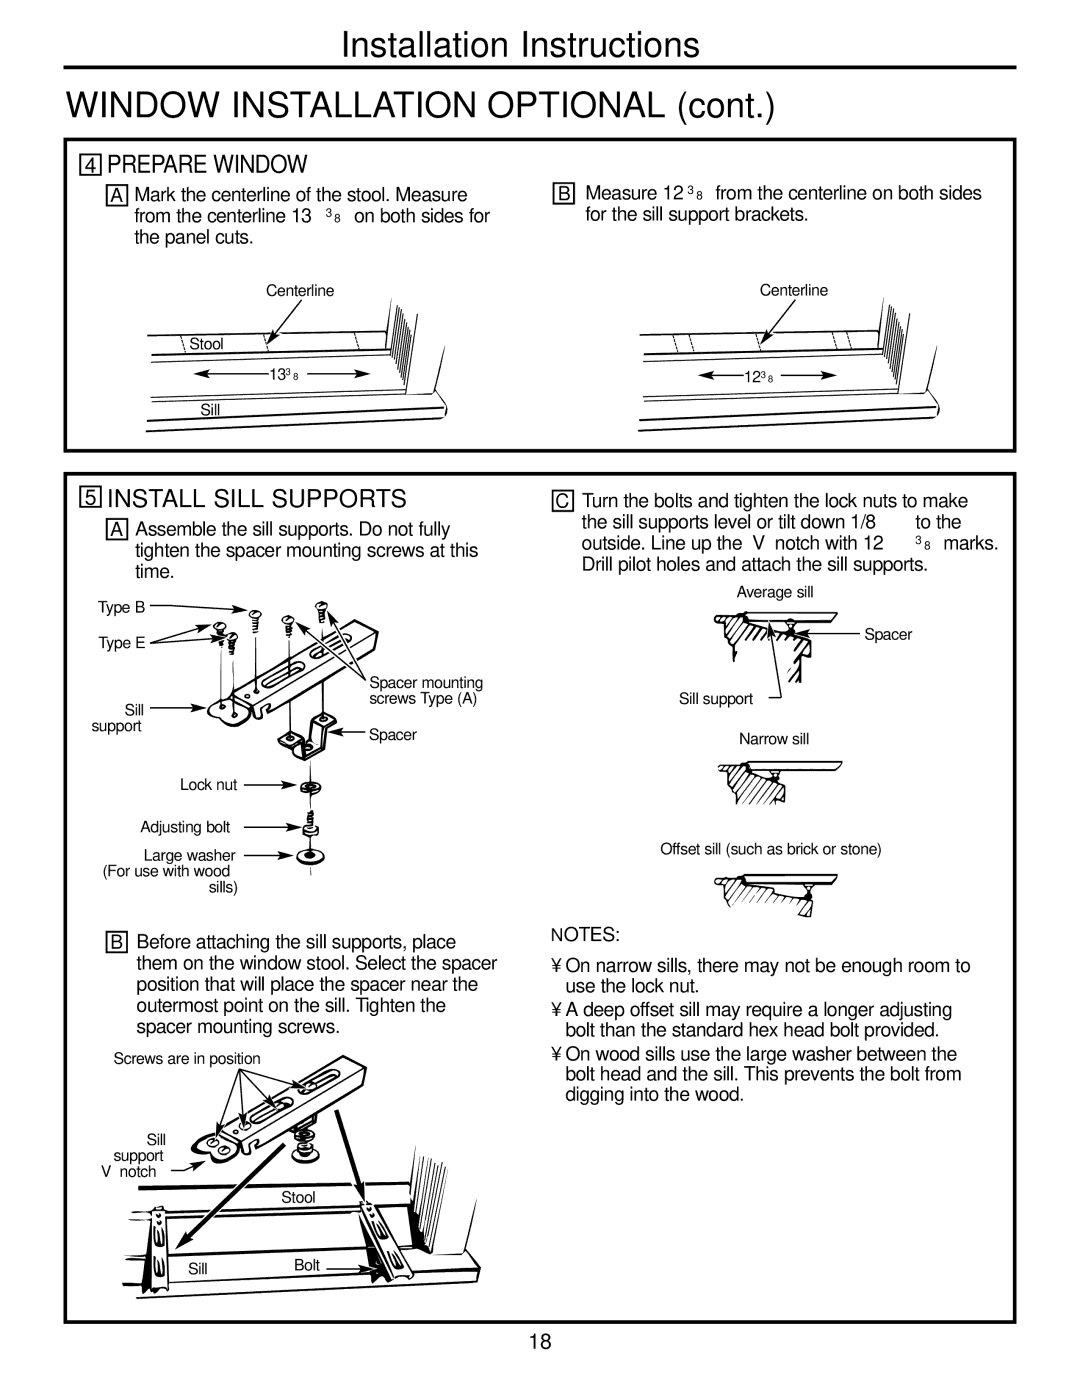
4PREPARE WINDOW
AMark the centerline of the stool. Measure from the centerline 133⁄8″ on both sides for the panel cuts.
Centerline
Stool
133⁄8″
Sill
BMeasure 123⁄8″ from the centerline on both sides for the sill support brackets.
Centerline
![]() 123⁄8″
123⁄8″![]()
5INSTALL SILL SUPPORTS
AAssemble the sill supports. Do not fully tighten the spacer mounting screws at this time.
Type B
Type E![]()
![]()
![]()
CTurn the bolts and tighten the lock nuts to make the sill supports level or tilt down 1/8″ to the outside. Line up the “V” notch with 123⁄8″ marks. Drill pilot holes and attach the sill supports.
Average sill
Spacer
Sill support
Spacer mounting screws Type (A)
Spacer
Sill support
Narrow sill
Lock nut ![]()
Adjusting bolt ![]()
Large washer ![]() (For use with wood
(For use with wood
sills)
Offset sill (such as brick or stone)
BBefore attaching the sill supports, place them on the window stool. Select the spacer position that will place the spacer near the outermost point on the sill. Tighten the spacer mounting screws.
Screws are in position
Sill support “V” notch ![]()
Stool
NOTES:
•On narrow sills, there may not be enough room to use the lock nut.
•A deep offset sill may require a longer adjusting bolt than the standard hex head bolt provided.
•On wood sills use the large washer between the bolt head and the sill. This prevents the bolt from digging into the wood.
SillBolt
18