Installation Instructions
PLANNING FOR PLUMBING
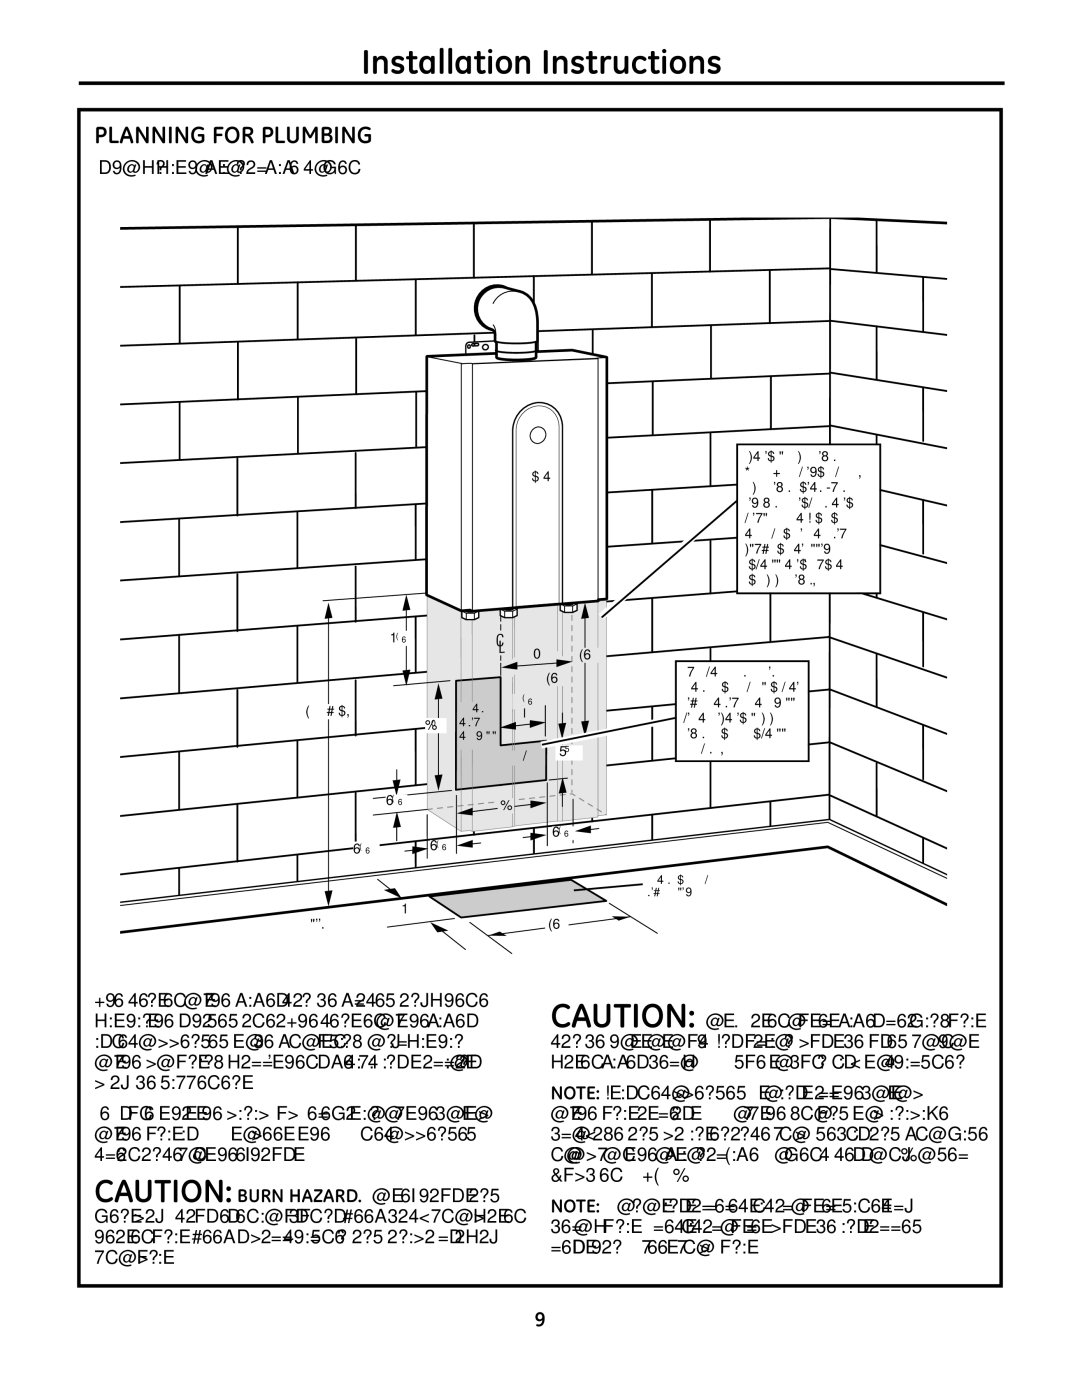
(shown with optional pipe cover)
Unit
| 61⁄2″ |
|
|
|
| 7″ | 12″ |
|
|
| 12″ |
18″ min. |
| 41⁄2″ |
|
| Water |
| |
|
| 97⁄8″ through |
|
|
| the wall |
|
|
| Gas | 33⁄8″ |
|
|
| |
| 21⁄2″ | 9″ |
|
|
|
| |
|
| 21⁄2″ | 21⁄2″ |
21⁄2″ |
|
| |
Floor | 6″ |
| 12″ |
|
|
Optional Pipe Cover (AGTPCM) shown shaded. Pipe cover not required, However, consideration should be taken in
the design of the rough plumbing to allow installation of unit and pipe cover.
Suggested area for Water and Gas lines to come through the wall so the optional pipe cover can be installed, if desired.
Water and Gas from below
The center of the pipes can be placed anywhere within the shaded area. The center of the pipes is recommended to be protruding only within 6″ of the mounting wall. Other specific installations may be different.
Be sure that the minimum elevation of the bottom of the unit is 16″ to meet the 36″ recommended clearance for the exhaust.
CAUTION: BURN HAZARD. Hot exhaust and vent may cause serious burns. Keep back from water heater unit. Keep small children and animals away from unit.
CAUTION: Hot Water outlet pipes leaving unit can be hot to touch. Insulation must be used for hot water pipes below 36″ due to burn risk to children.
NOTE: It is recommended to install the bottom
of the unit at least 18″ off the ground to minimize blockage and maintenance from debris and provide room for the optional Pipe Cover Accessory Model Number AGTPCM.
NOTE: Do not install electrical outlet directly below unit. Electrical outlet must be installed less than 6 feet from unit.
9
