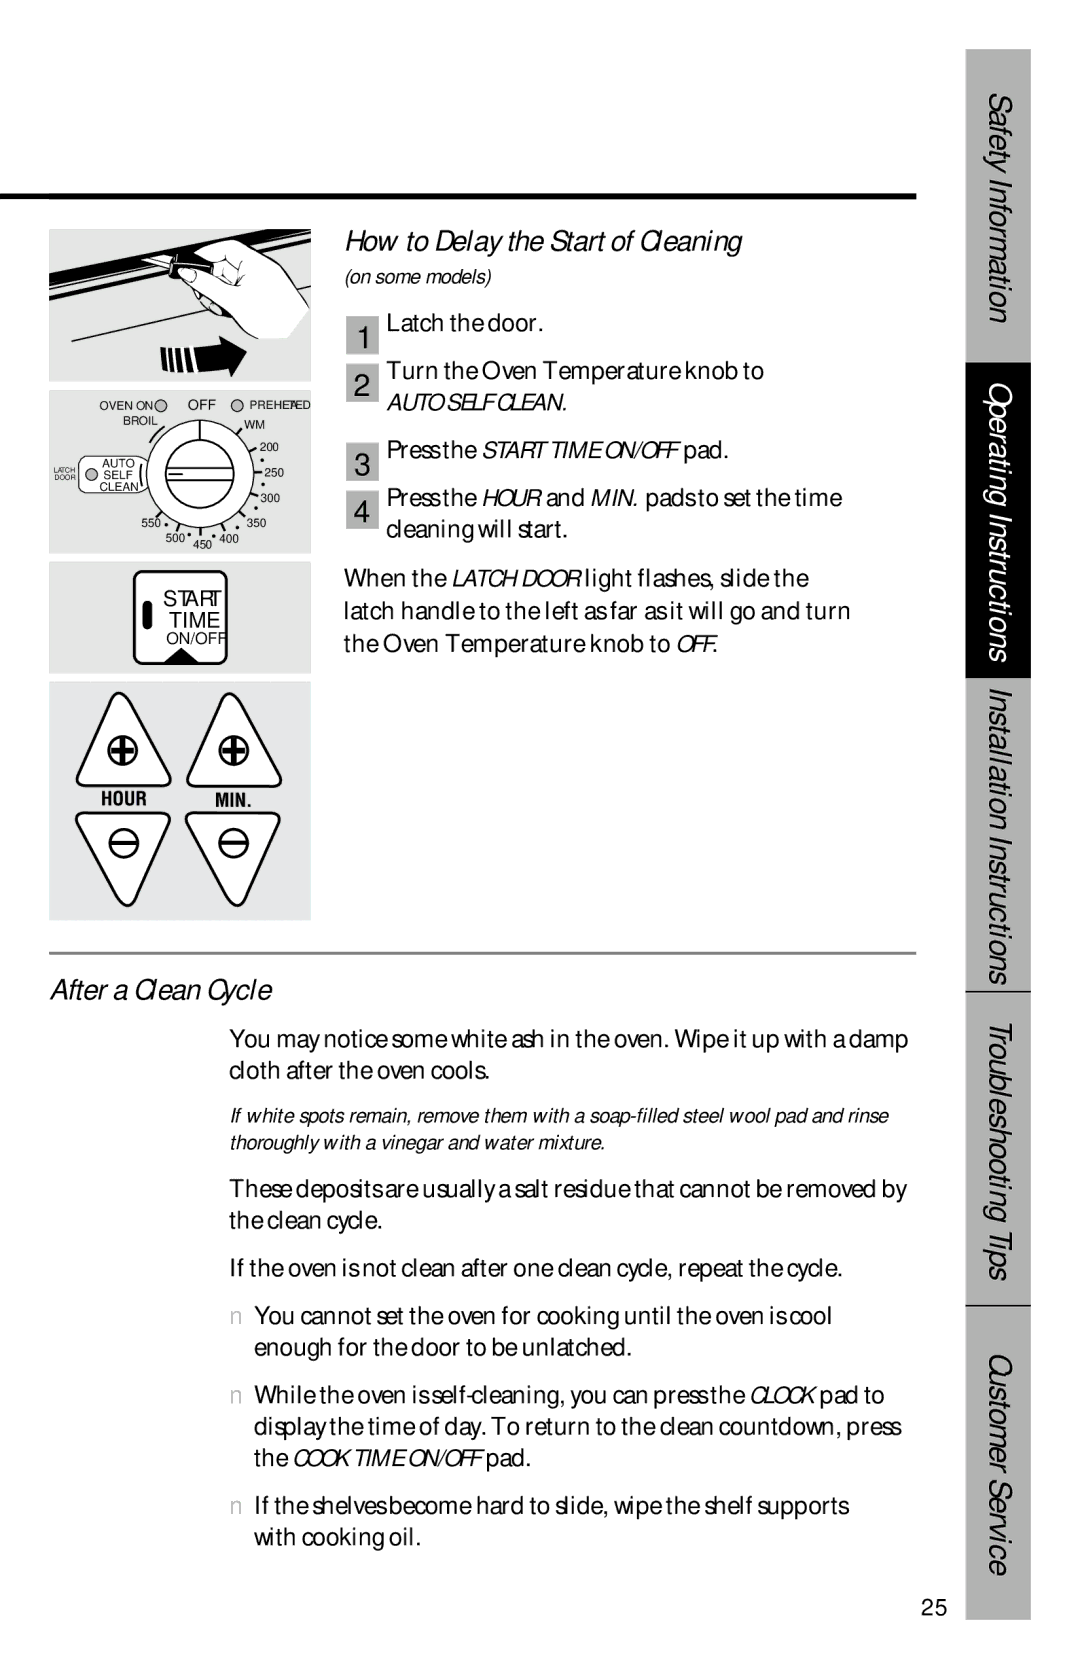
How to Delay the Start of Cleaning
Safety Information
| OVEN ON |
| OFF | PREHEATED |
| BROIL |
|
| WM |
|
|
|
| |
|
|
|
| 200 |
LATCH | AUTO |
|
| 250 |
SELF |
|
| ||
DOOR |
|
| ||
| CLEAN |
|
| 300 |
|
|
|
| |
| 550 |
|
| 350 |
|
| 500 | 450 | 400 |
|
|
|
|
START
TIME
ON/OFF
(on some models)
| Latch the door. | |
1 | ||
| Turn the Oven Temperature knob to | |
2 | ||
AUTO SELF CLEAN. | ||
| ||
| Press the START TIME ON/OFF pad. | |
3 | ||
| Press the HOUR and MIN. pads to set the time | |
4 | ||
| cleaning will start. |
When the LATCH DOOR light flashes, slide the latch handle to the left as far as it will go and turn the Oven Temperature knob to OFF.
Operating Instructions Installation Instructions
After a Clean Cycle
You may notice some white ash in the oven. Wipe it up with a damp cloth after the oven cools.
If white spots remain, remove them with a
These deposits are usually a salt residue that cannot be removed by the clean cycle.
If the oven is not clean after one clean cycle, repeat the cycle.
■You cannot set the oven for cooking until the oven is cool enough for the door to be unlatched.
■While the oven is
■If the shelves become hard to slide, wipe the shelf supports with cooking oil.
Troubleshooting Tips Customer Service
25
